How to install and configure WHMCS in Moloni ON
In this guide, you'll learn how to install and configure the Moloni ON plugin in WHMCS.
What is WHMCS and what is it for?
WHMCS (Web Host Manager Complete Solution) is a client management, support and automated billing platform, used mainly by web hosting companies, domain resellers and digital service providers. This tool centralises the entire customer lifecycle, from domain registration and service activation to sending payment notices.
By connecting WHMCS to your Moloni ON account, you integrate and automate your business's invoicing. The plugin ensures certified documents are issued automatically as soon as your customers make payments, eliminating administrative work and keeping customers, products and taxes synced in real time without manual errors.
Prerequisites
- FTP access or File Manager for your website's hosting.
- Administrator credentials for the WHMCS panel.
- An active account in Moloni ON.
Follow these steps:
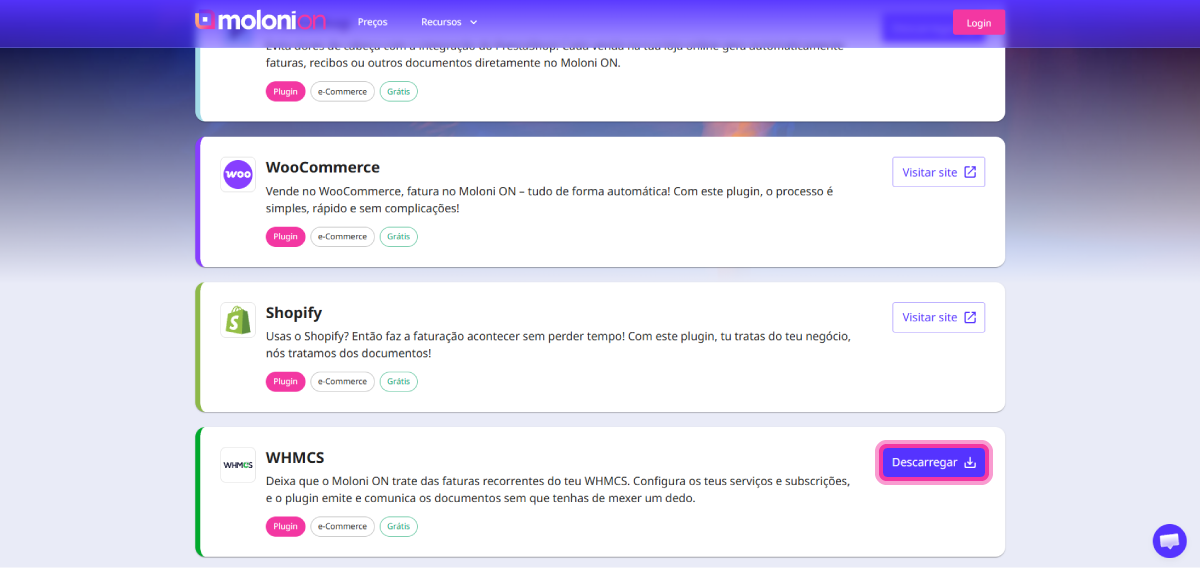
1. Go to this link and, in the WHMCS plugin section, click the Download button.
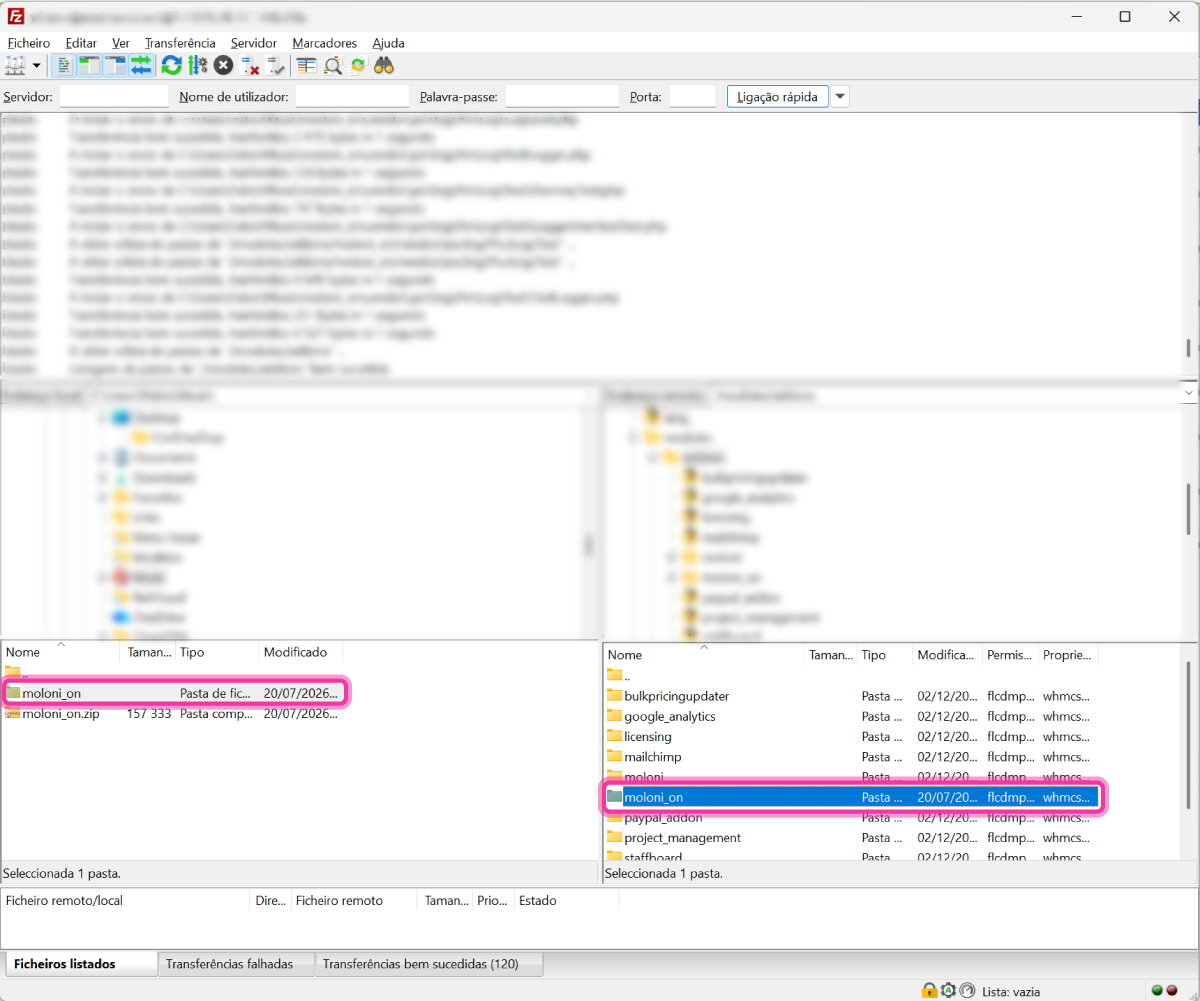
2. Unzip the moloni-on folder and move it to the modules/addons folder of your website.
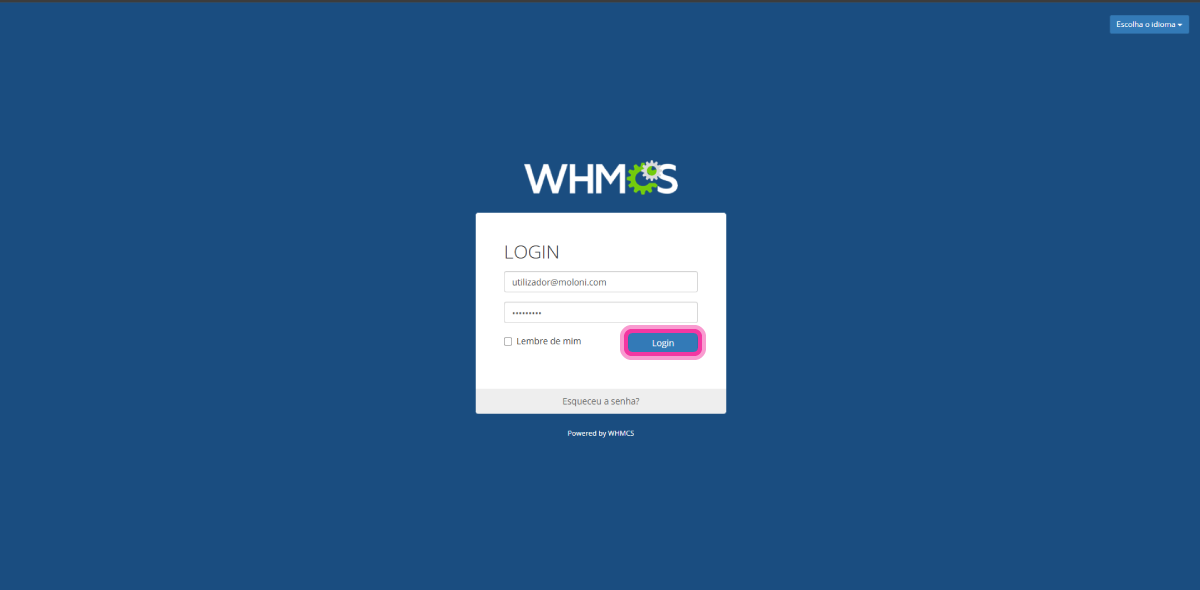
3. Then, log in to the WHMCS panel with your credentials.
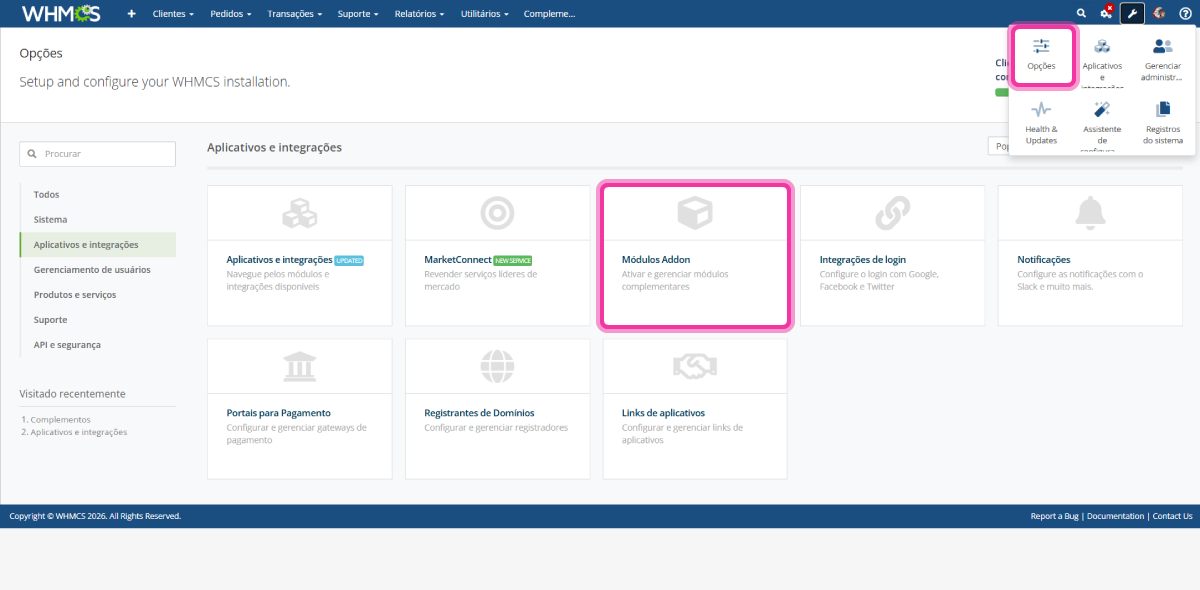
4. After logging in, go to Setup and then Addon Modules.
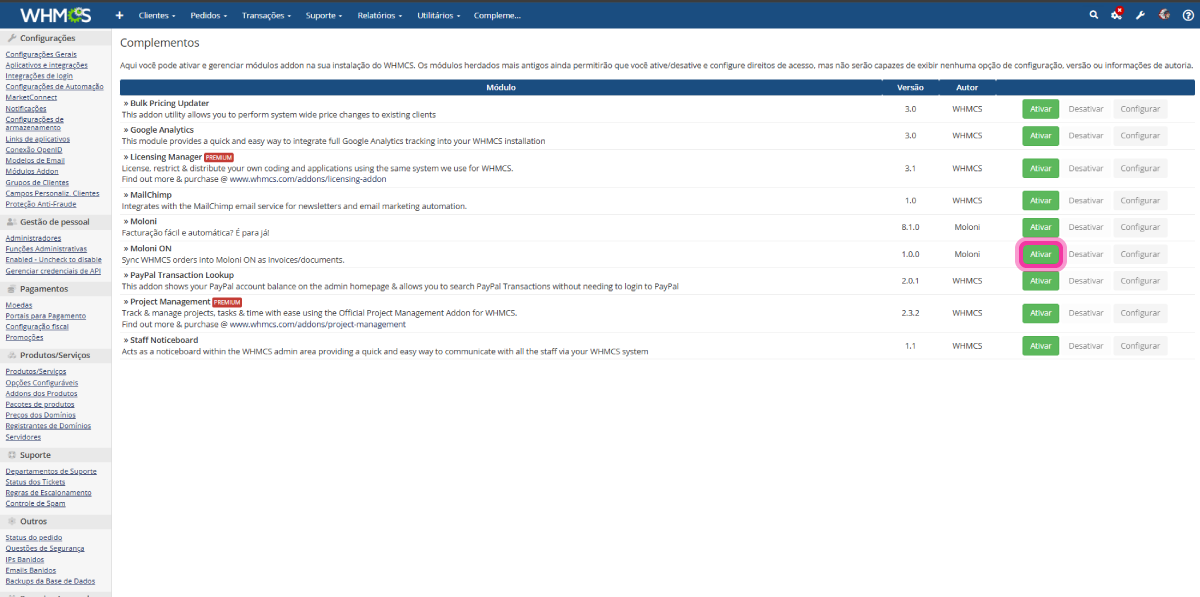
5. In the module list, find Moloni ON and click the Activate button on the right side.
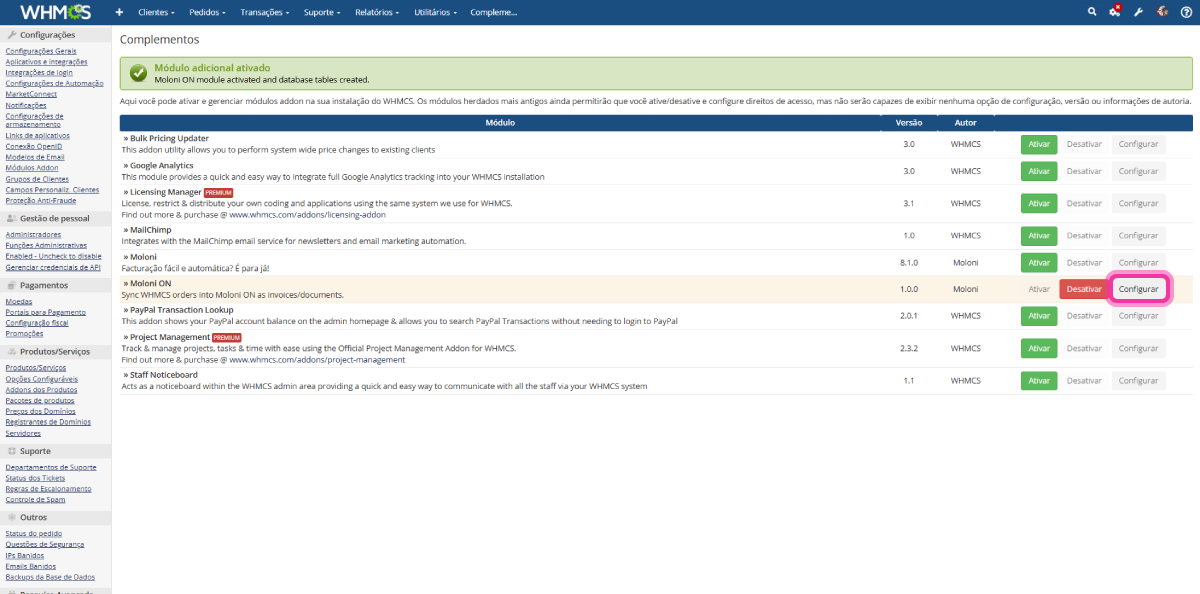
6. Still in the module list, click the Configure button.
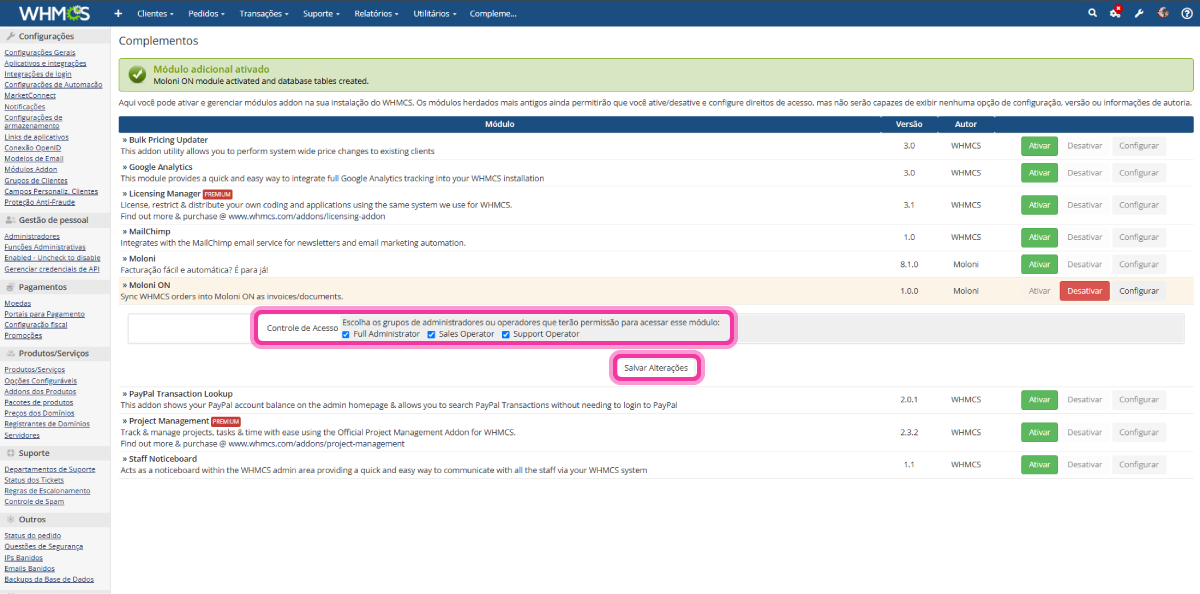
7. You can control access to the module by choosing which administrator or staff groups will have permission to access it. Click Save Changes to save.
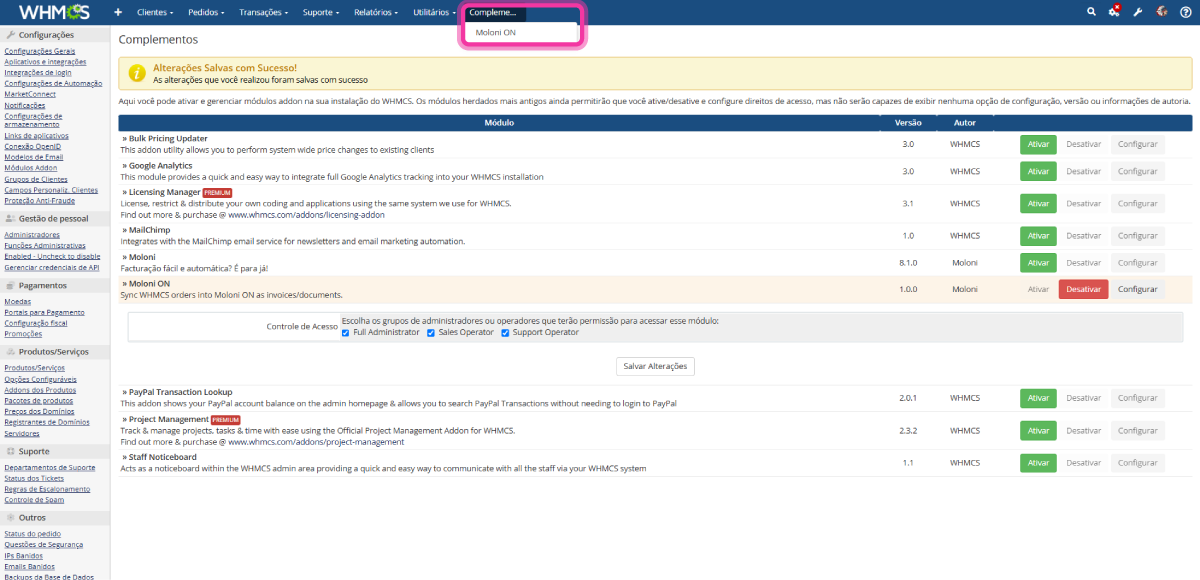
8. Then, from the main menu, go to the Addons tab and then Moloni ON.
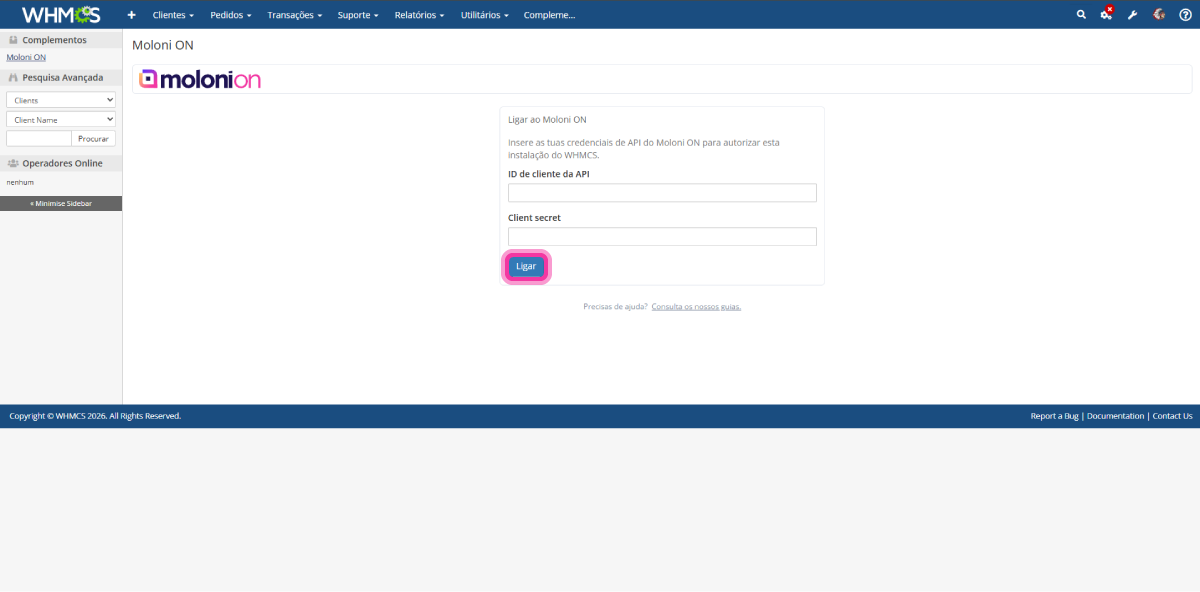
9. Enter your API access details and click Connect.
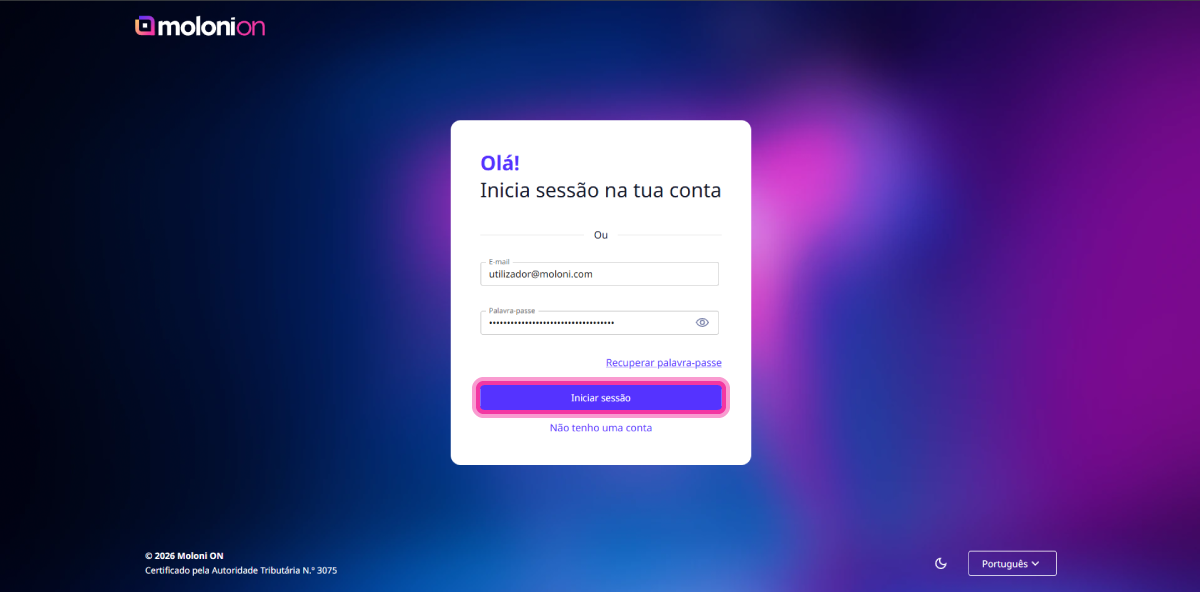
10. Log in with your Moloni ON account details.
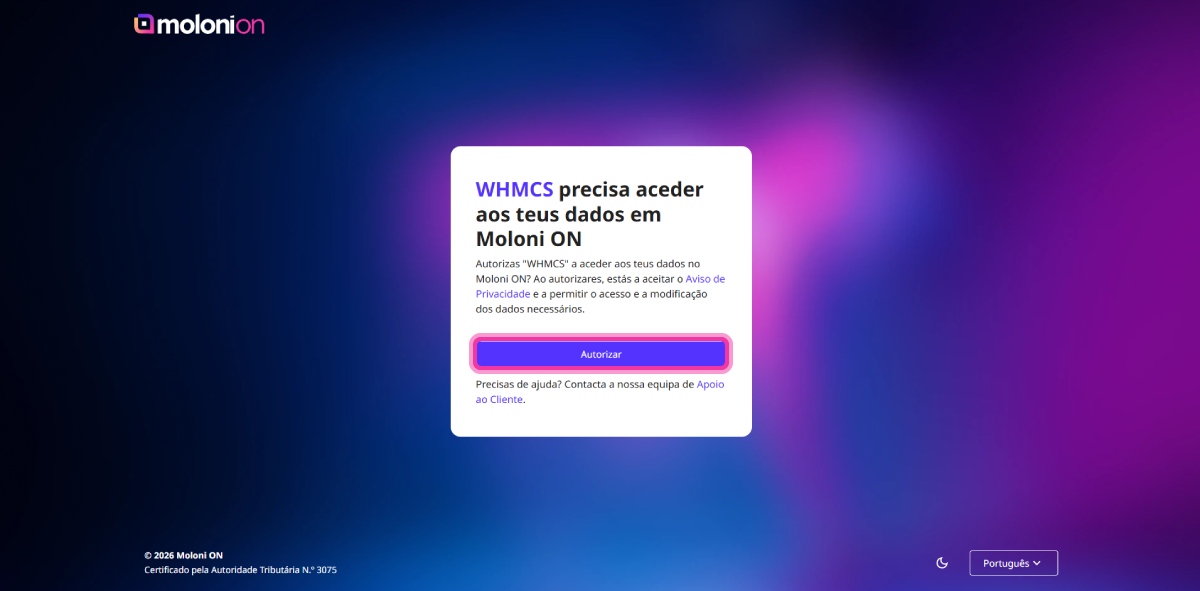
11. Click Authorize.
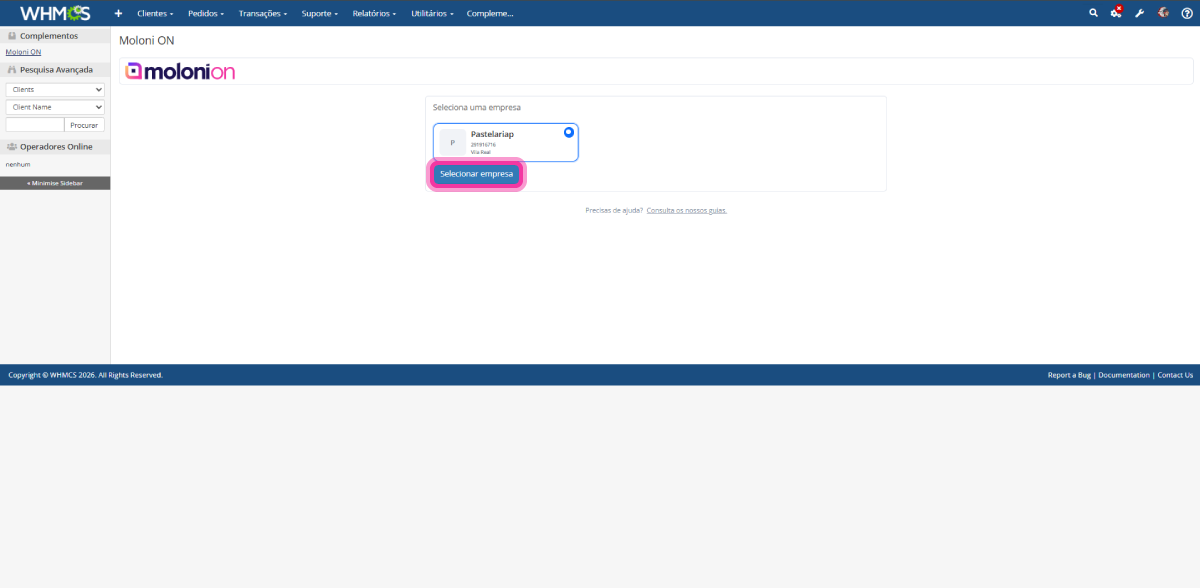
12. Finally, choose the matching company in your account and the module will be ready to start syncing your customers and products.
Configuring the Moloni ON module
After selecting your company, go to the Your settings tab inside the Moloni ON module to define the automation and invoicing rules.
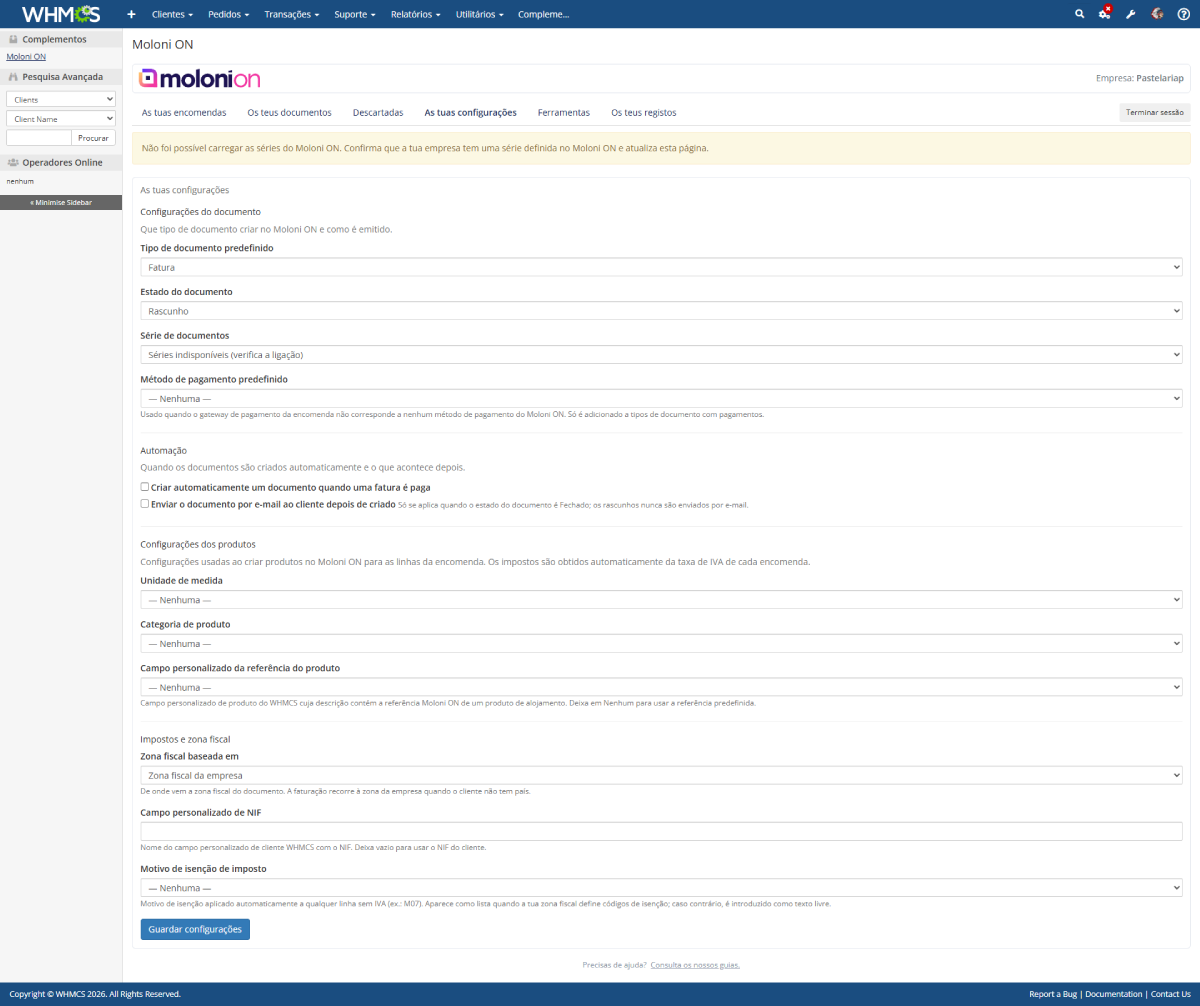
Configure the following sections:
Document settings
- Default document type: Choose the document type you want created in Moloni ON (e.g. Invoice-Receipt).
- Document status: Define the status the document is issued with (e.g. Closed).
- Document set: Select the document set you created in your Moloni ON account.
- Default payment method: Choose the default payment method (e.g. Card). This is applied if the WHMCS order's payment gateway doesn't match any Moloni ON payment method.
Automation
- Automatically create a document when an invoice is paid: Enable this option so the module automatically issues the document as soon as the invoice is marked as paid in WHMCS.
- Email the document to the customer after it's created: Enable this option to send the document in digital format by email to the customer after it's created (only applies if the document status is Closed; drafts are never sent).
Product settings
- Unit of measurement: Define the default unit for invoiced products (e.g. Unit (un)).
- Product category: Select the default Moloni ON category where new products created from WHMCS should be placed (e.g. Online Store).
- Product reference custom field: If you use a WHMCS custom field for the product reference (SKU), select or enter the field name here (e.g. sku). Leave as None to use the default reference.
Taxes and tax zone
- Tax zone based on: Define where the document's tax zone comes from (e.g. customer's billing country). If the customer has no country set, the module will use your company's tax zone.
- Tax ID custom field: Enter the name of the WHMCS customer custom field that stores the Tax ID (e.g. Taxpayer). Leave empty to use the customer's Tax ID.
- Tax exemption reason: If applicable, choose the default VAT exemption reason (e.g. M10 - VAT - Exemption regime). This reason will be applied automatically to any product line without VAT.
Finally, click the Save settings button at the bottom of the page to save all changes and start invoicing automatically.