How to set up the VAT number field in Shopify
To ensure your documents include your customers' tax identification numbers, you can adapt the Company or Address 2 fields.
Enable the field in Checkout
First, you need to enable the field in the Checkout settings to ensure it appears to the customer during the purchase.
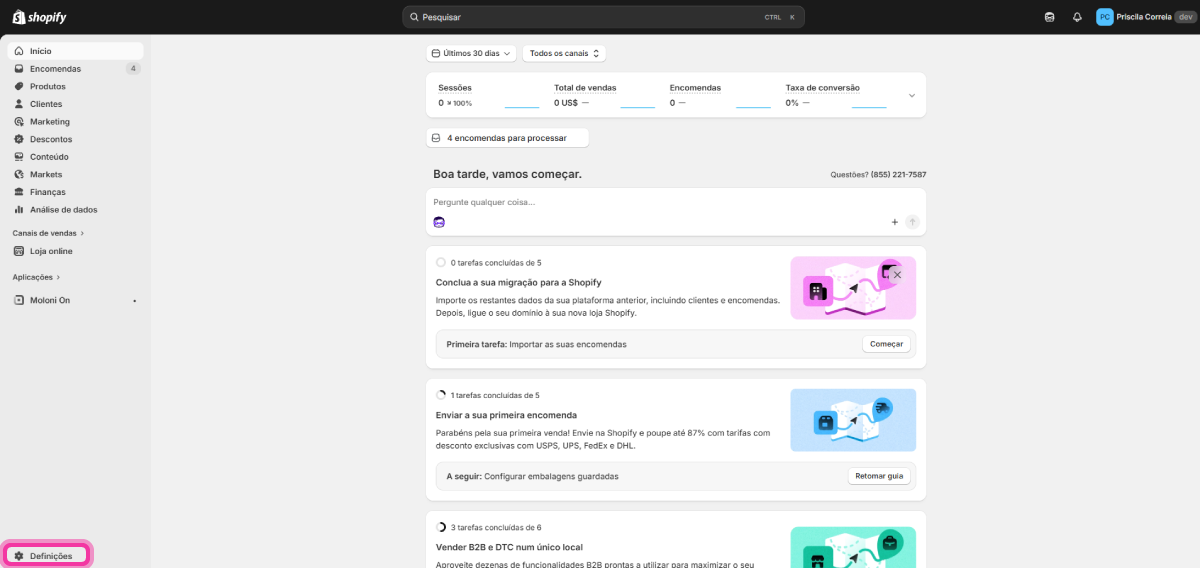
1. In the Shopify admin, go to Settings (bottom left corner).
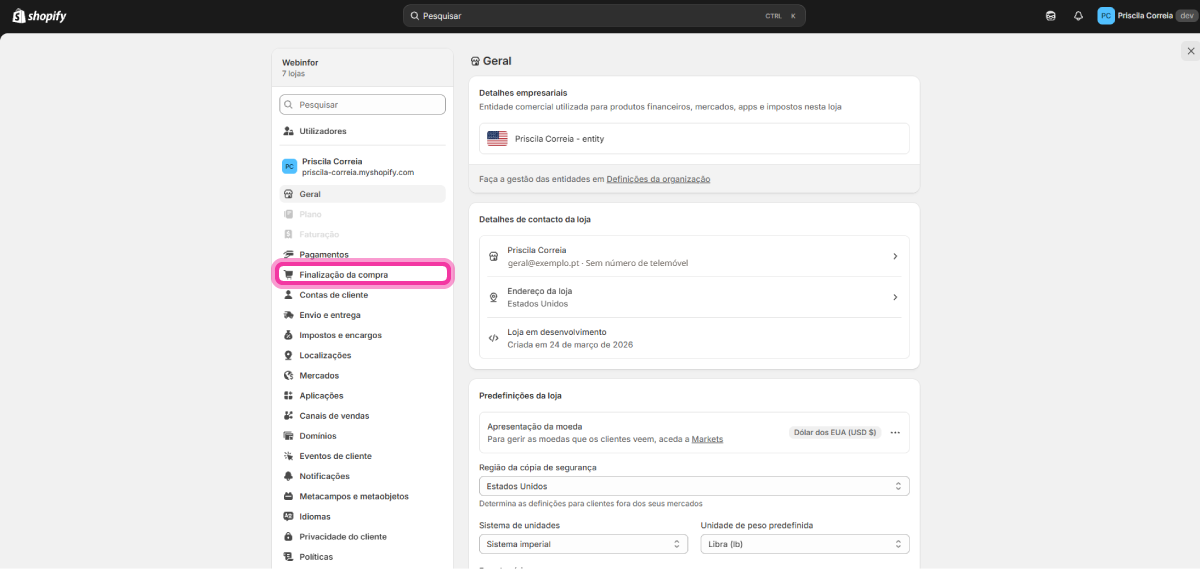
2. Select Checkout.
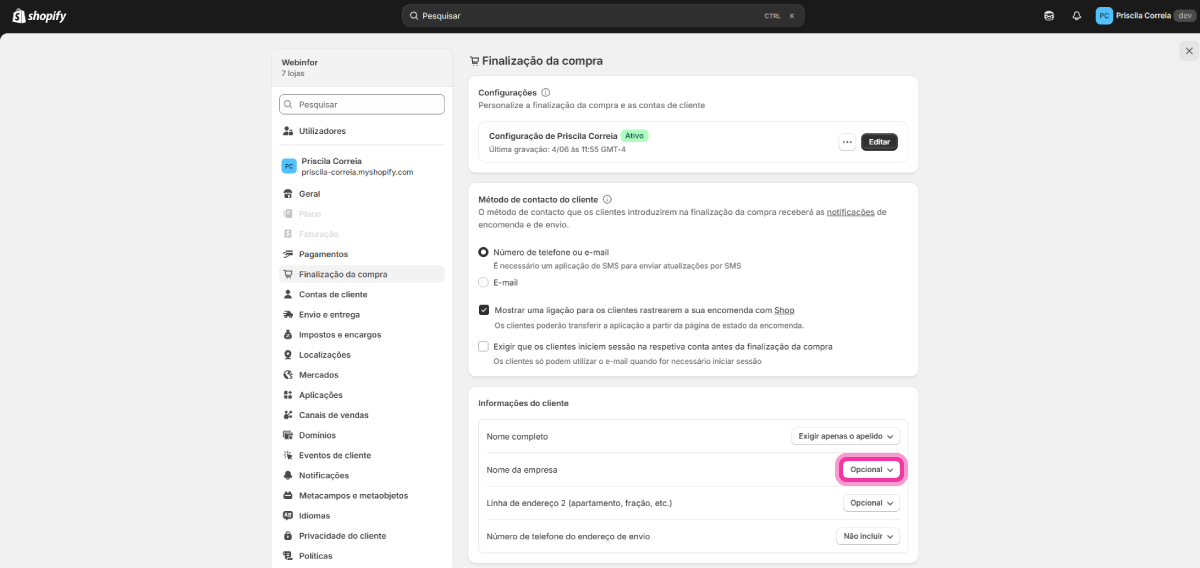
3. In the Customer information section, under the Company name field, select the Optional option.
4. Click Save.
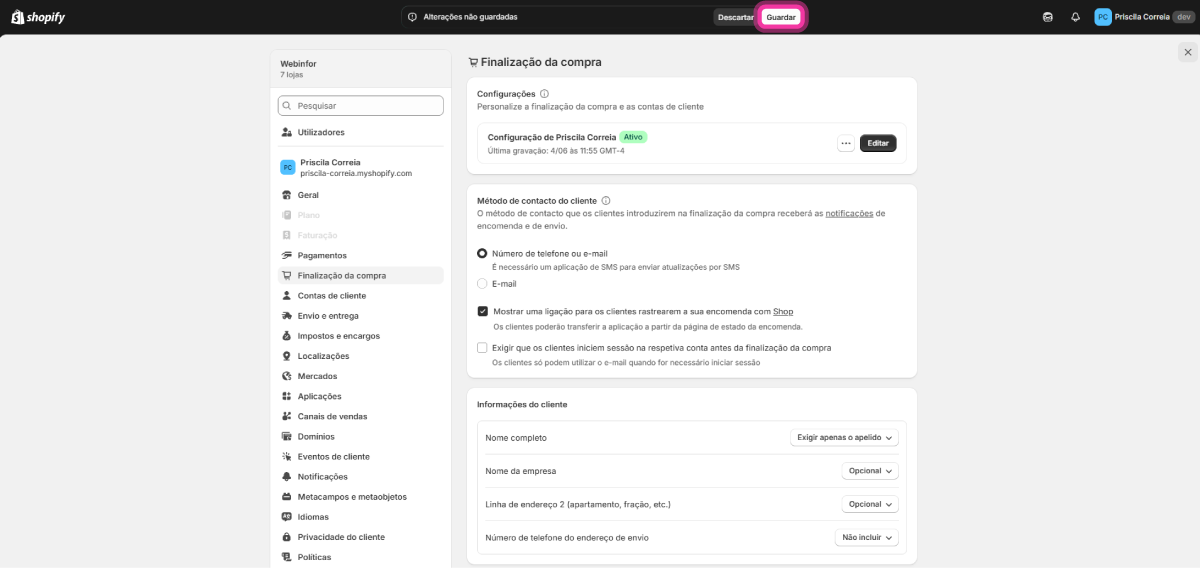
5. Click the Close button.
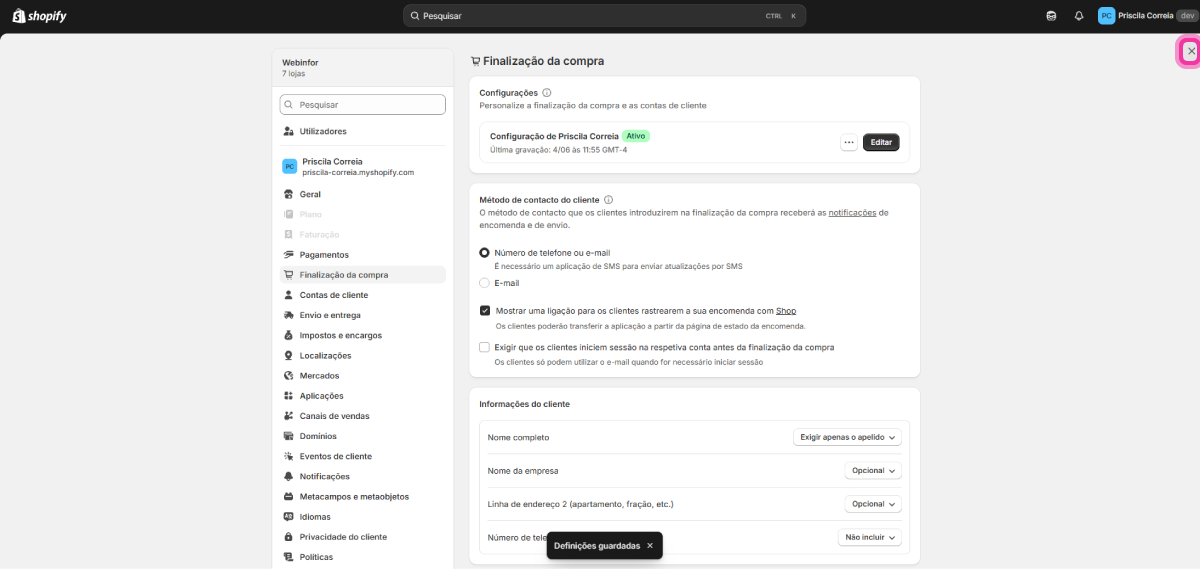
Translate the field for the customer
Now, let's change the text the customer sees, so they know they should enter their VAT number in that field.
1. Go to Online Store.
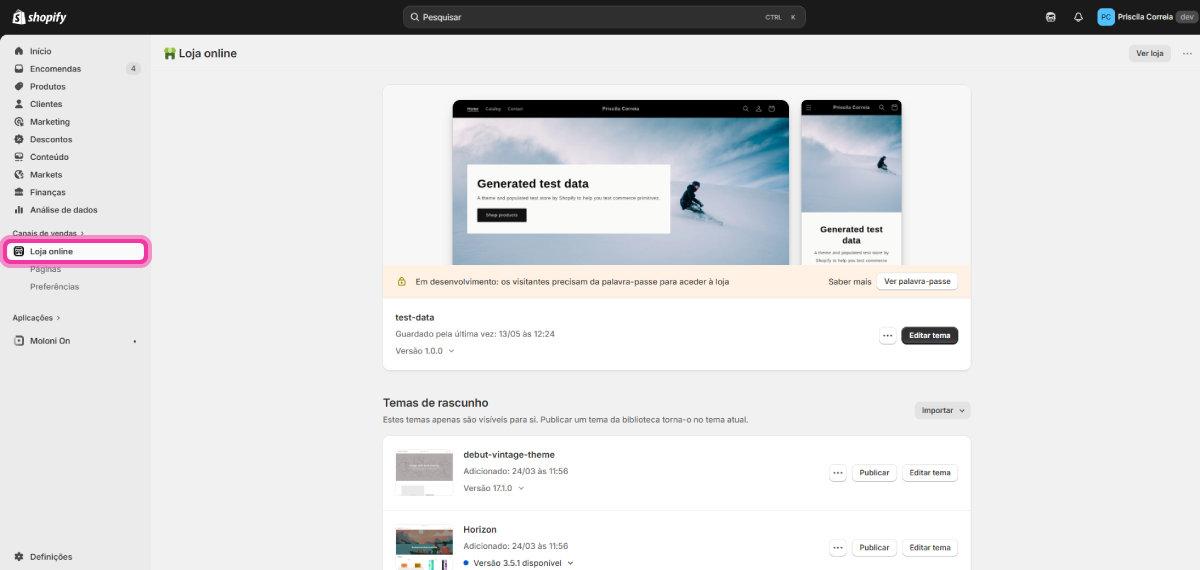
2. Click the three-dot button and select Edit default theme content.
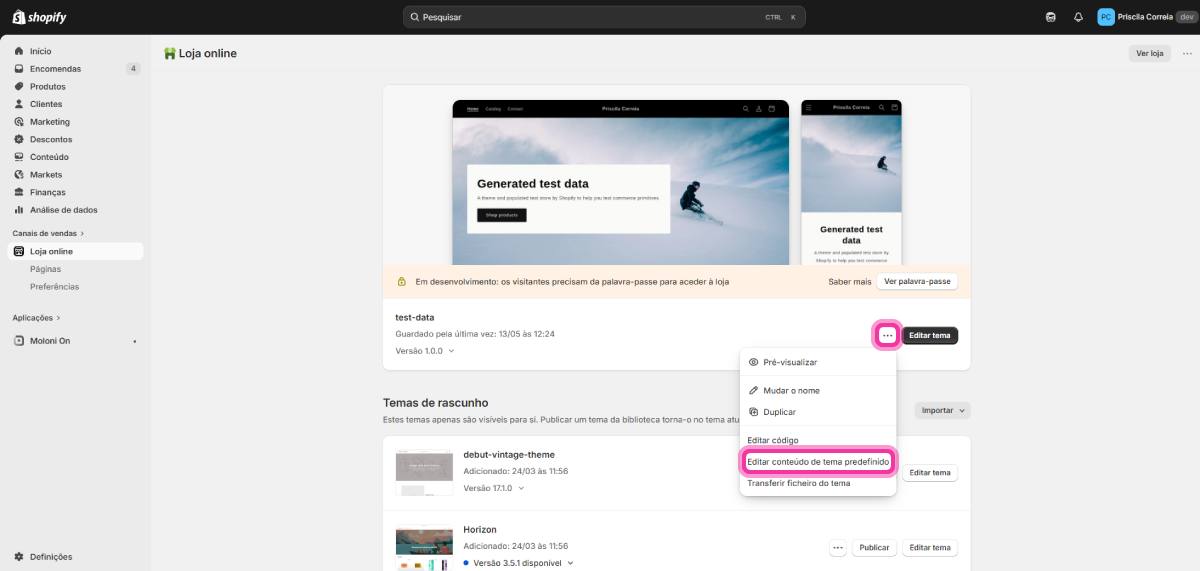
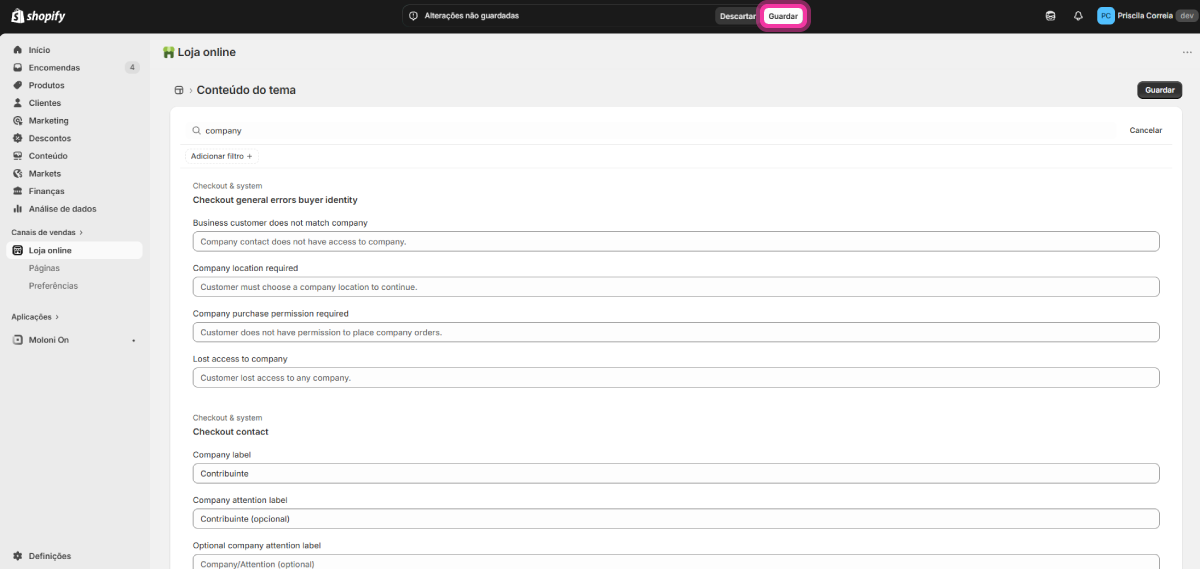
3. Click the search button.
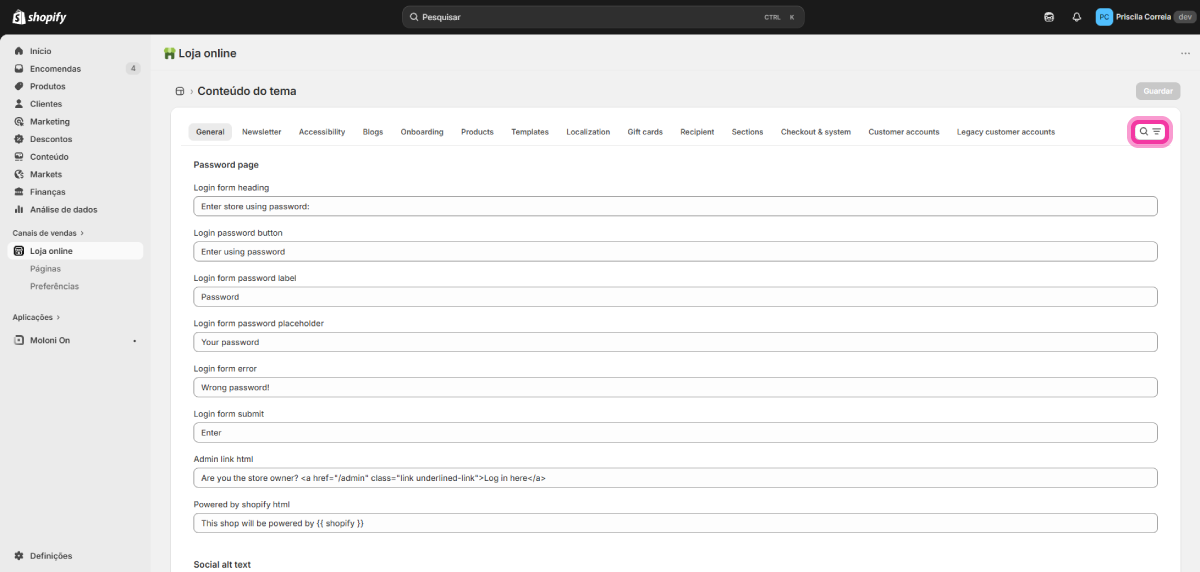
4. Search for company or address2, depending on the field you intend to adapt.
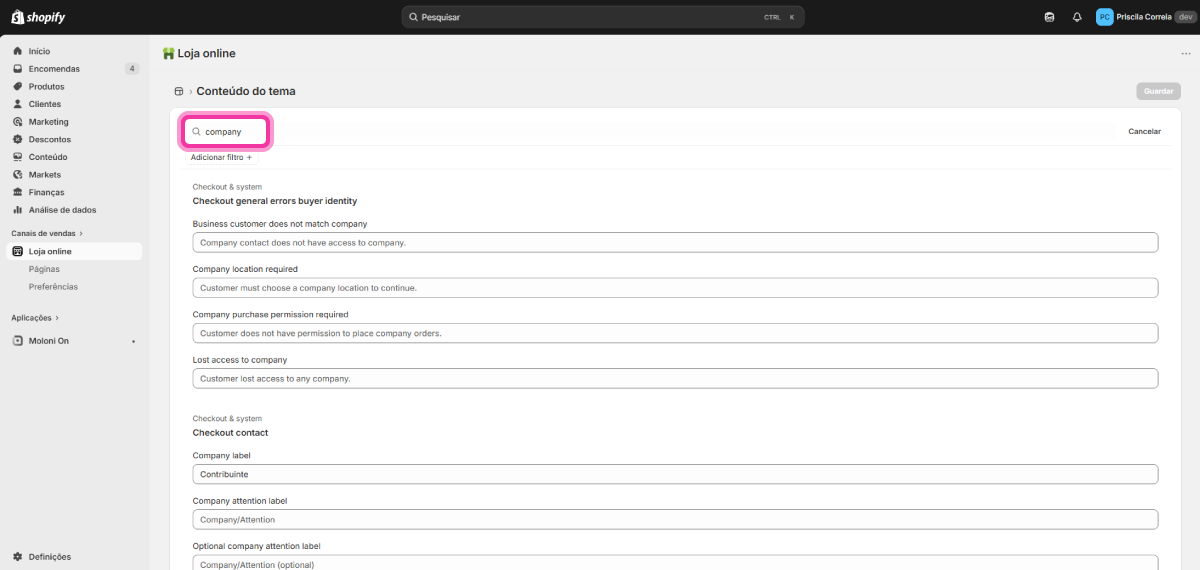
5. In the Company label field, enter VAT number.
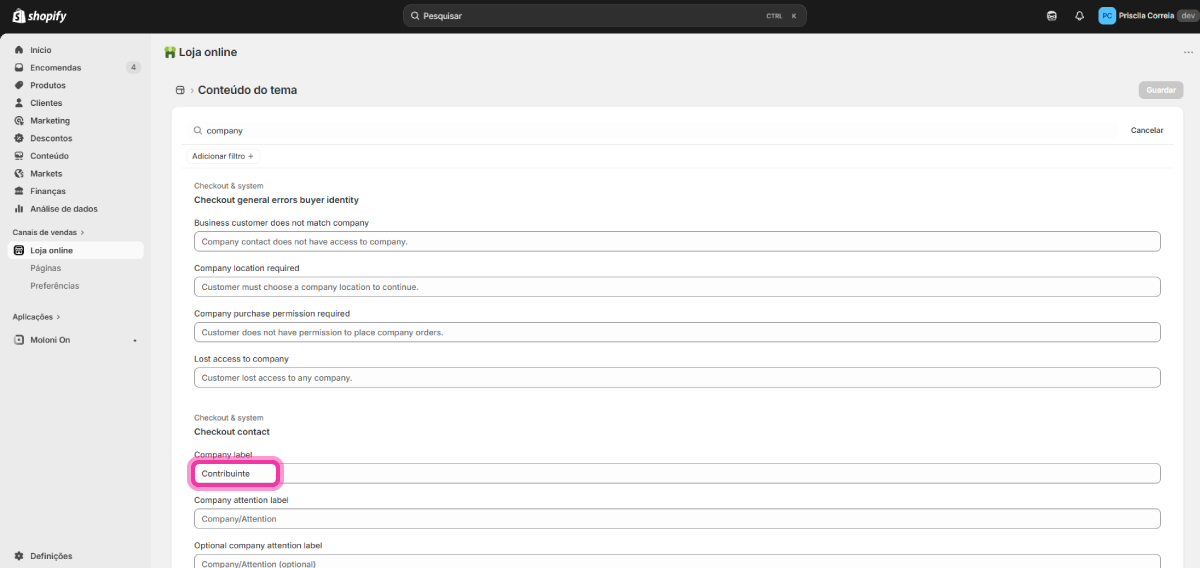
6. In the Optional company label field, enter VAT number (optional).
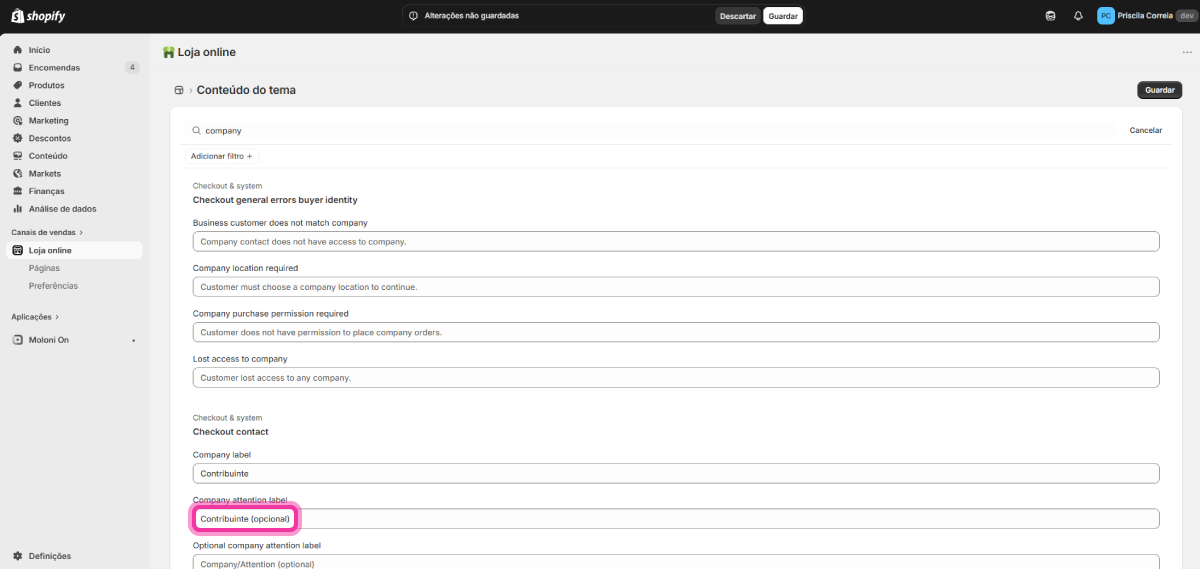
7. Click the Save button. The VAT number field is now configured.
Configure extraction in Moloni ON
After preparing the Checkout, you must tell the Moloni ON app which Shopify field should be read as the VAT number field for invoice issuance.
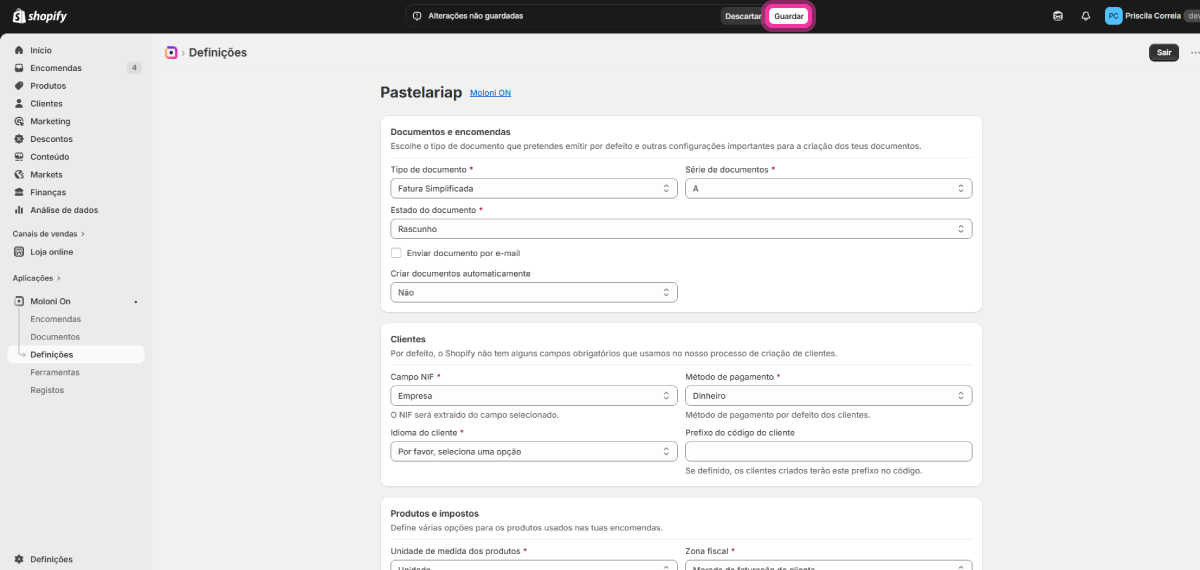
1. In the Apps section, click Moloni ON > Settings.
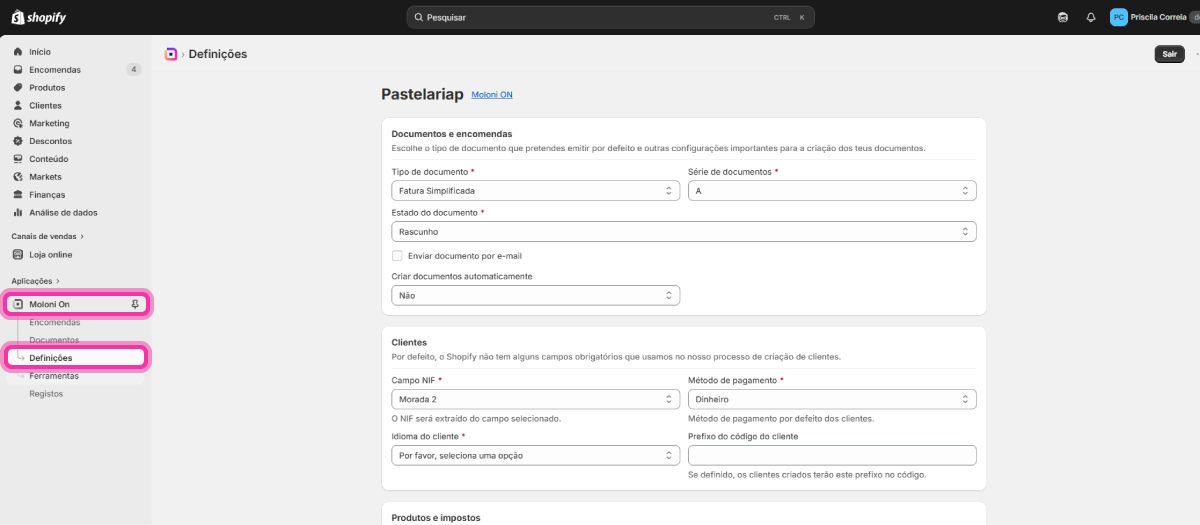
2. In the Customers section, under the VAT number field, select Company or Address 2, according to the field you previously selected.
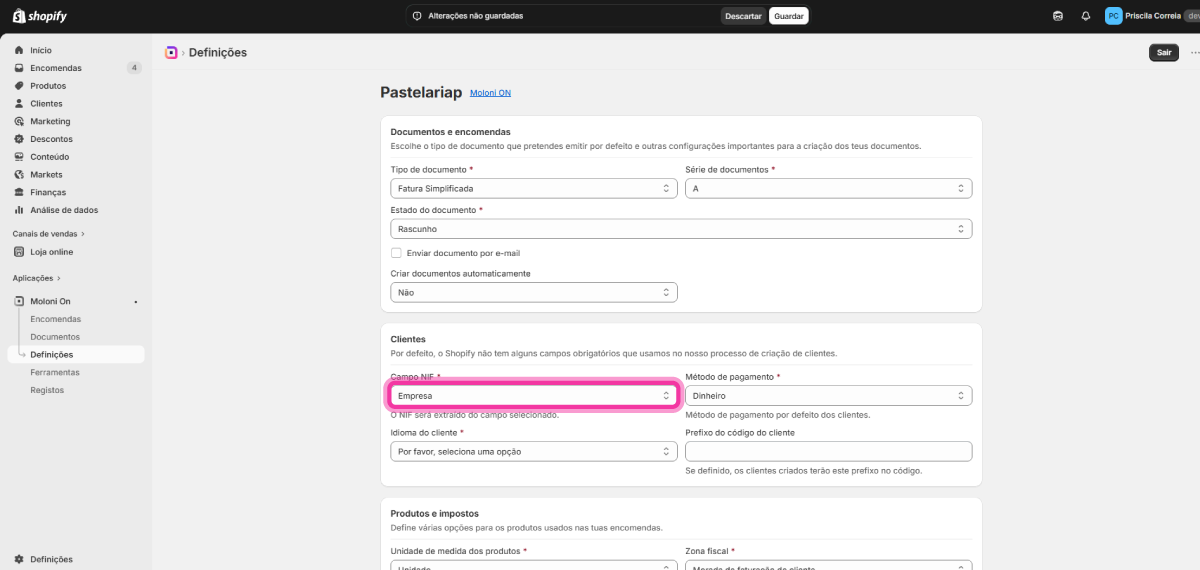
3. Click the Save button. The VAT number will be extracted directly from this field.