How to use Moloni ON's MCP
The MCP (Model Context Protocol) works as a direct and secure channel between your AI assistant and your Moloni ON account. This technology transforms your business management: instead of navigating complex menus or filling out manual forms, you can now control your company's operations through a normal conversation.
Simply give direct text or voice instructions, such as: "Issue a simplified invoice of €45 to the End User customer" or "Tell me what the best-selling products were this week".
What can you do?
With the support of Artificial Intelligence, you can speed up your company's daily tasks on several fronts:
- Prepare and issue quotes, invoices or receipt-invoices in an instant, using just everyday language.
- Check accumulated balances and lists of amounts owed.
- Compare billing volumes between different periods.
- Create new customer records in the system or update existing details (such as address or email).
Compatibility
As it is based on an open standard, Moloni ON's MCP is ready to work within your usual work tools:
- Official artificial intelligence clients (such as Claude Desktop).
- Assistants run directly in the terminal (such as Claude Code).
- Claude, VSCode (Copilot), ChatGPT, n8n and others that implement the MCP system.
Setup
Before moving forward, ensure you have these 3 elements ready:
- An active Moloni ON account.
- The API module activated.
- An AI tool installed that supports the MCP protocol.
Follow these steps:
1. For this example, we are using Claude. Open the Claude Desktop application on your computer.
If you would rather use ChatGPT, see OpenAI's instructions on Developer mode and MCP apps in ChatGPT.
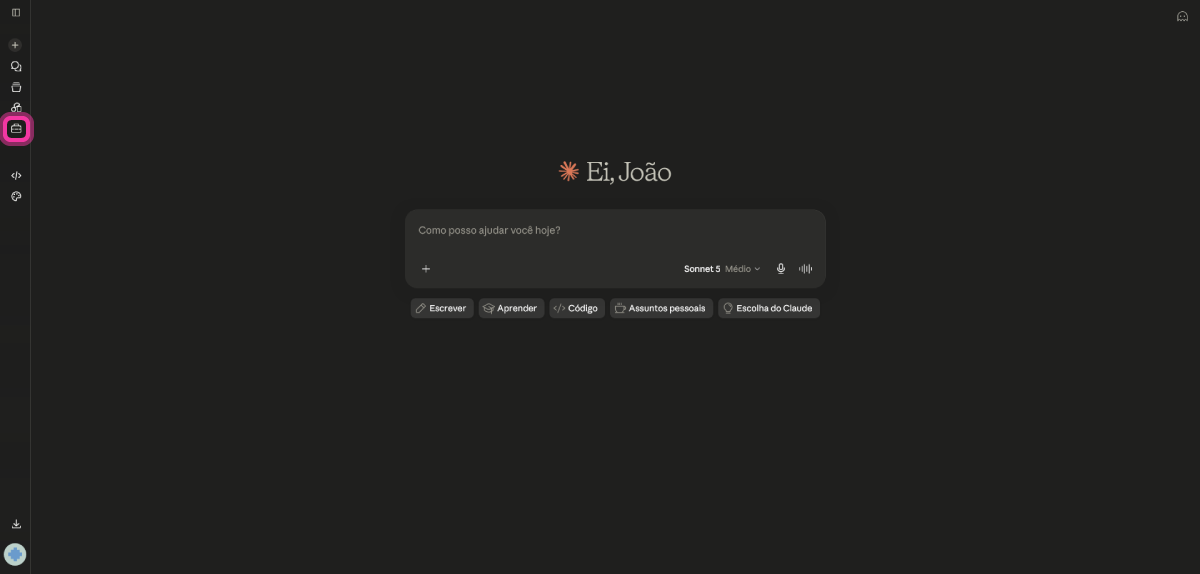
2. In the left sidebar of the Claude interface, click on the Tools icon.
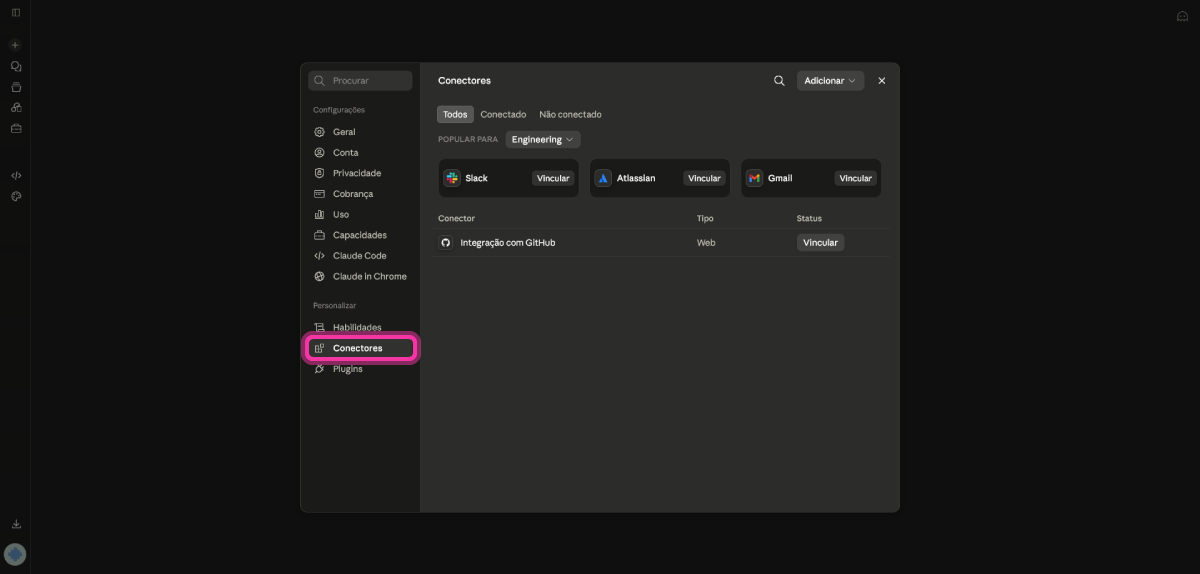
3. In the settings pop-up window that opens, look at the left sidebar and select the Connectors option.
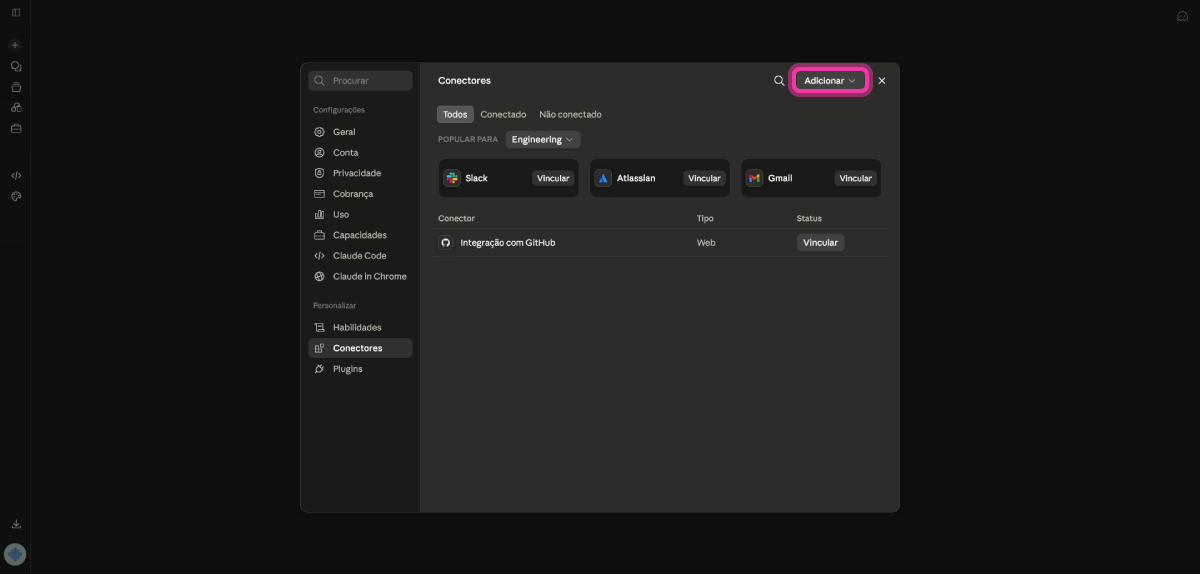
4. In the Connectors panel, click the Add button.
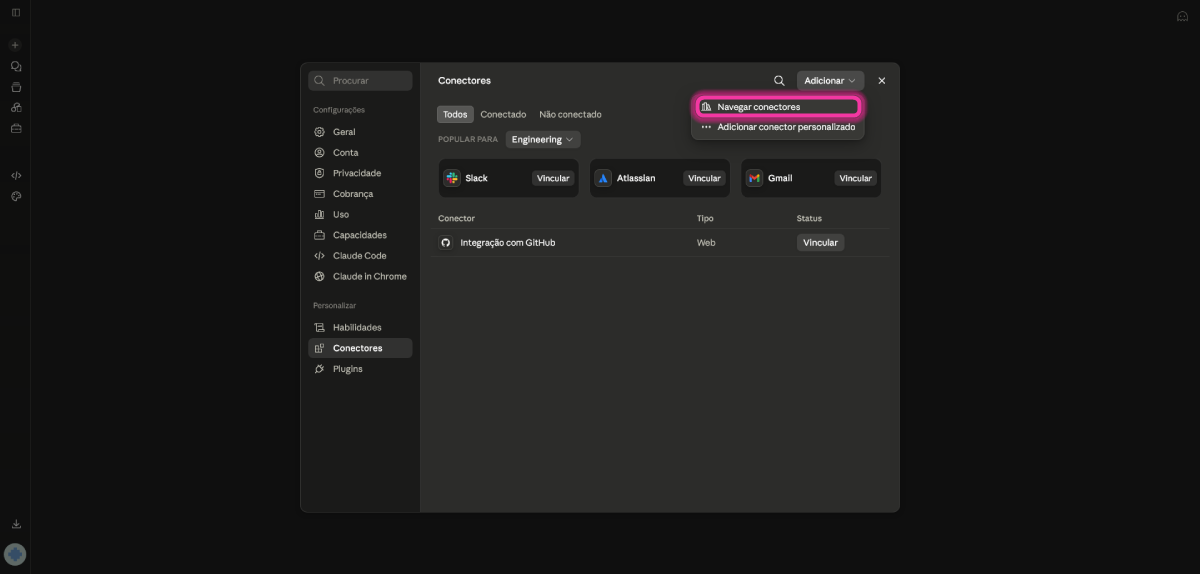
5. In the menu that expands, select Browse connectors.
6. In the search field, type Moloni ON and click the Moloni ON connector.
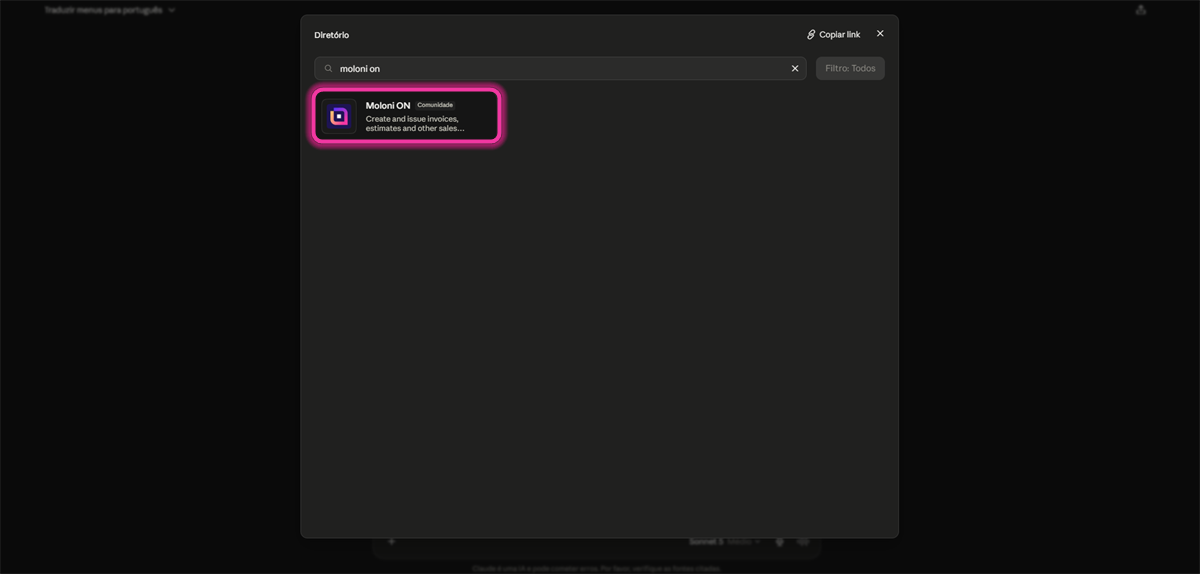
7. Click the Connect to Claude button.
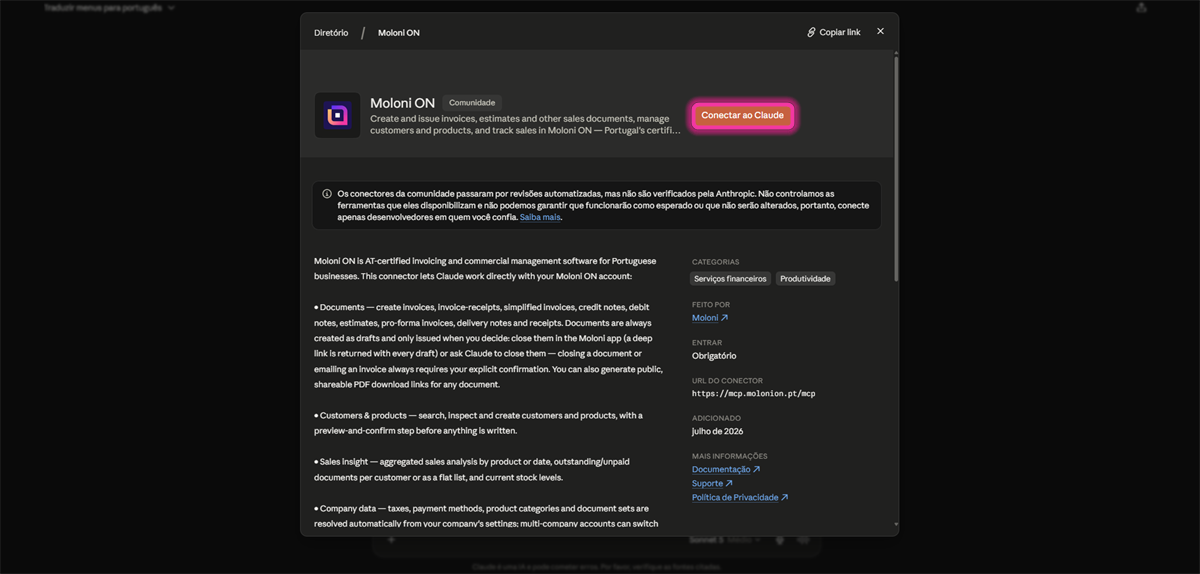
8. Log in on the Moloni ON page with your credentials and click the Authorize button to validate the connection.
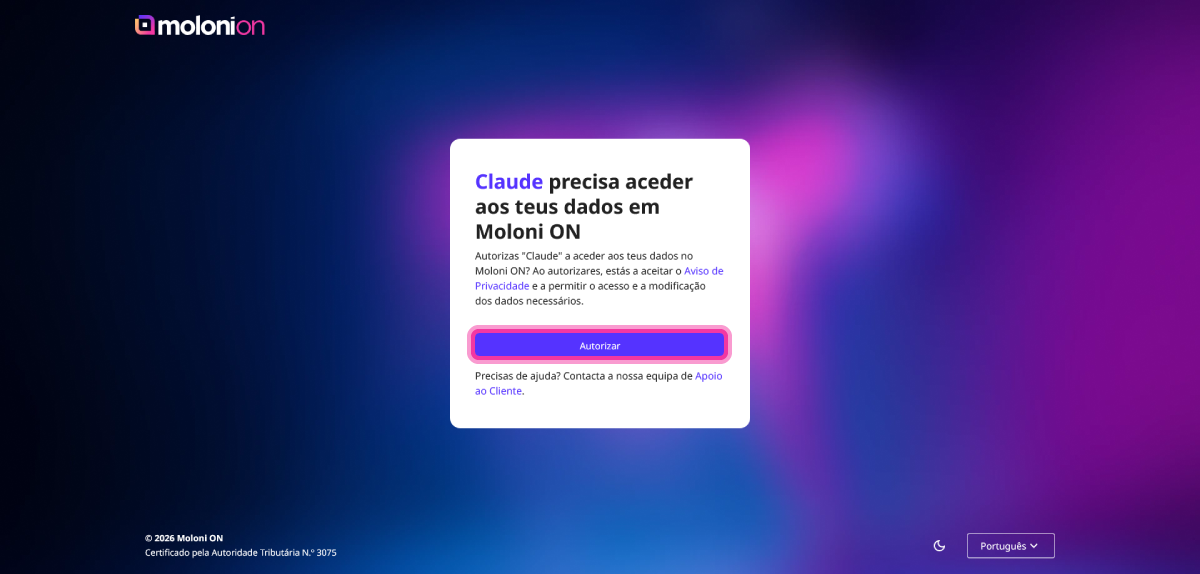
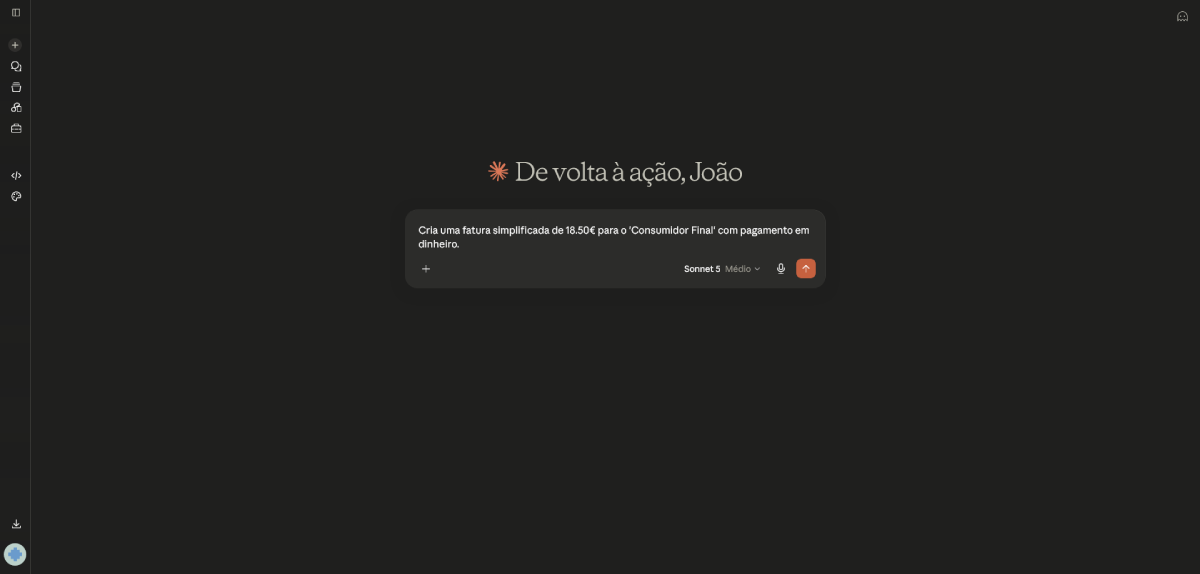
9. Return to Claude and open a new chat. Your assistant can now talk directly to your management system.
Practical examples of commands
Try interacting with your AI assistant using requests tailored to your day-to-day routine:
Daily sales
- "Create a simplified invoice of €18.50 for 'End User' with cash payment."
Product management
- "Add a new product named 'Eco Optical Mouse', reference RATO-02, retail price €15 and standard VAT rate."
Cash flow and customer management
- "Find the record for the customer with VAT number 509876543 and show me their address."