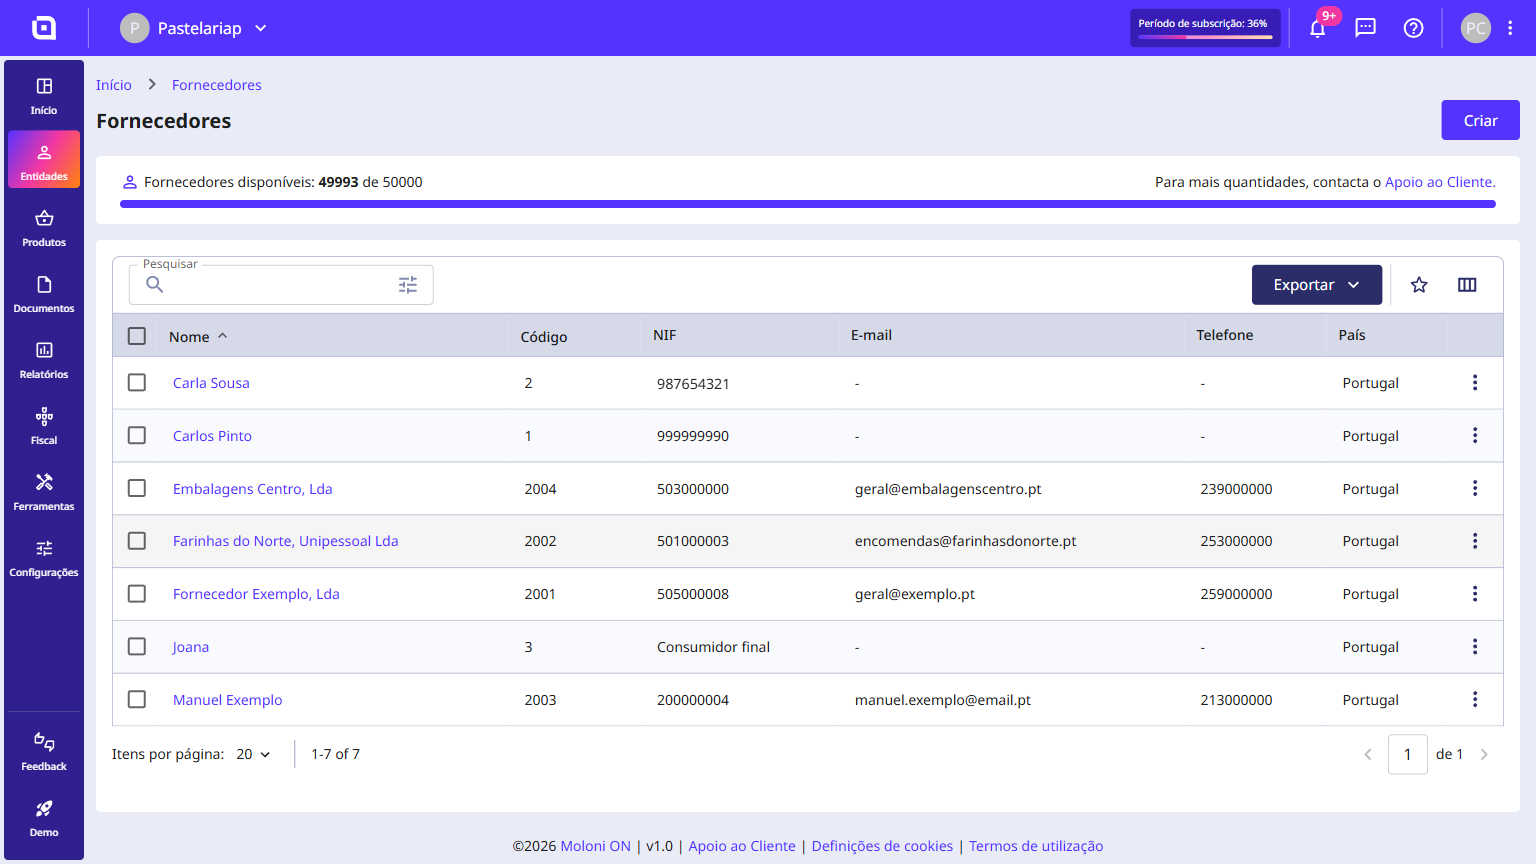
How to import suppliers from an XLS or CSV file
In Moloni ON you can import suppliers from an XLS or CSV file, choosing which column of the file matches each supplier detail. It is the fastest way to bring all your suppliers into your account, without creating them one by one.
Prepare the file with one header row and one row per supplier. If you give the columns the same names as the Moloni ON fields - Code, Name, VAT number or Address - Moloni ON matches some of them on its own and you only have the remaining ones to confirm.
Follow these steps:
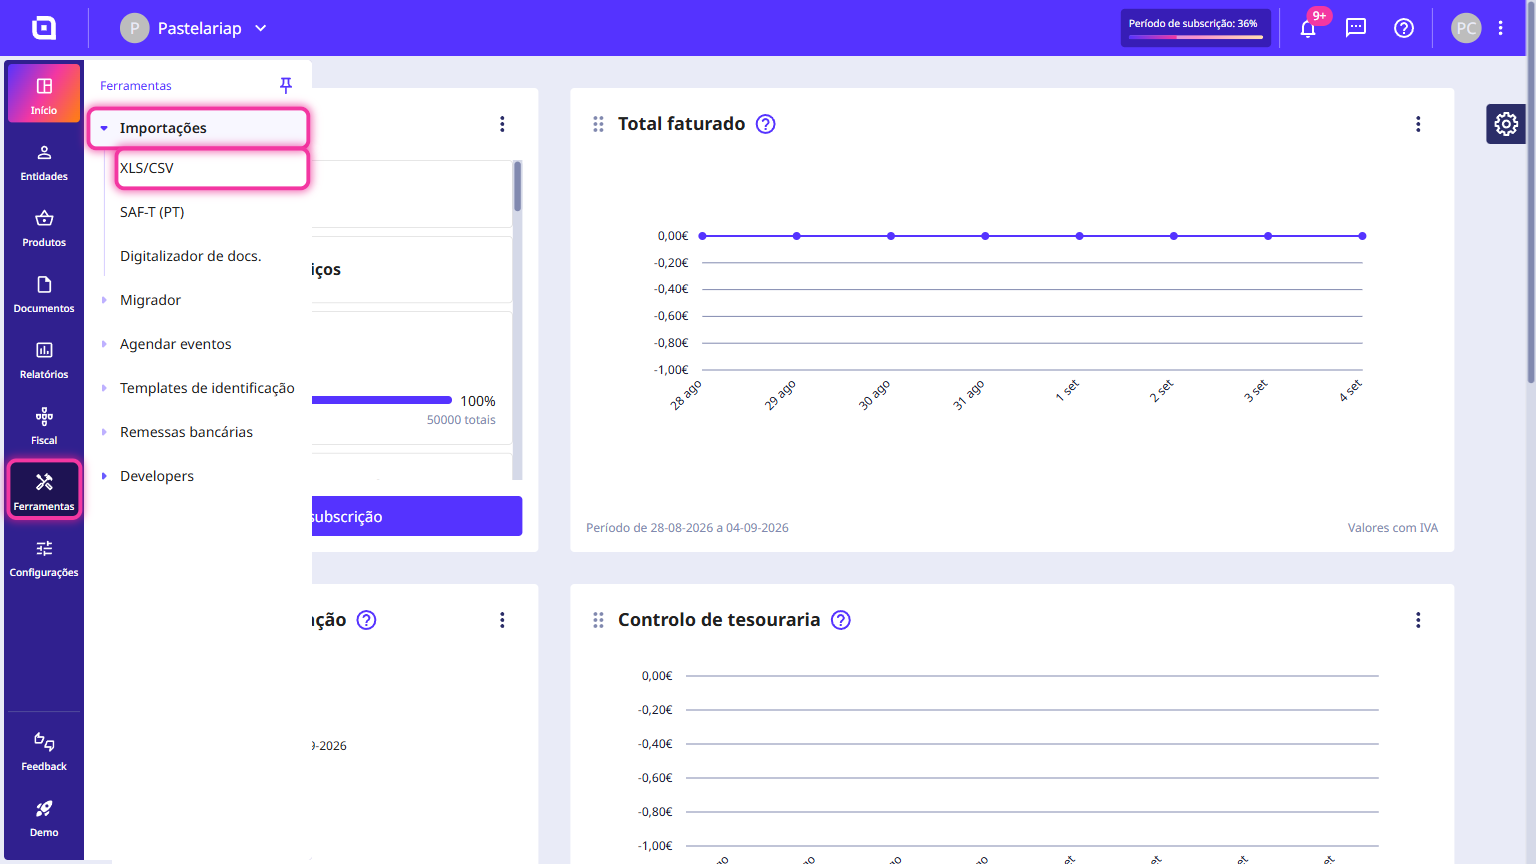
1. In the Client Area, in the left side menu, go to Tools, click on Imports and choose XLS/CSV.
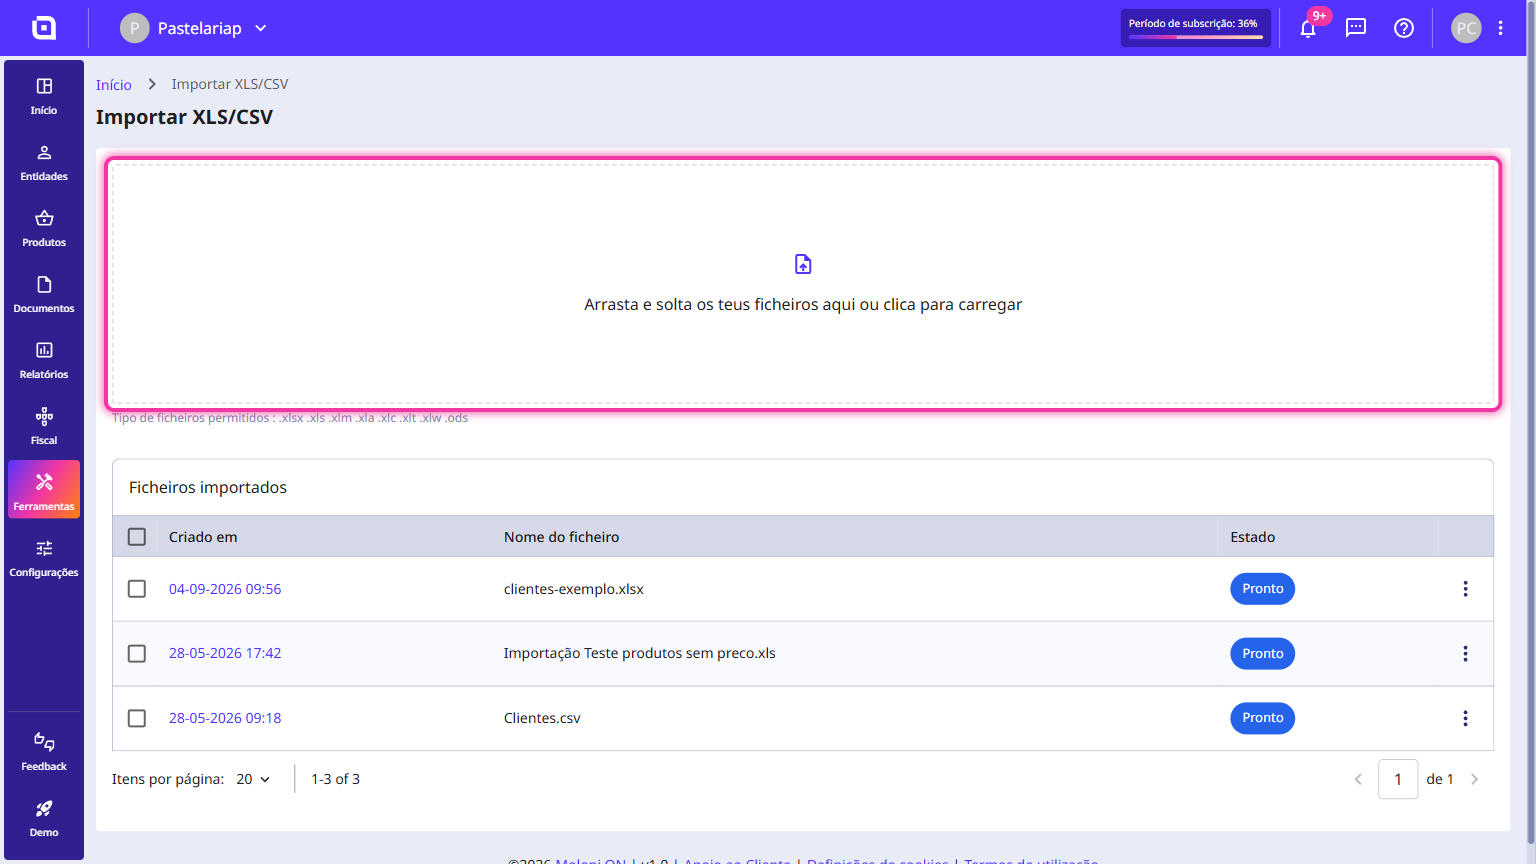
2. Drag the file into the upload area, in the centre of the page, or click that area to choose it from your computer.
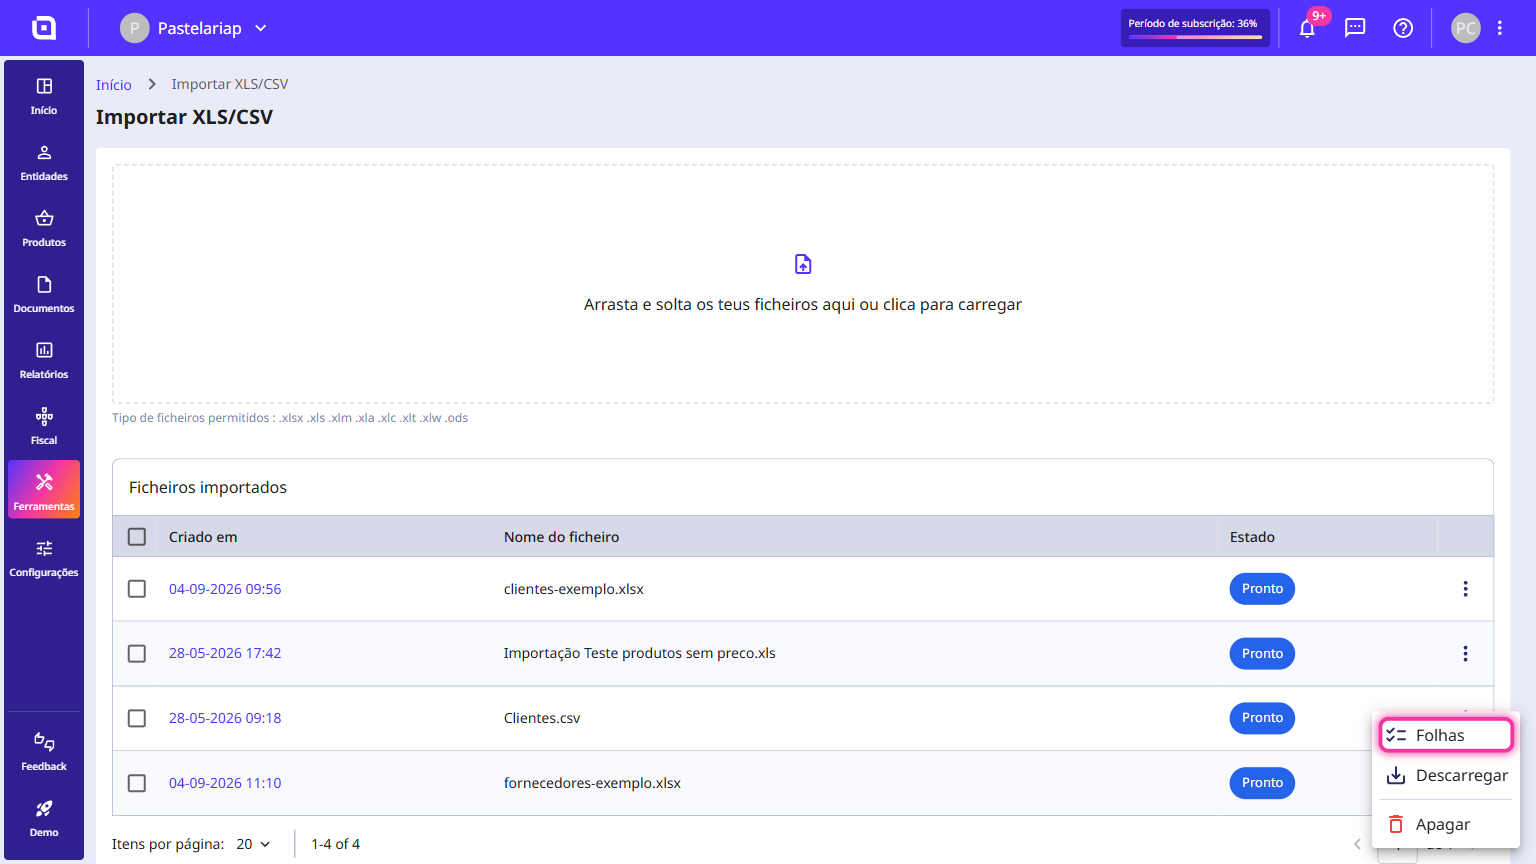
3. Moloni ON lets you know when the file is Ready. Click the three-dot menu on the file's row and select Sheets.
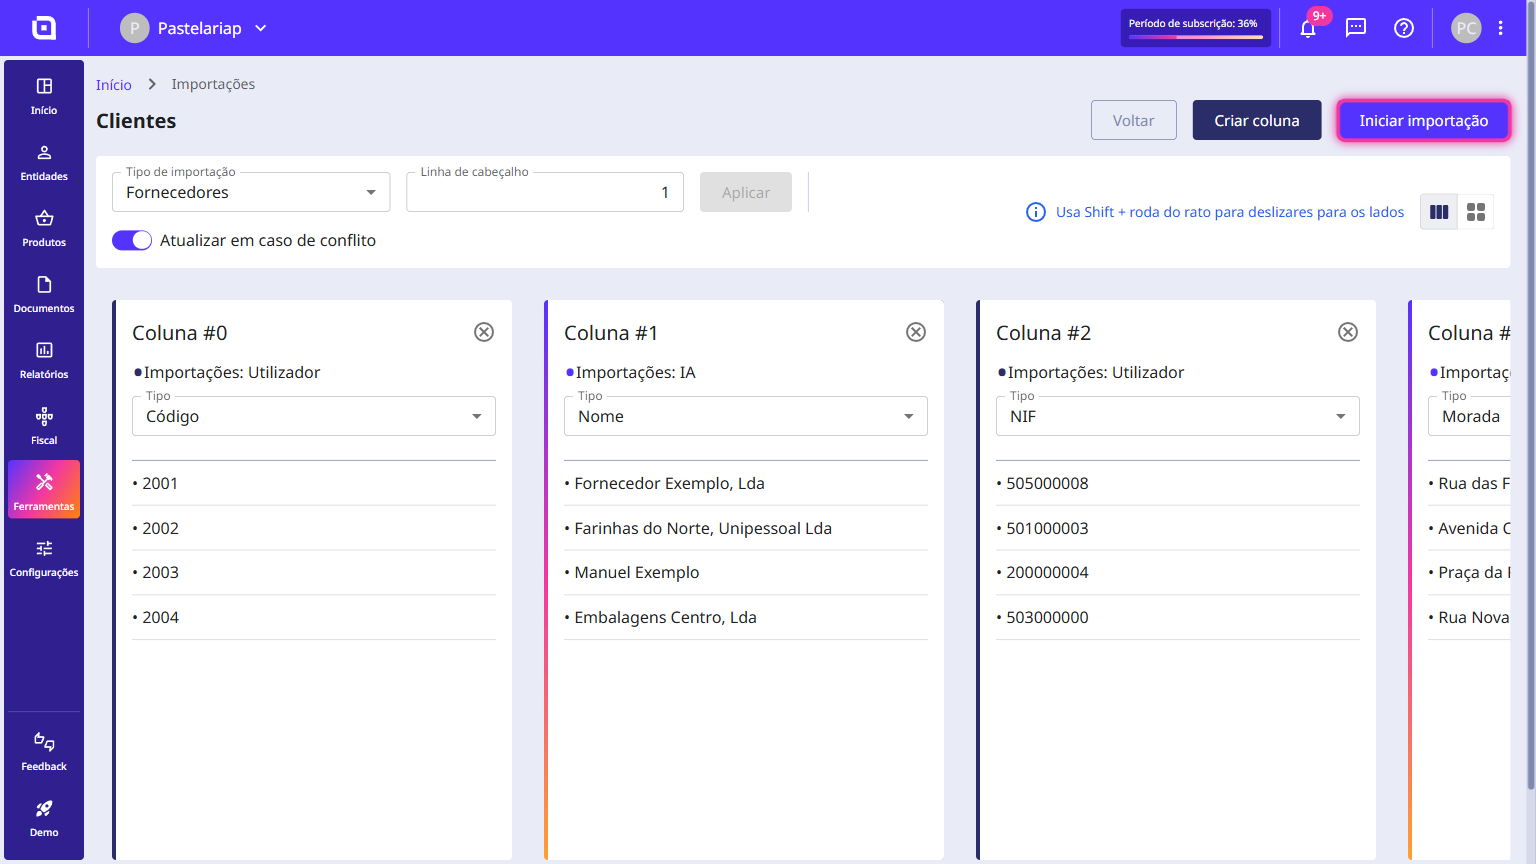
4. Start organising: under Import type select Suppliers.
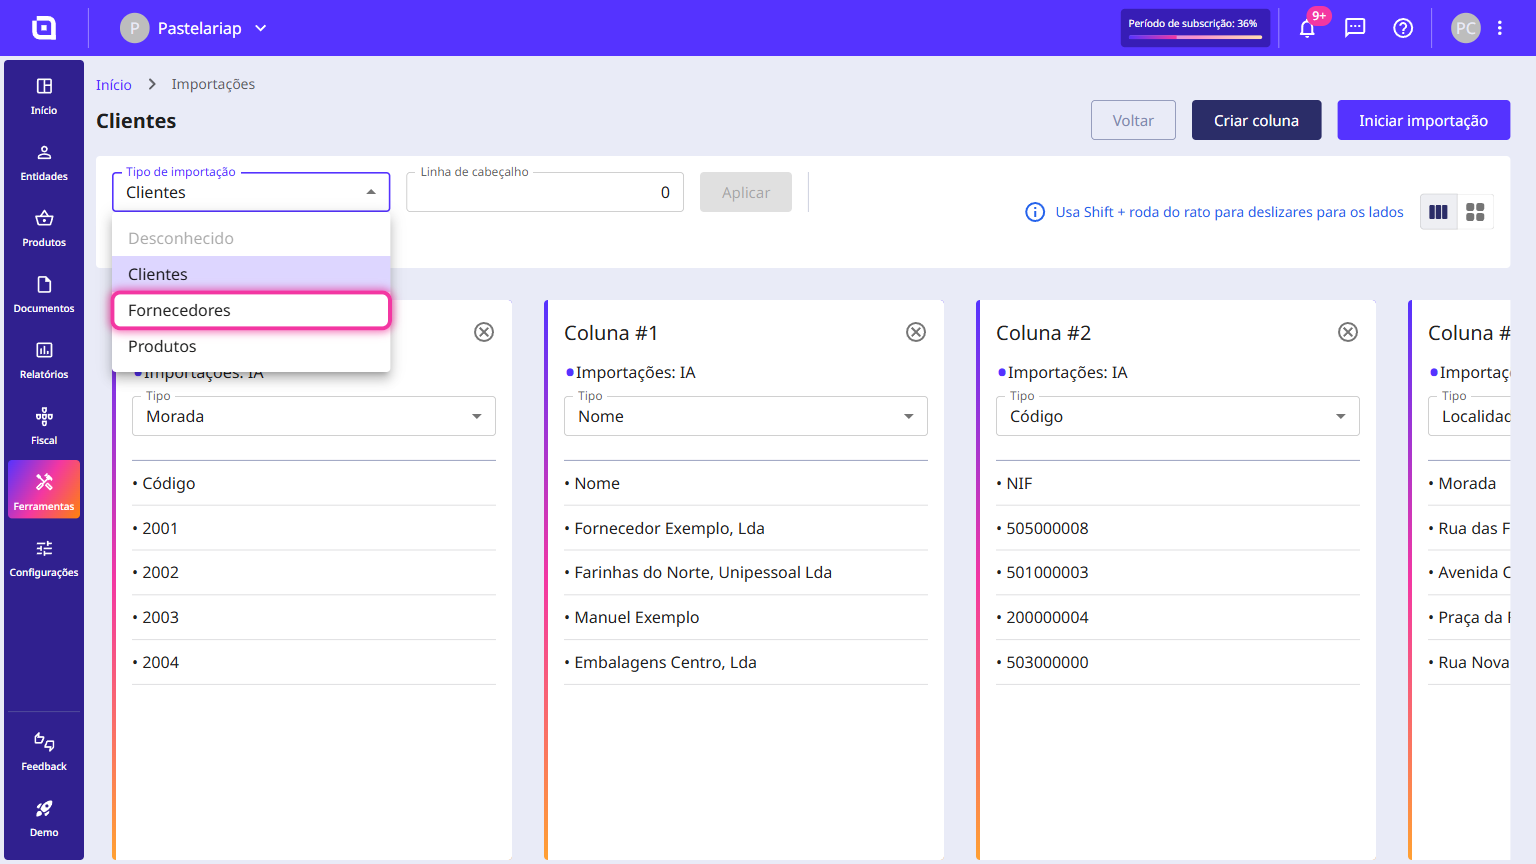
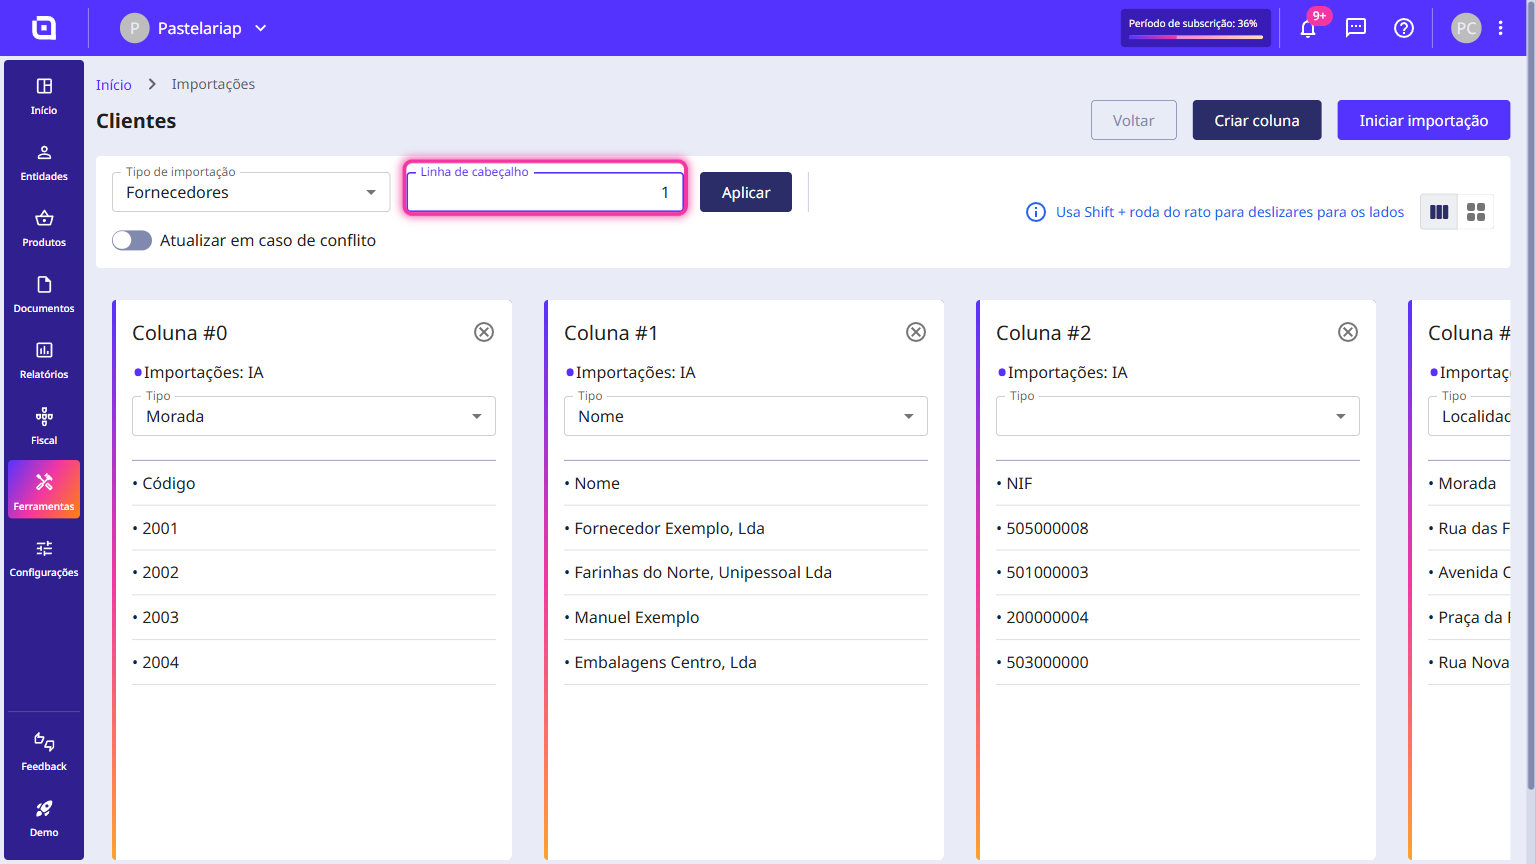
5. Under Header line select the row with the column names and click the Apply button.
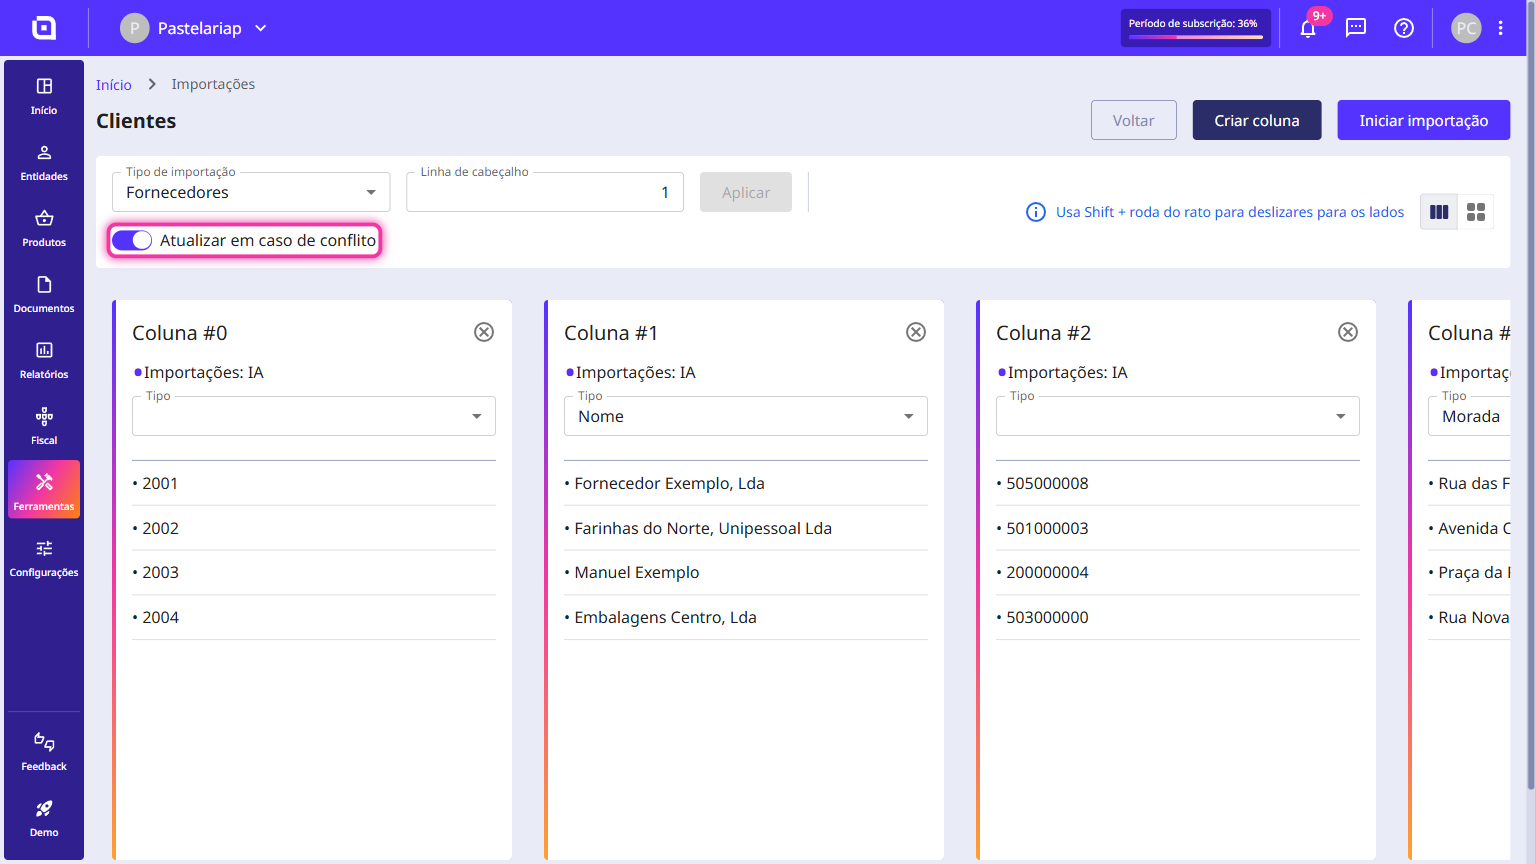
6. If you wish to update existing information, enable the Update in case of conflict option.
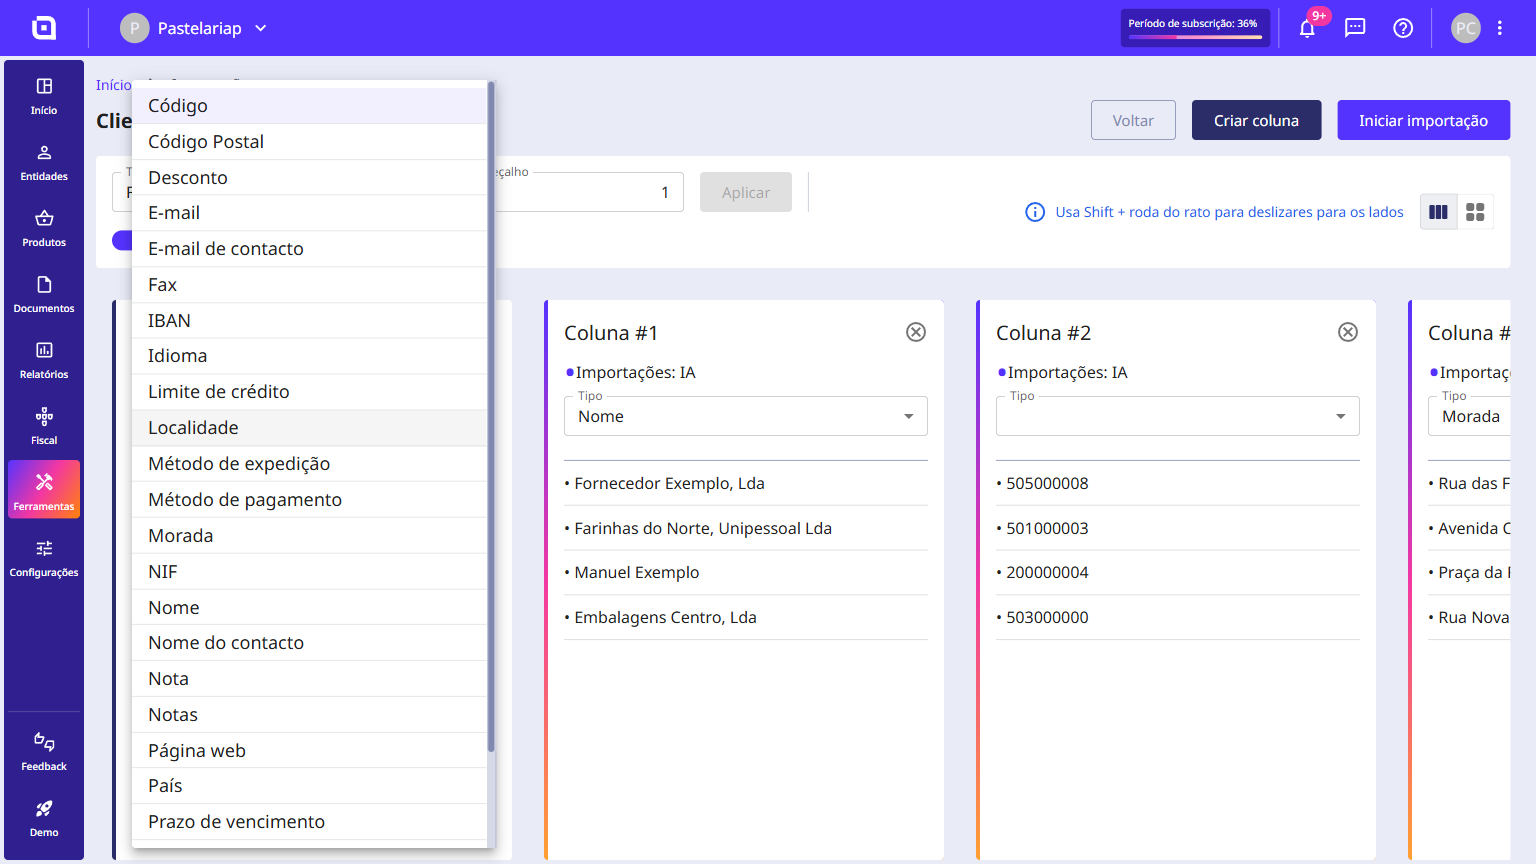
7. In each column, under the Type field, select the desired option. Moloni ON suggests a type for some of the columns based on the file header, so go through every column and confirm what is selected.
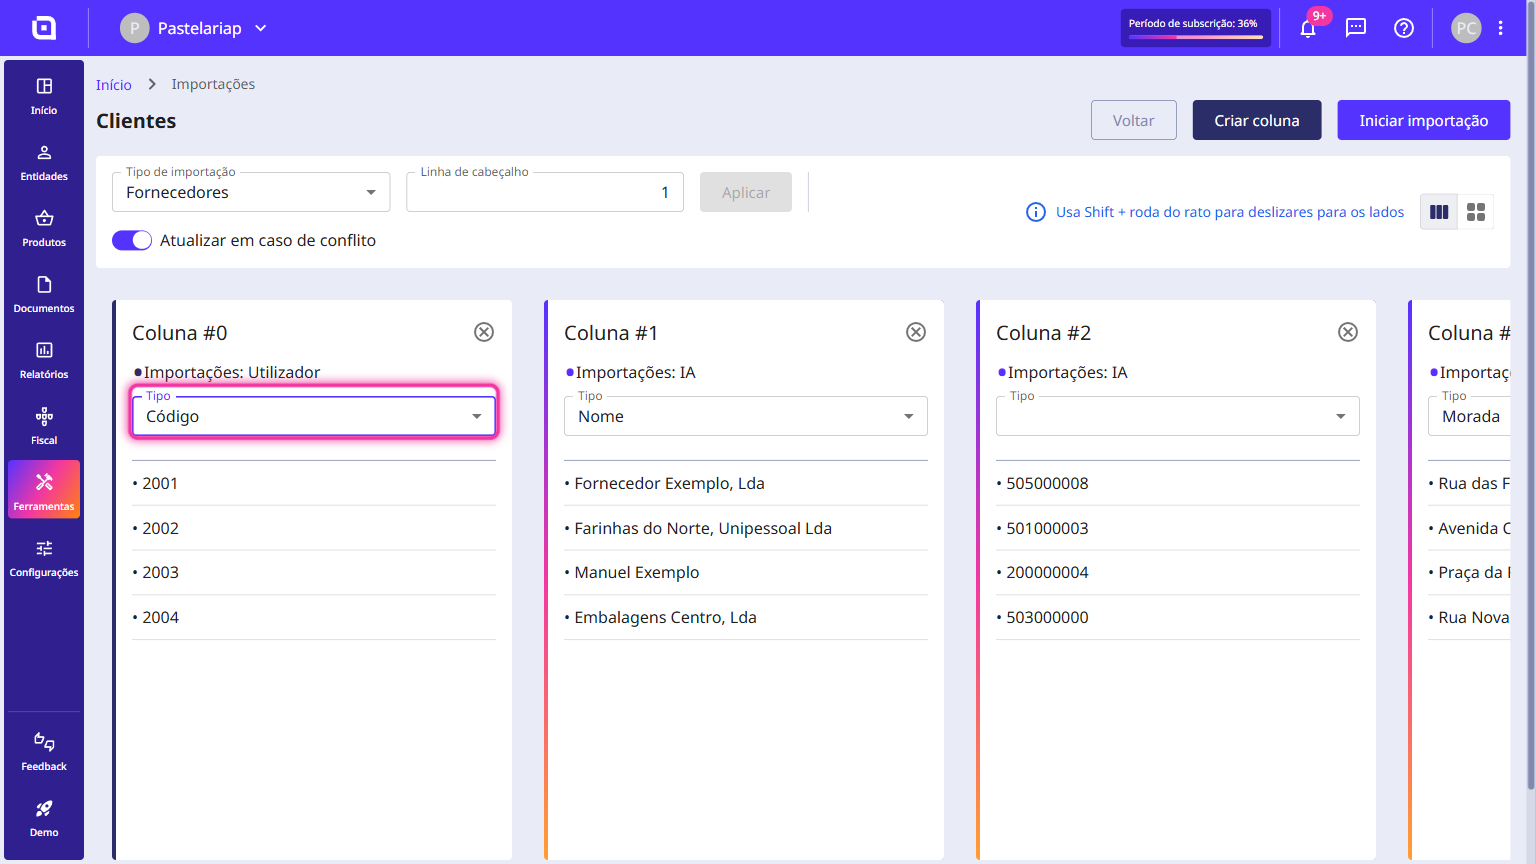
8. The list shows every detail you can import for a supplier - from the Code and the VAT number to the IBAN, the Payment method or the Maturity date.
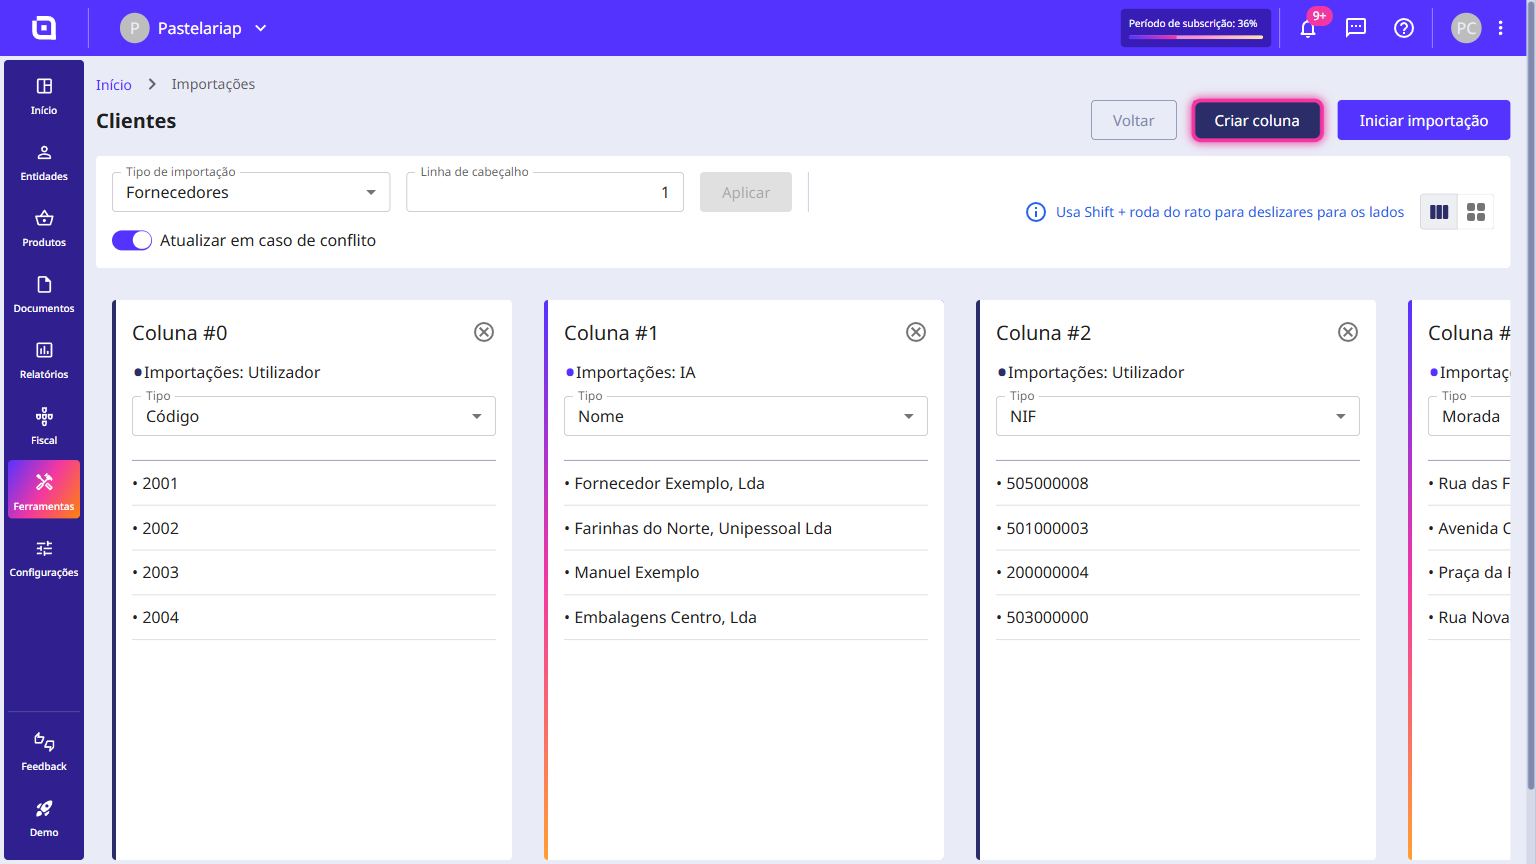
9. You can add new columns by clicking the Create column button.
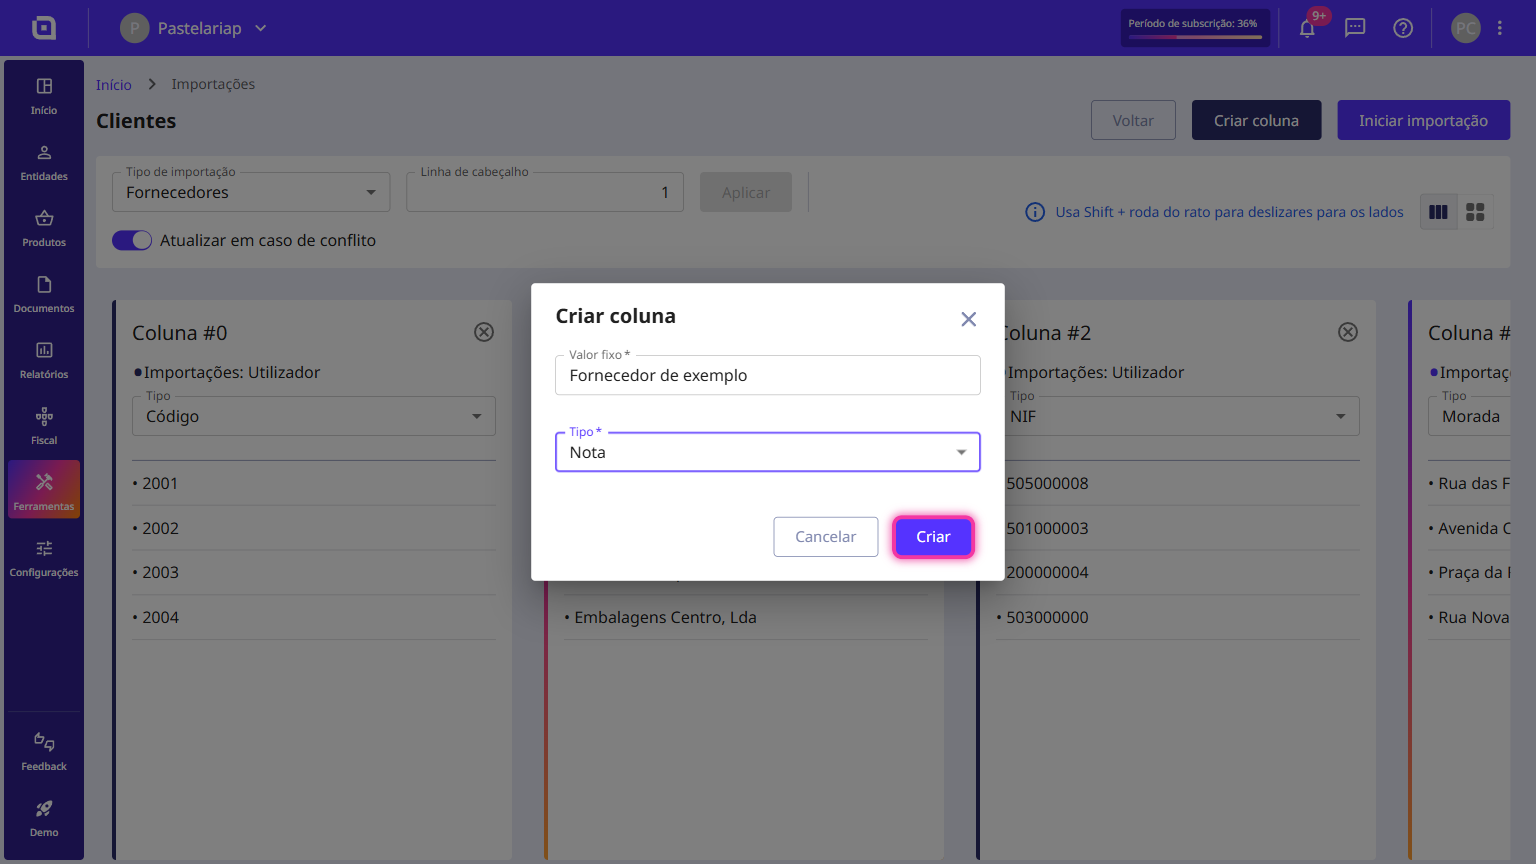
10. In the Fixed value field enter the text you want to apply to every row, choose the Type and click the Create button.
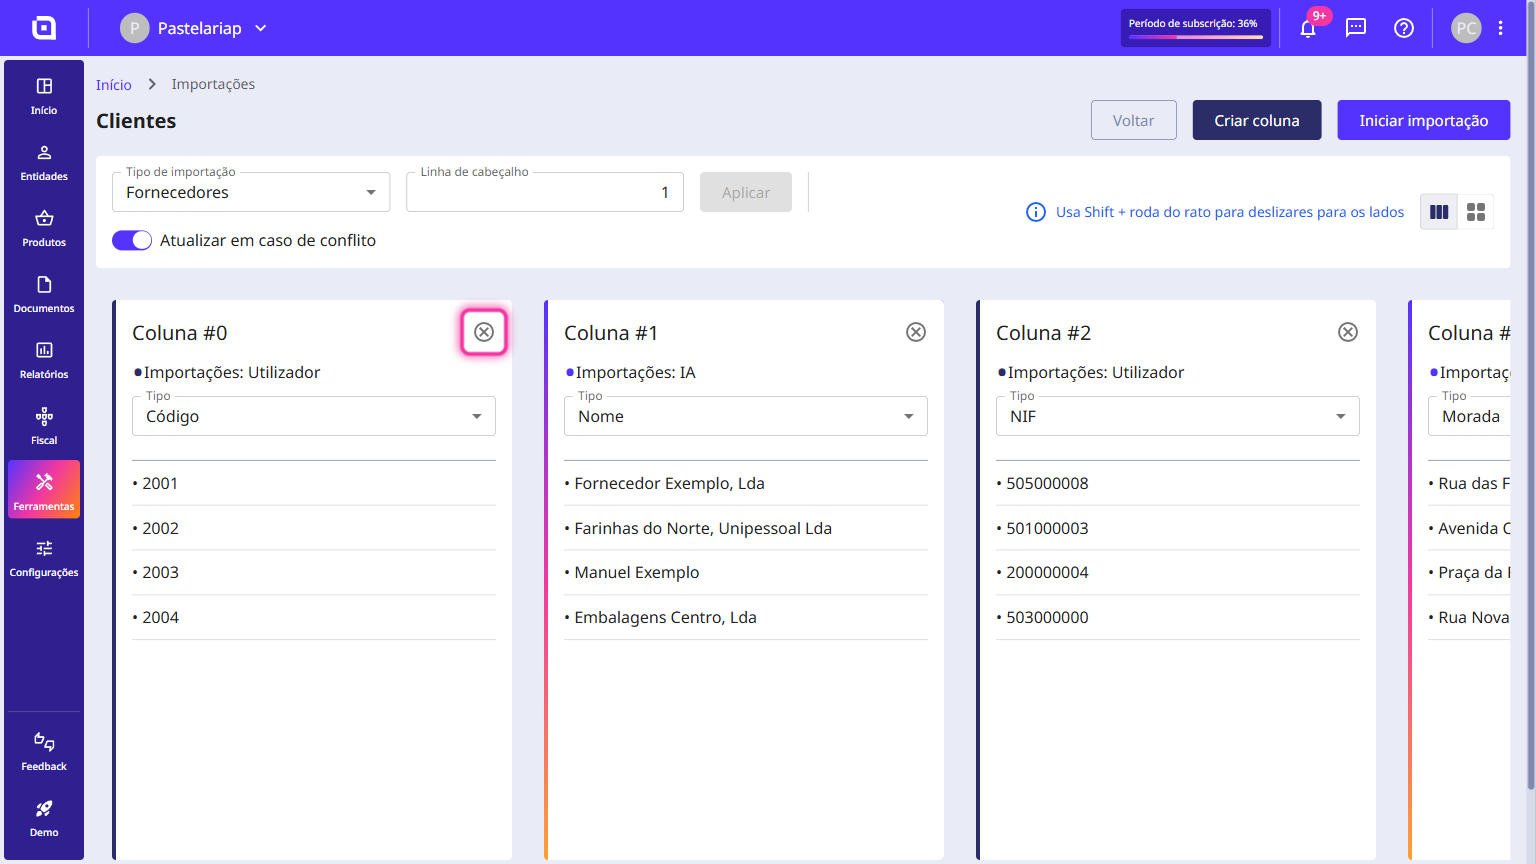
11. You can also delete the columns you do not wish to import, using the close icon on the column card.
12. Once the information is organised, click the Start import button to import the suppliers.
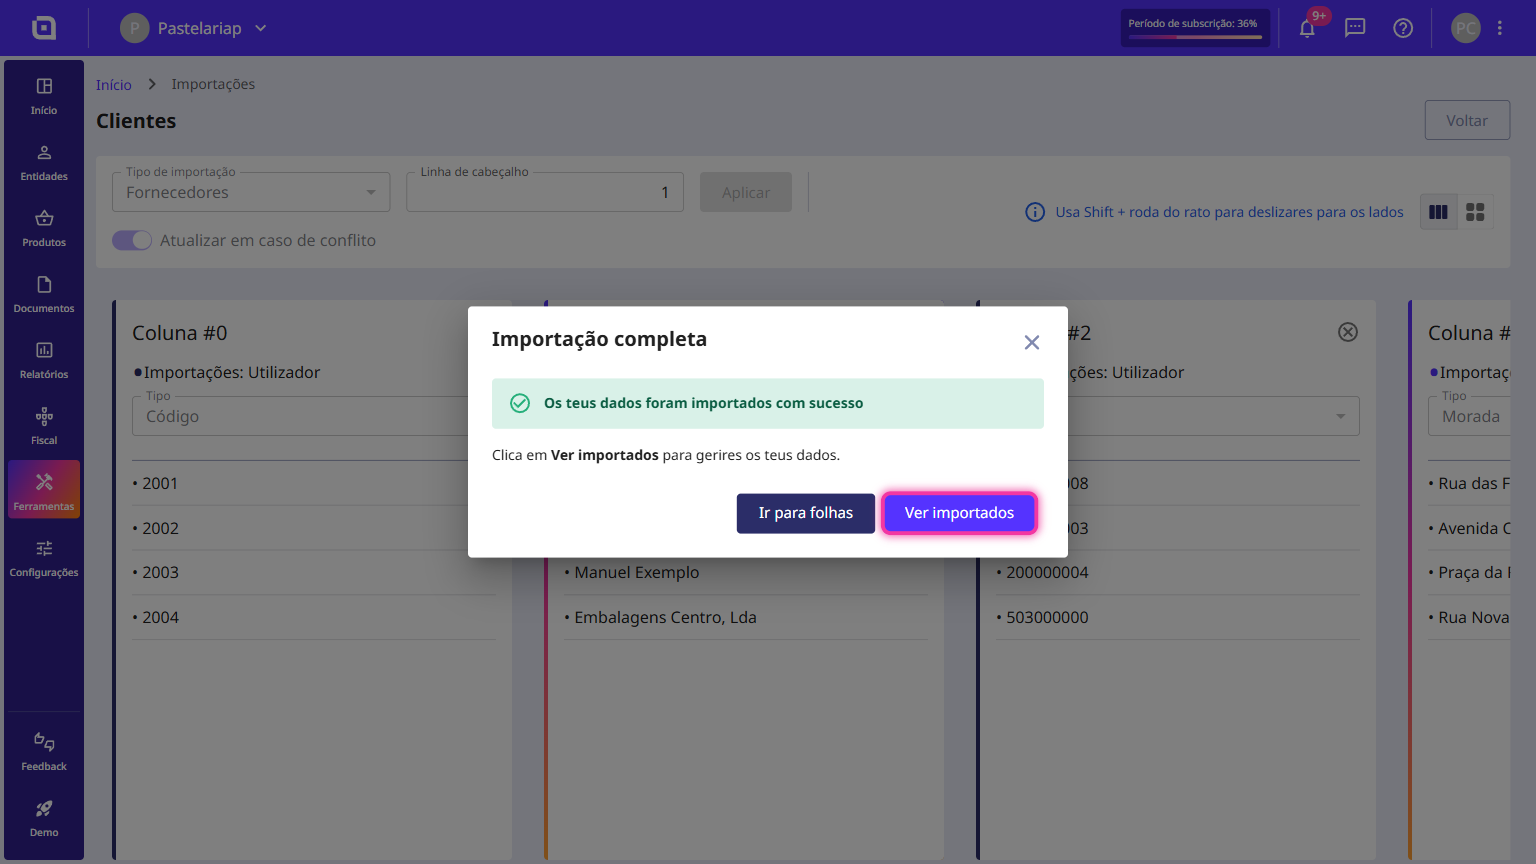
13. When the import finishes, click the View imported button.
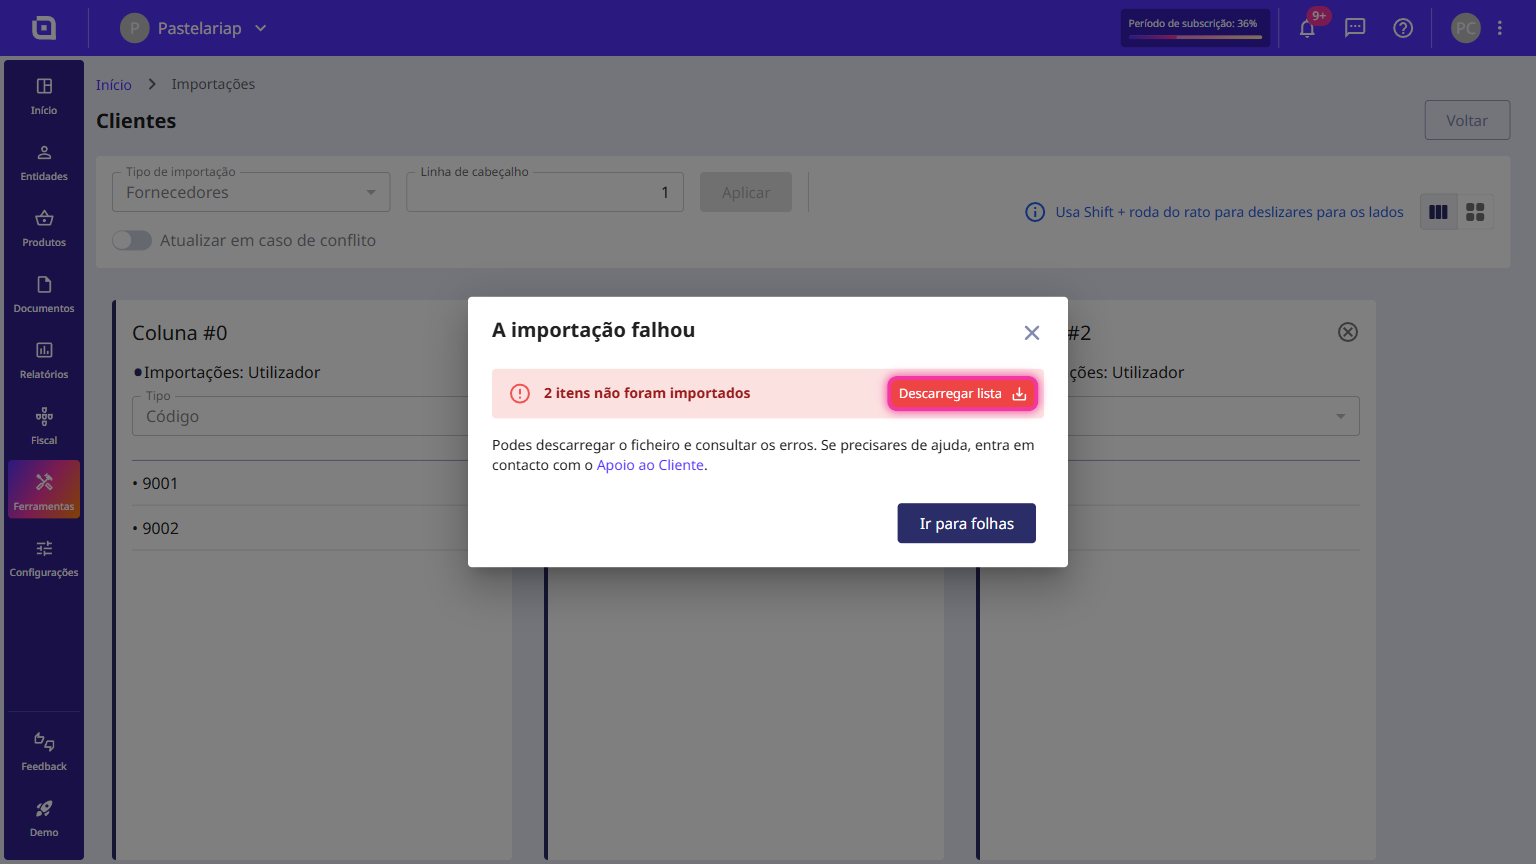
14. If the import shows errors and/or alerts, click the Download list button to check them. The file shows the rows that were left out and the reason for each one.
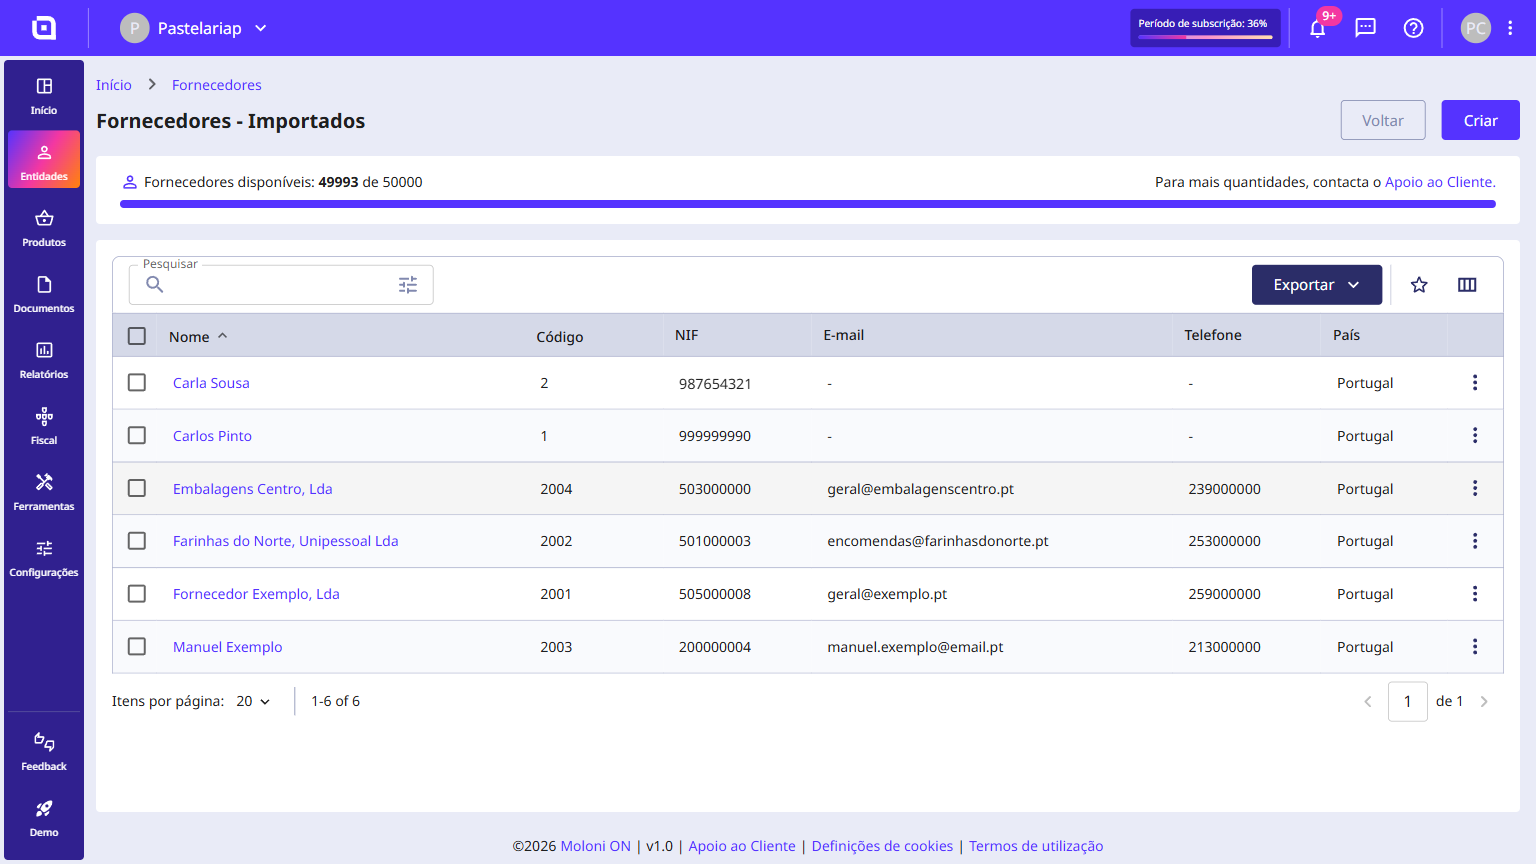
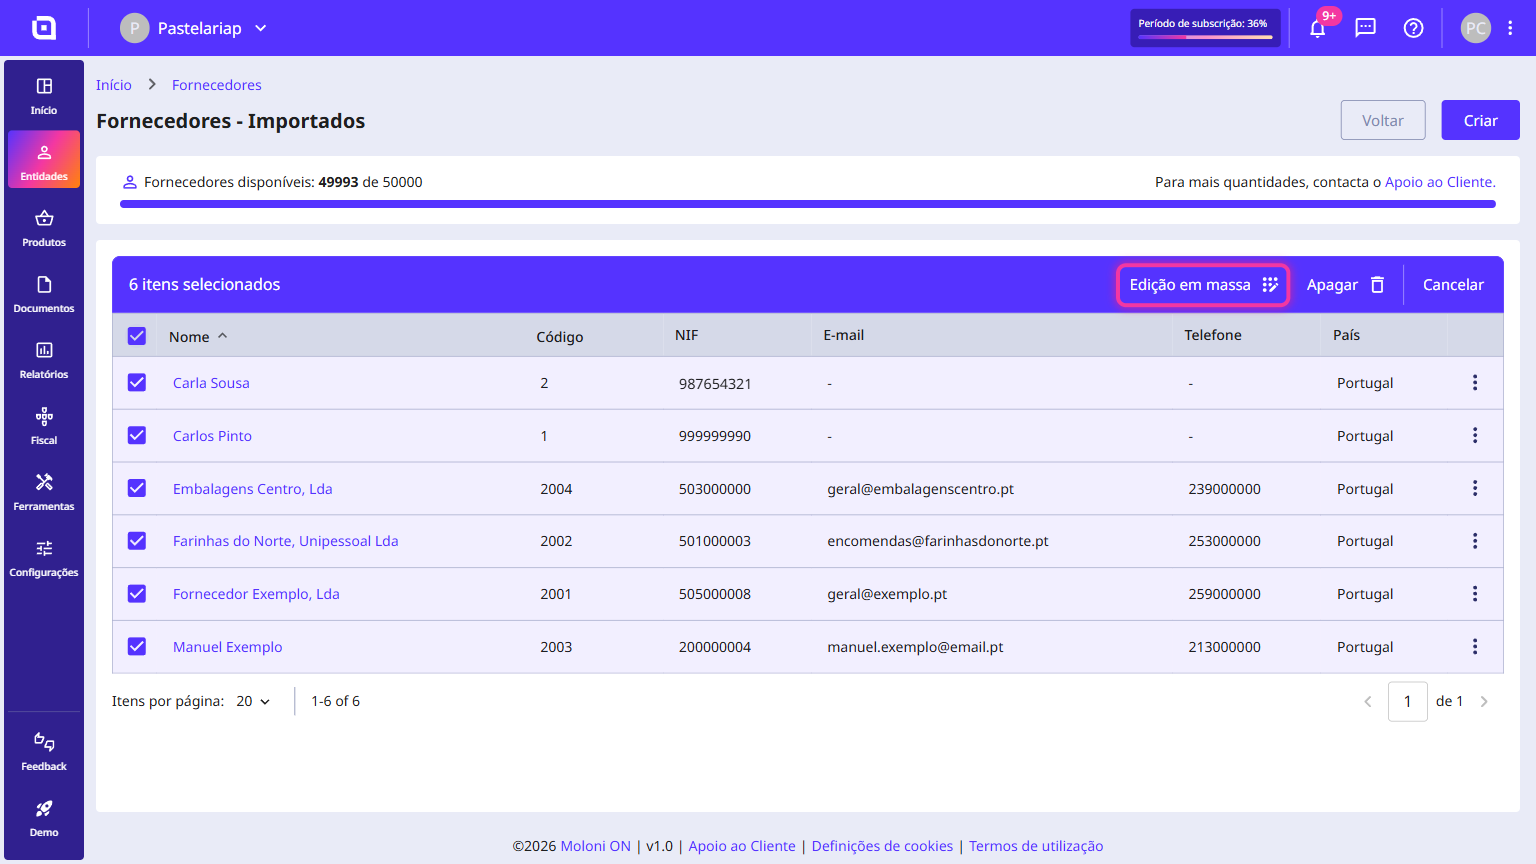
15. The Suppliers - Imported list shows everything that came in from this and from previous imports.
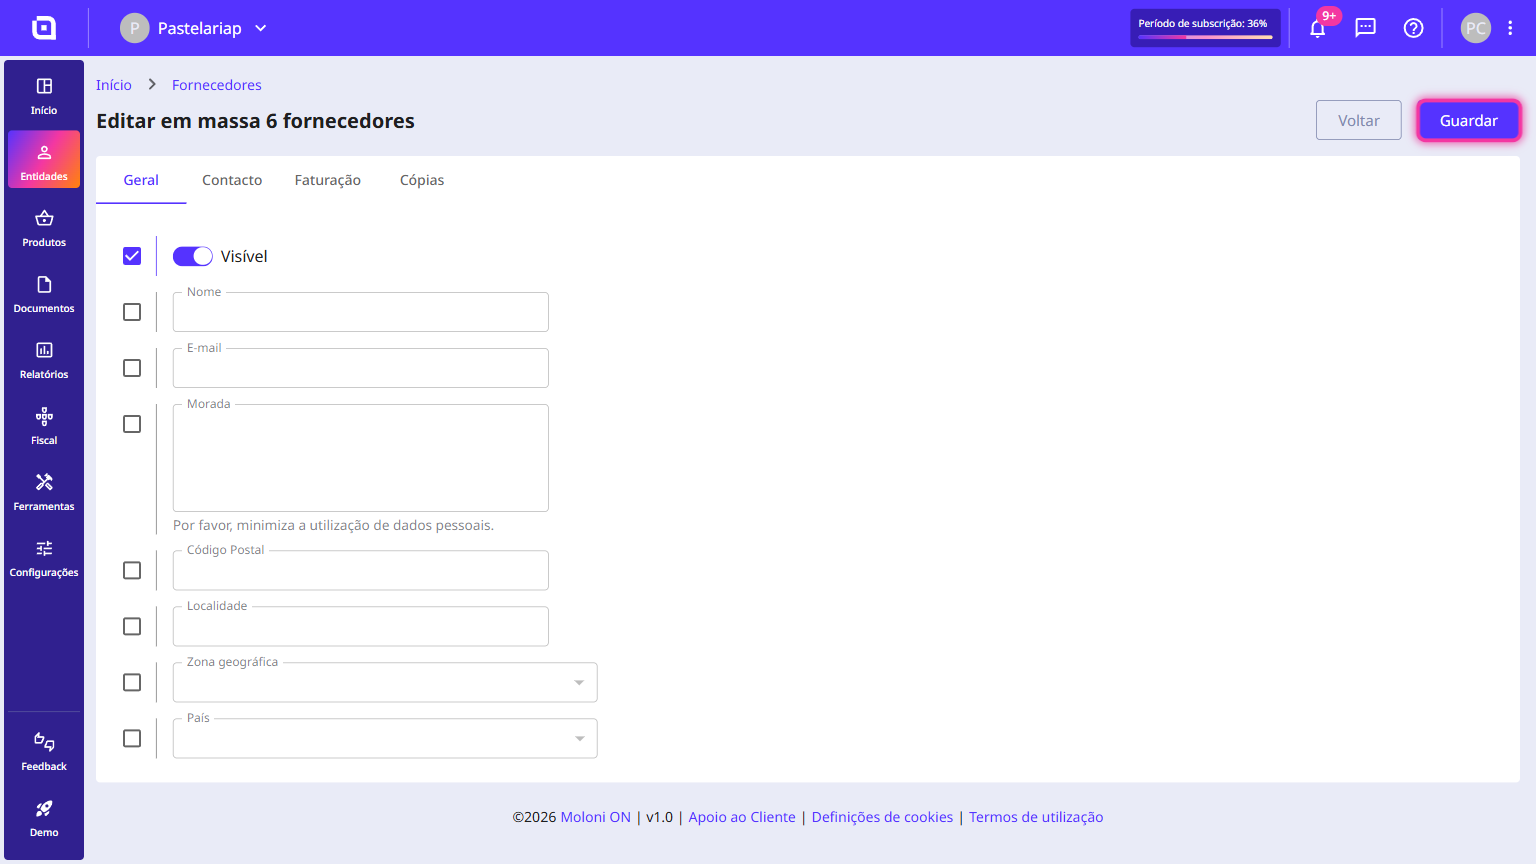
16. Select all the imported suppliers and click on Bulk edit. This feature allows you to update multiple data sets simultaneously.
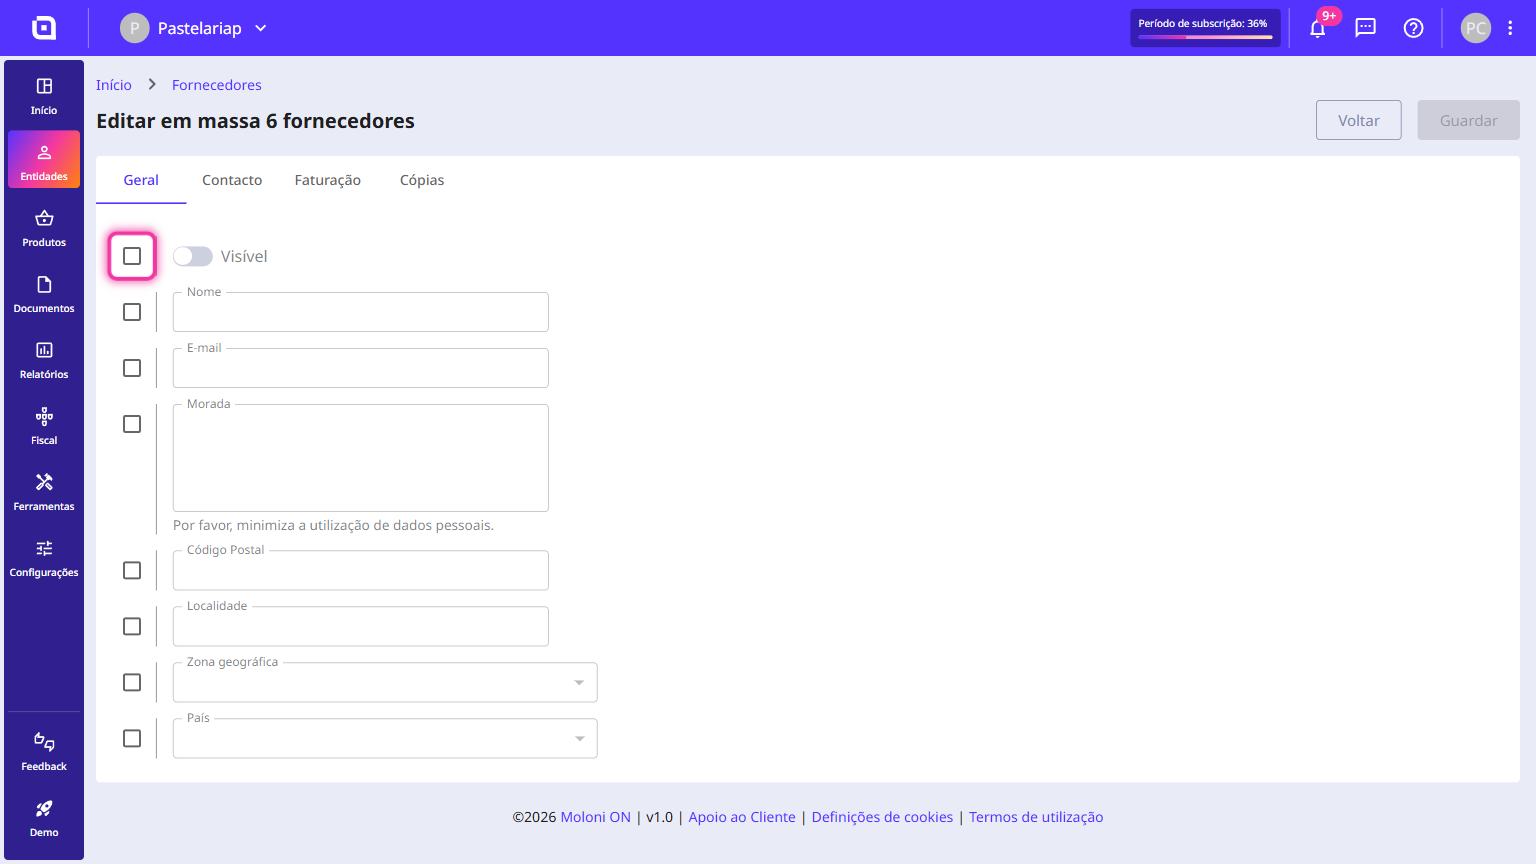
17. Enable the checkbox for the Visible option.
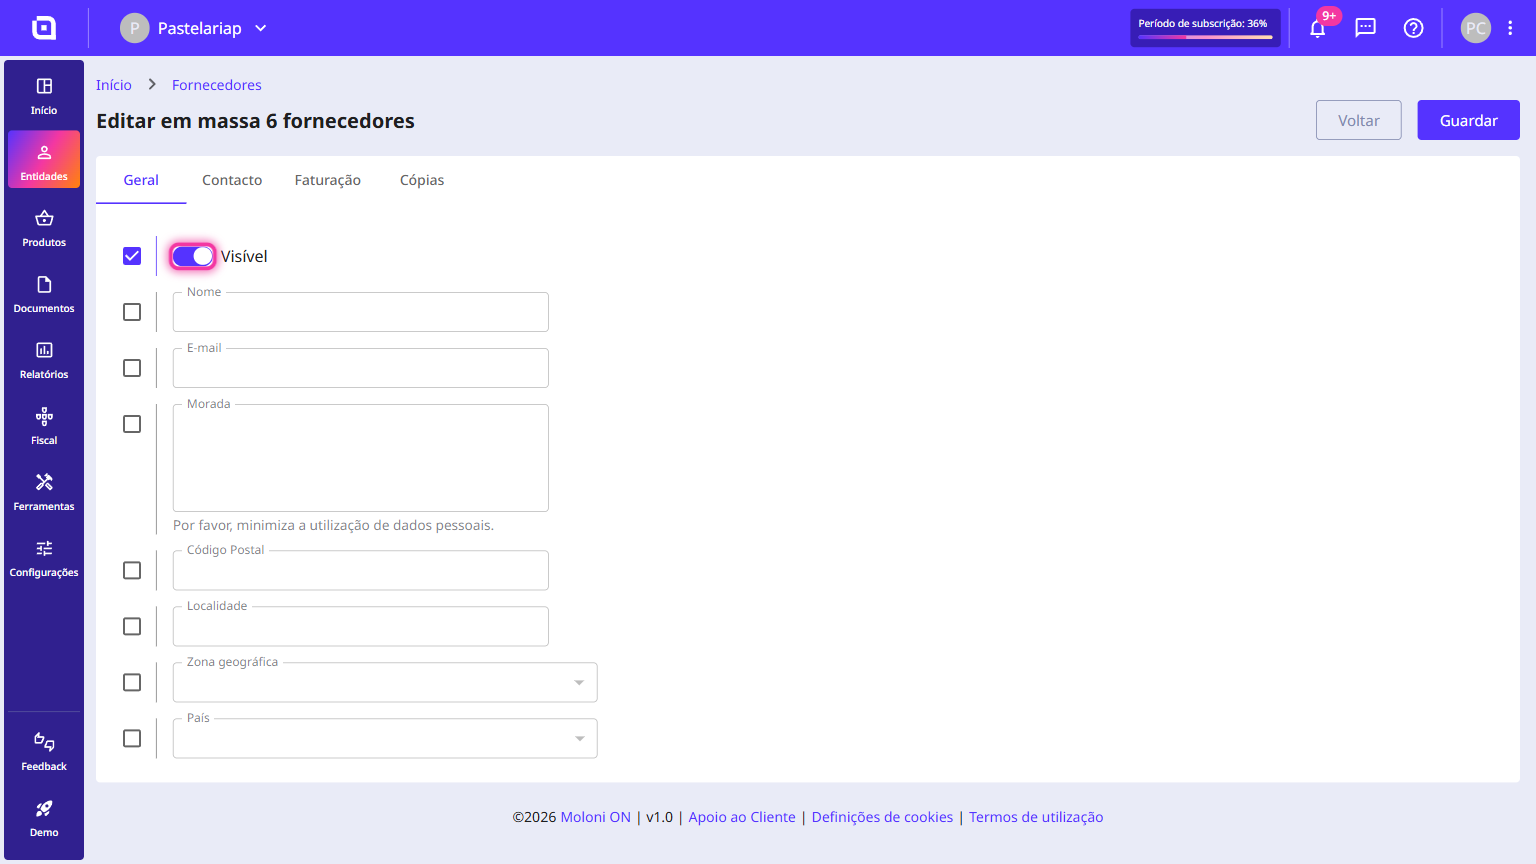
18. Enable the Visible option so that the suppliers appear in the list.
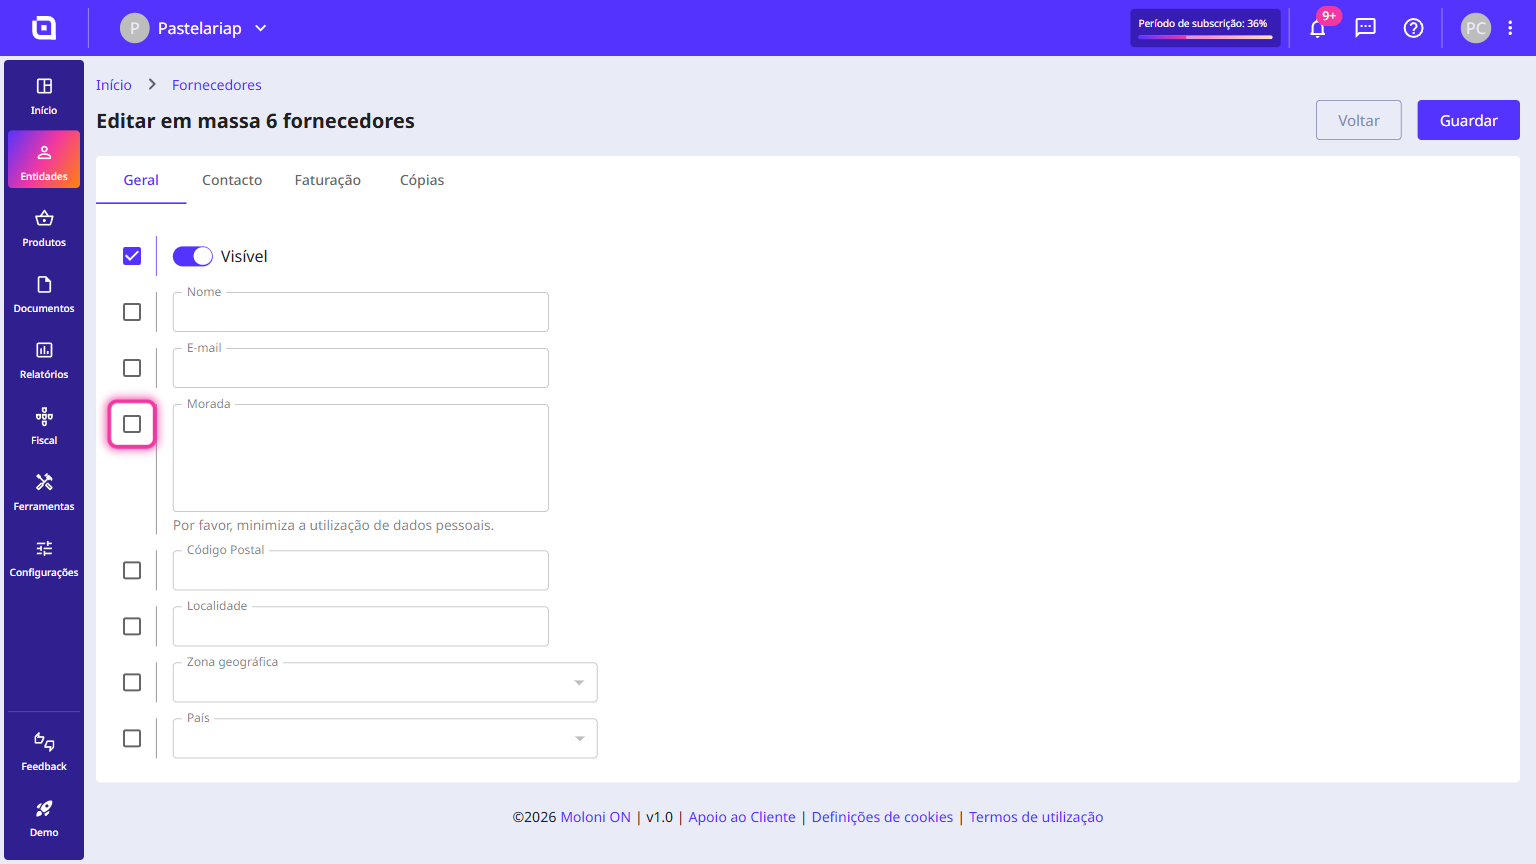
19. To update other data simultaneously (e.g. Address), enable the respective checkboxes to the left of each field and fill in the required information.
20. Confirm and click Save.
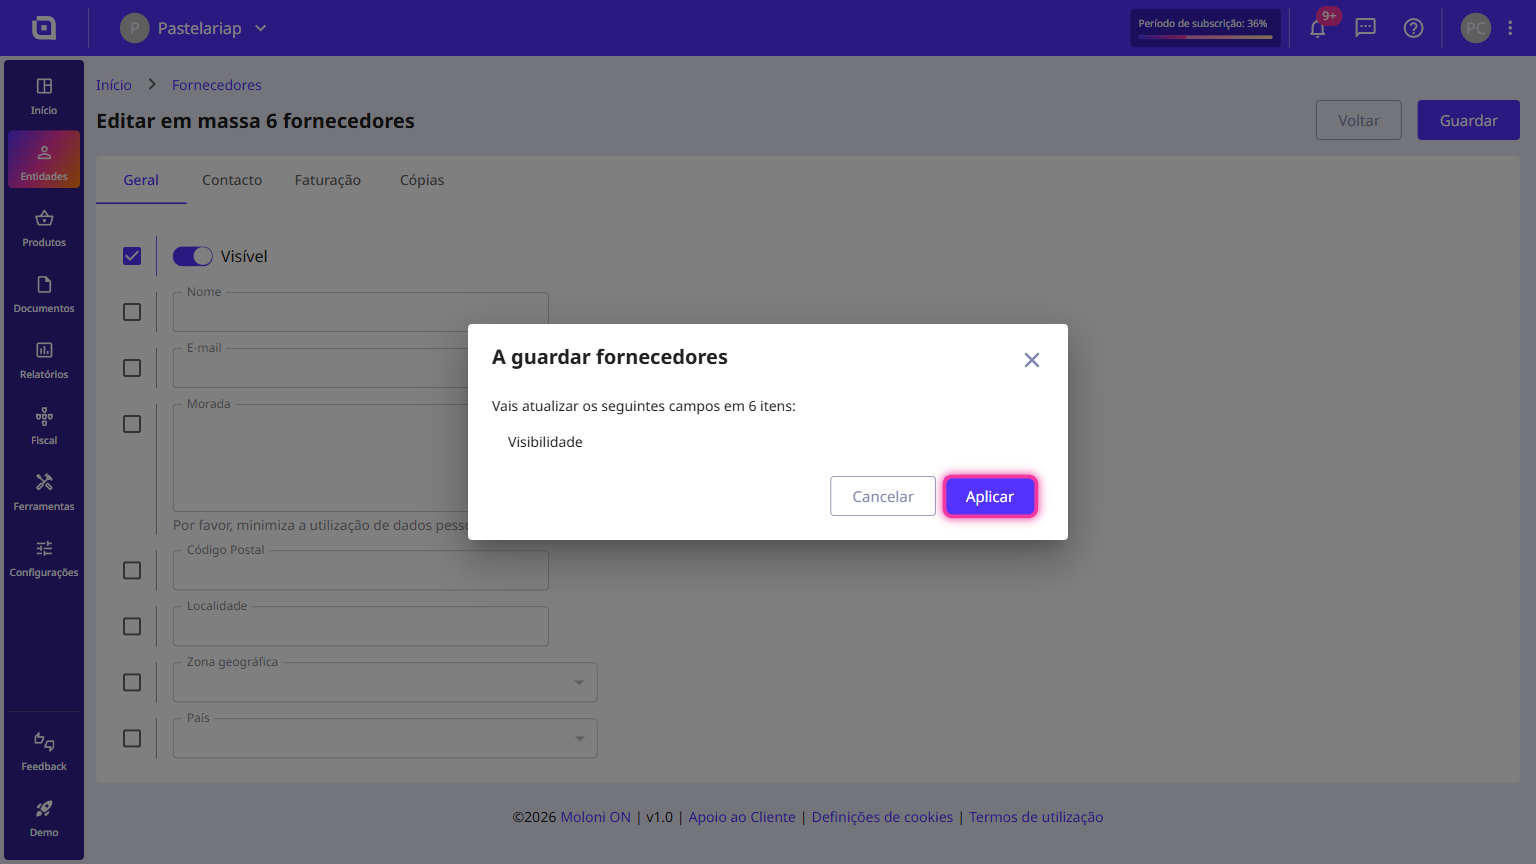
21. Moloni ON shows you which fields will be changed and in how many suppliers. Click the Apply button.
22. Once the processing is done, click the Finish button.
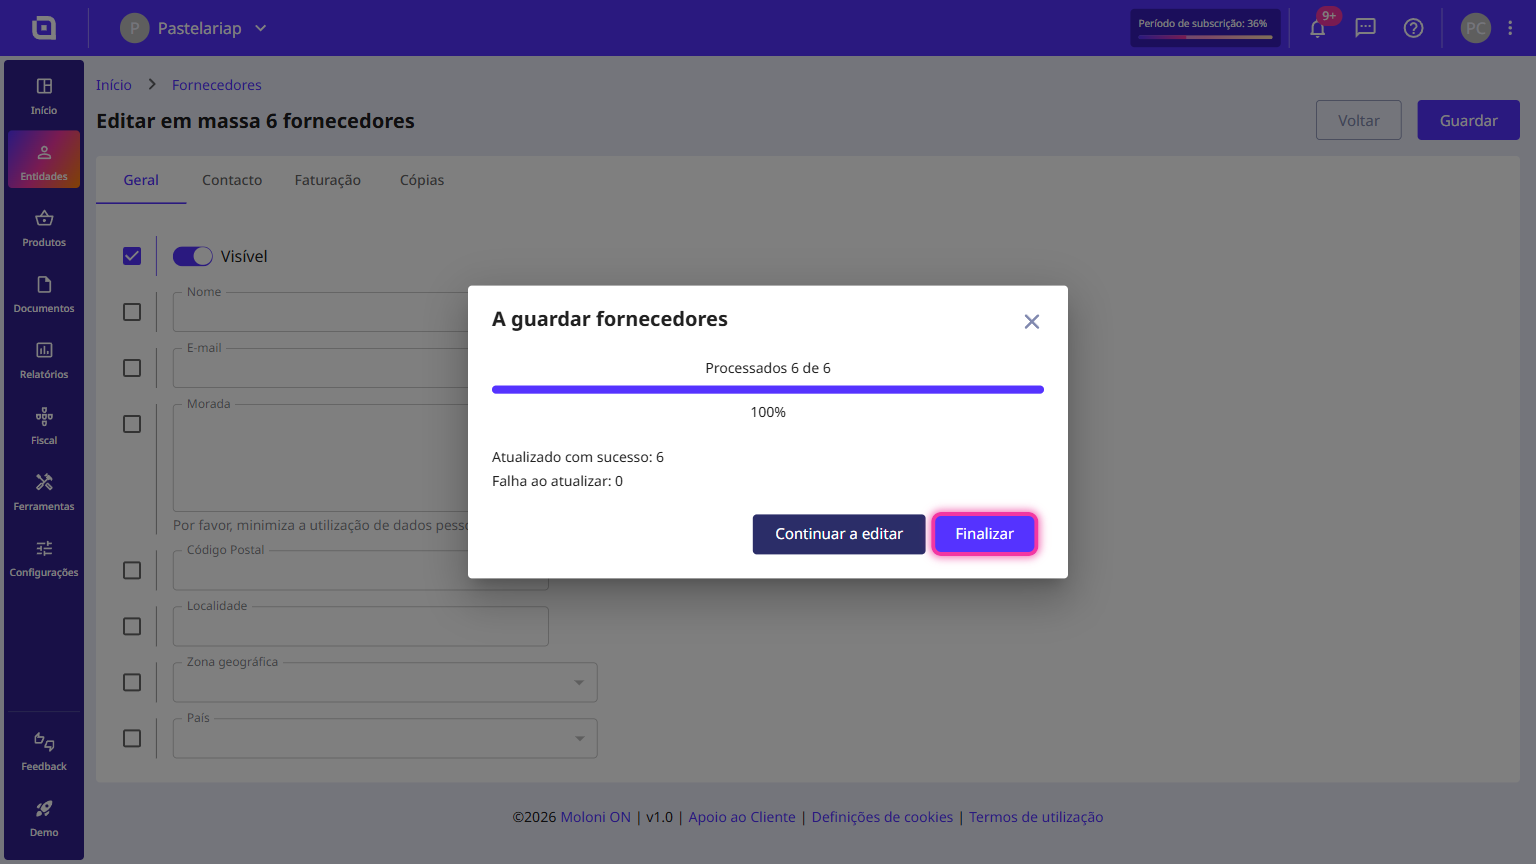
Import complete! Your suppliers are updated and ready to be used in your documents.