How to import products from an XLS or CSV file
Which columns can I import?
- Name*
- Category*
- Price*
- Price with taxes*
- Reference*
- Summary
- Type (product or service)*
- Unit of measurement*
- Stock inventory
- Tax value
- Stock
- Minimum Stock
- Has stock (Integer - 0 or 1) - 1 yes, 0 no
- Exemption reason
- Supplier - code
- Supplier - TRN
- Supplier - Cost price (excluding VAT)
- Supplier - Internal reference
- Price lists - name
- Price lists - value (excluding VAT)
- Tax - name*
- Tax - percentage*
- Tax - exemption reason*
- Warehouse - code
- Warehouse - name
- Warehouse - minimum stock
- Warehouse - stock
- Variants - within these, you can import the corresponding warehouse and stock, provided they are created beforehand so they can be imported.
- Variants - price lists - name
- Variants - price lists - value
Fields marked with * are mandatory.
Important note:
-
The last three points focus on taxes. In Tax - name, if it has already been created in Moloni ON, you must enter the exact same name in the column to avoid creating a duplicate tax.
-
If you include a single column with Tax - percentage, having a name associated with it will create a new tax which, after completing the import, must be accepted to make the products visible.
-
When importing the warehouse, the import is guided by the warehouse code, which may already be created in Moloni ON. In the absence of a code, it will be guided by the warehouse name.
Follow these steps:
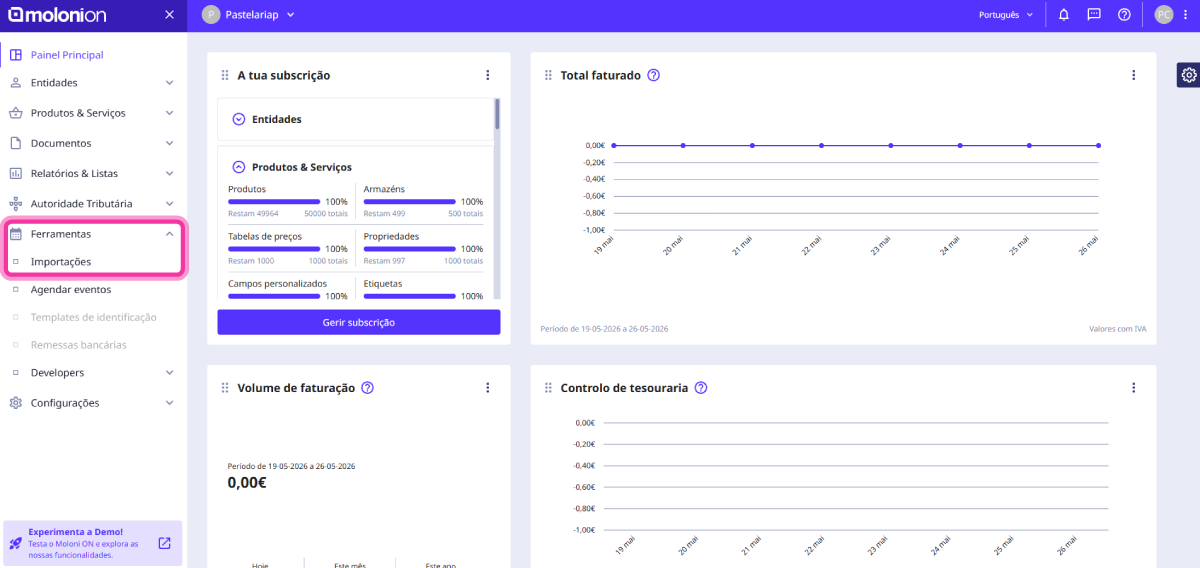
1. In the Client Area, in the top left corner, go to the Tools menu and click on Imports.
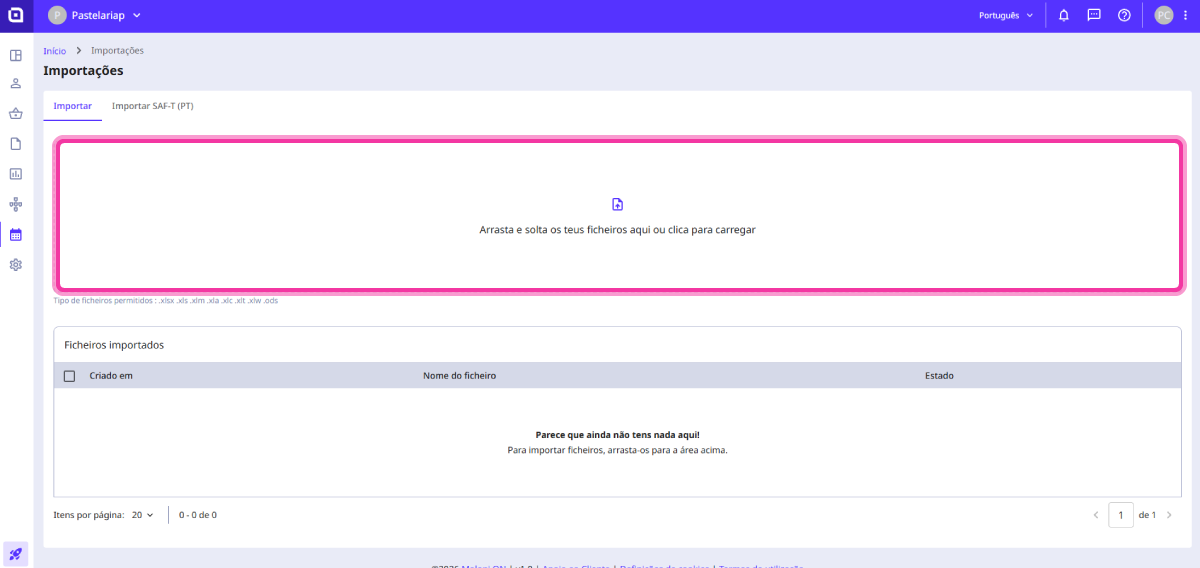
2. By default, the Import tab is selected. Drag the desired file to the import area located in the centre of the page.
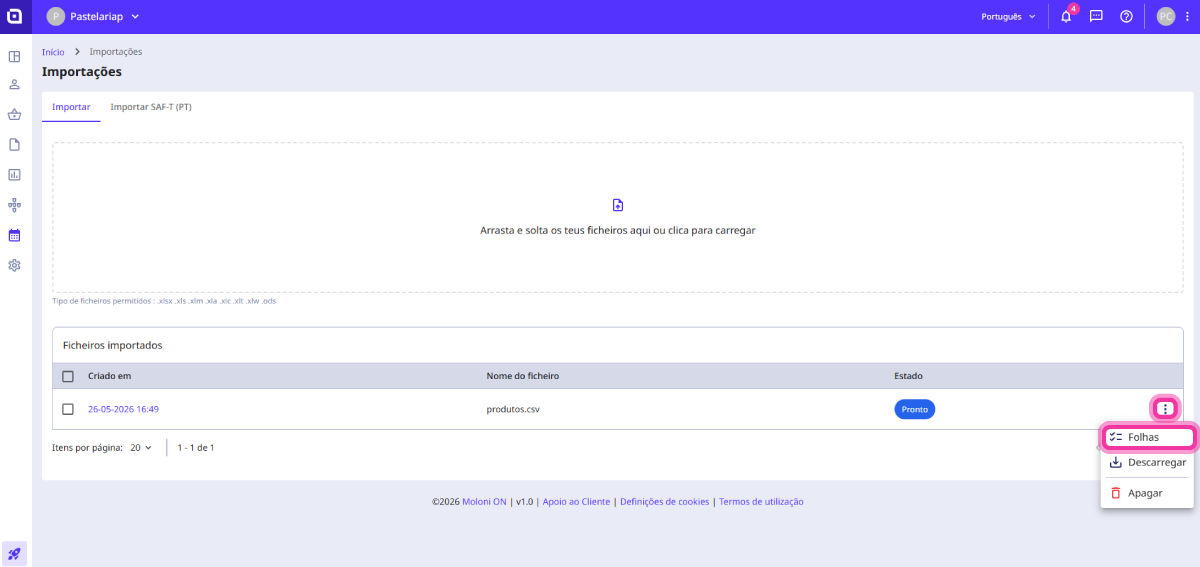
3. Moloni ON will inform you via notifications when the file is ready. Click on the 3-dot menu and select the Sheets option.
4. Start organising: under Import type, select Products.
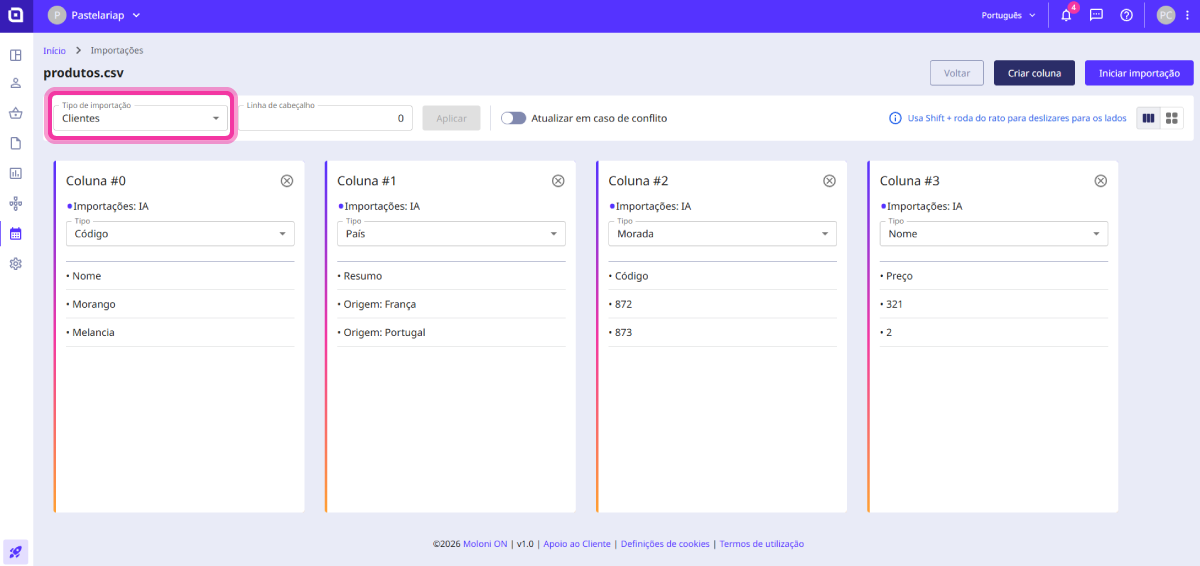
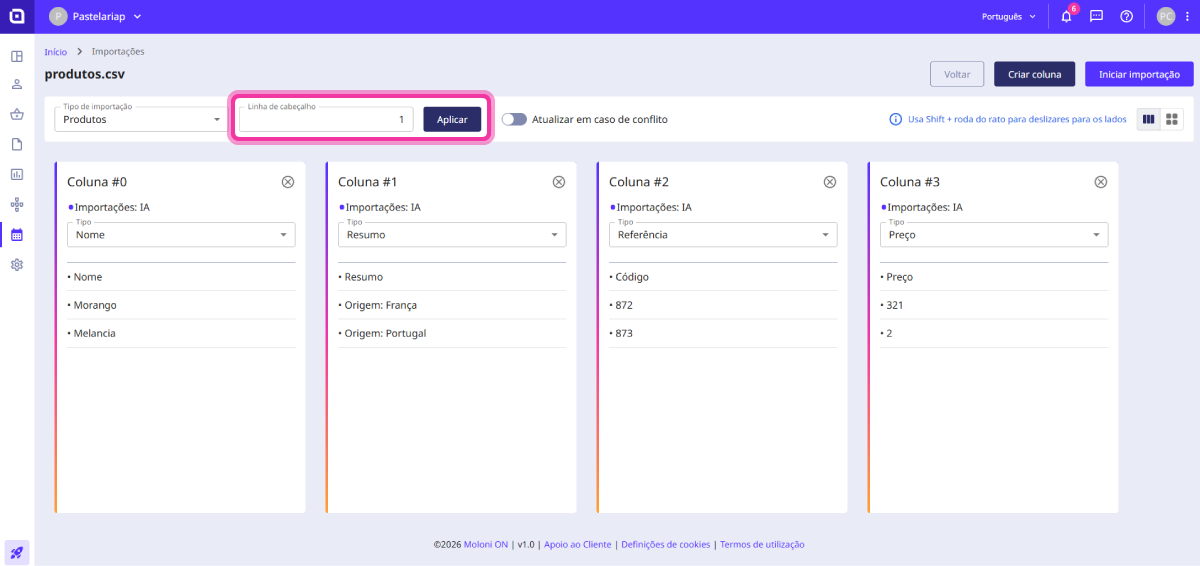
5. In the Header line field, select the row that corresponds to the file's header and click the Apply button.
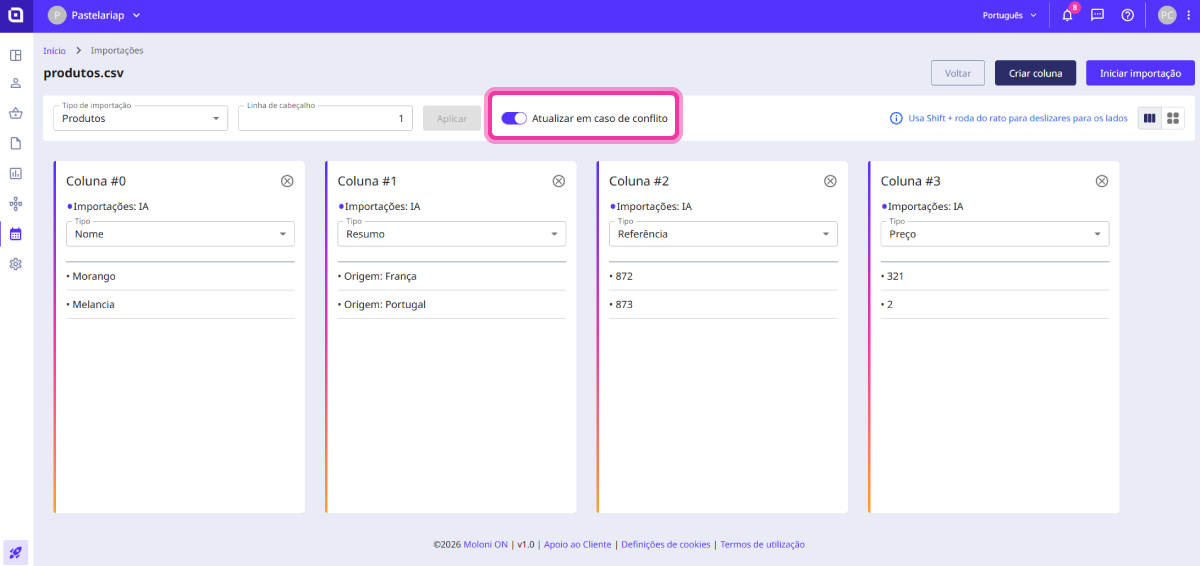
6. If you want to update existing information, enable the Update in case of conflict option.
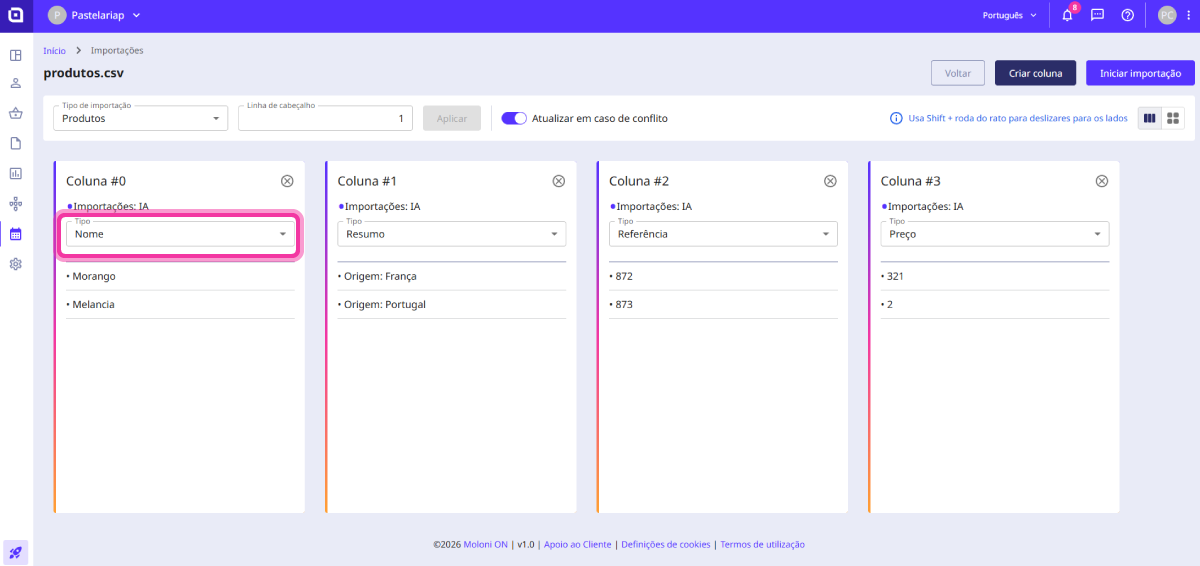
7. In each column under the Type field, select the desired option.
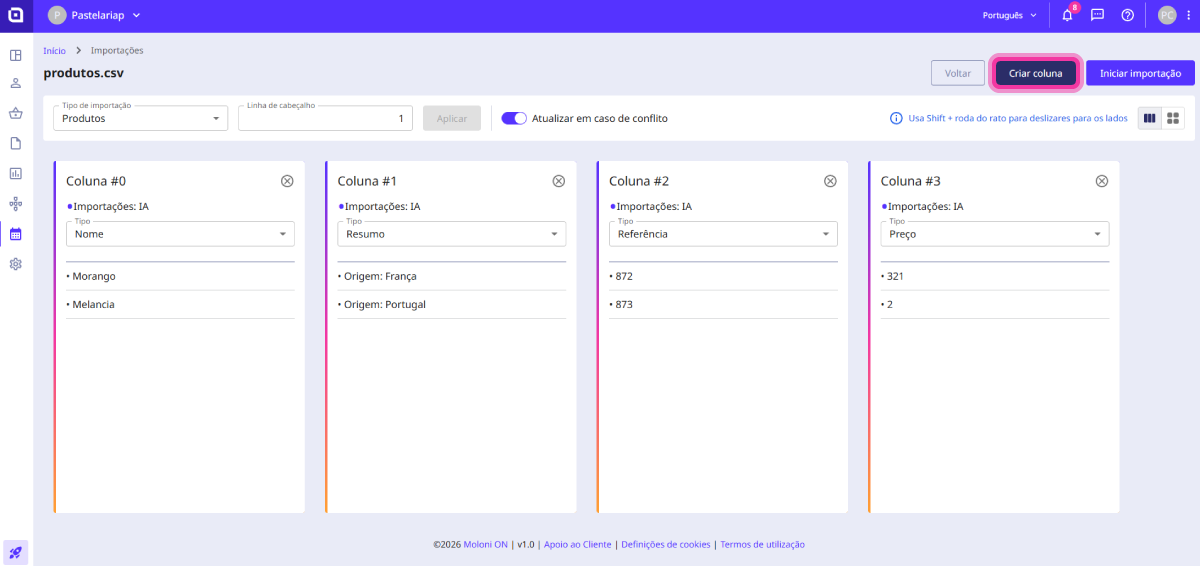
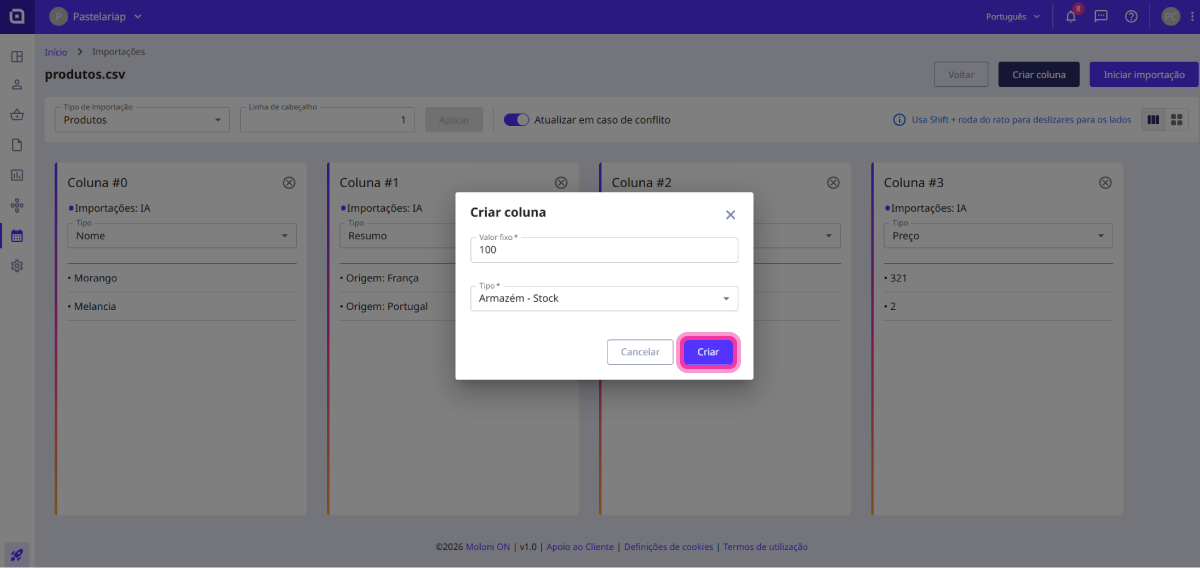
8. You can add new columns by clicking the Create column button.
In the Fixed value field, you can enter, for example, 100. Under Type, select the desired option and click the Create button.
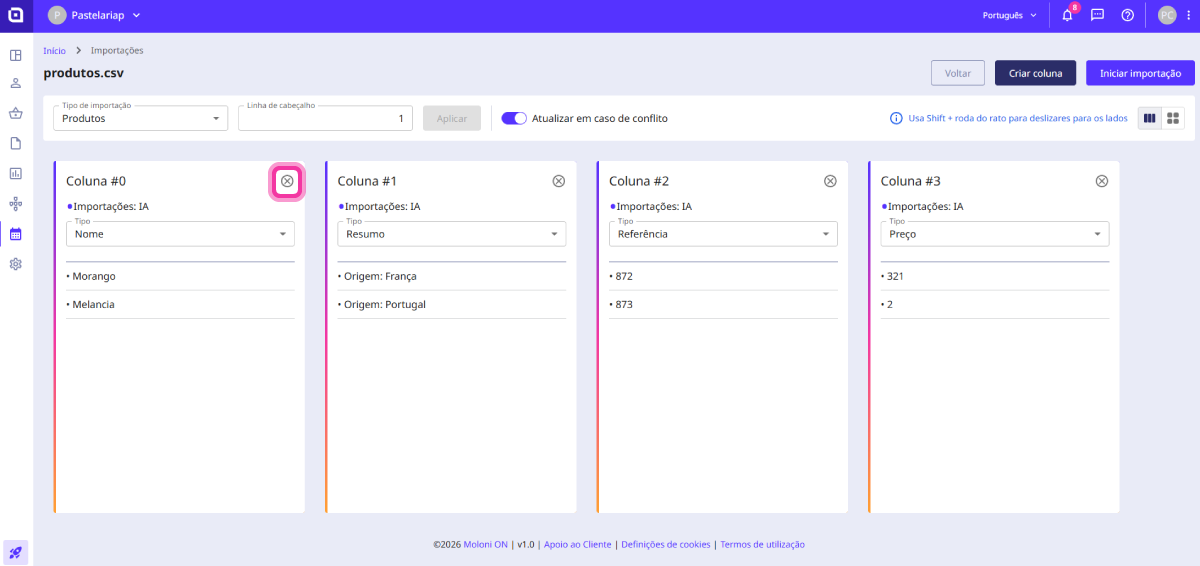
9. You can also remove columns you do not wish to import by clicking the Delete button.
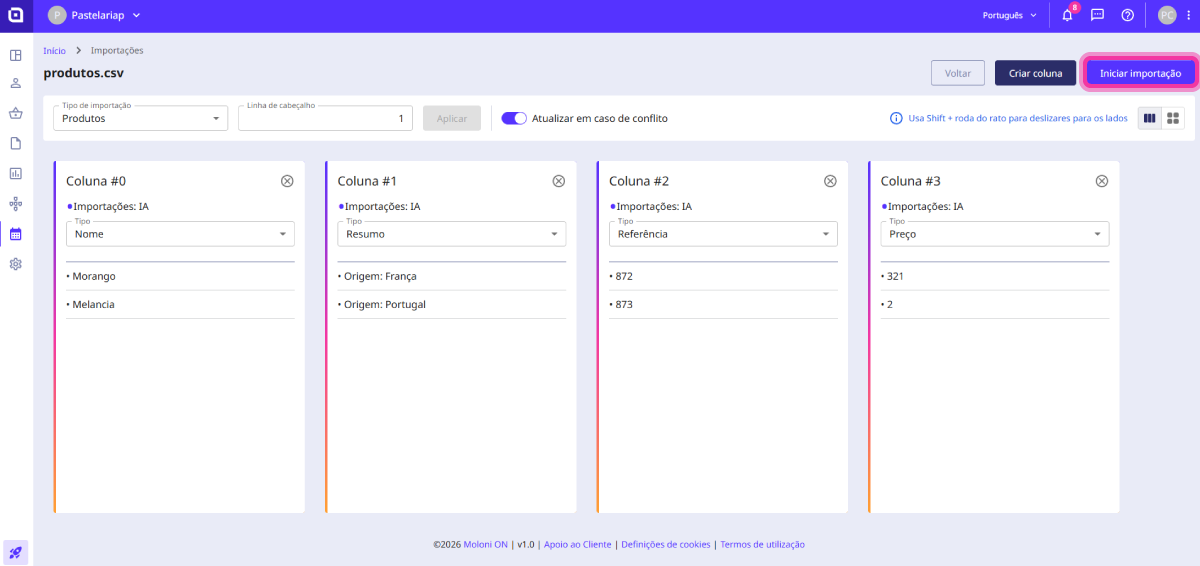
10. Once the information is organised, click the Start import button to import the products.
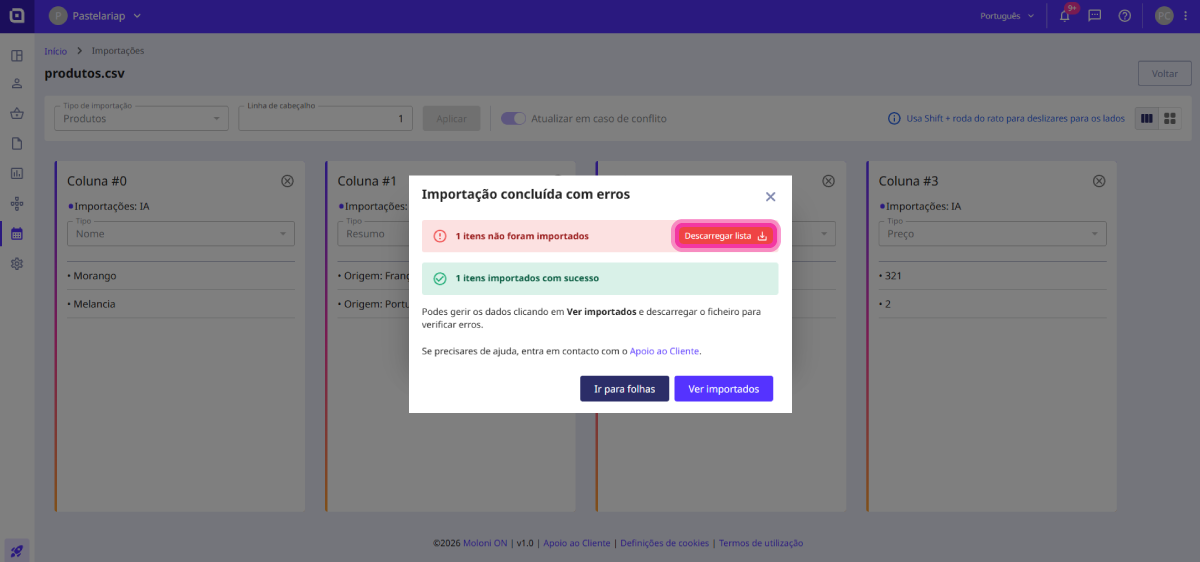
11. After the import, click the View imported button.
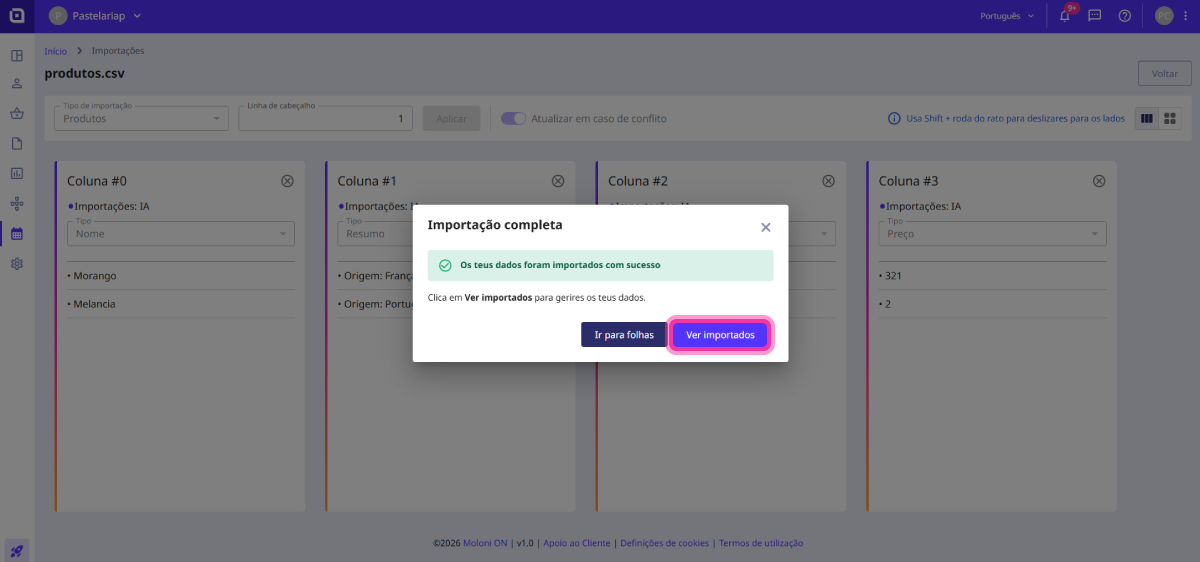
If the import contains errors and/or warnings, click the Download list button to review them.
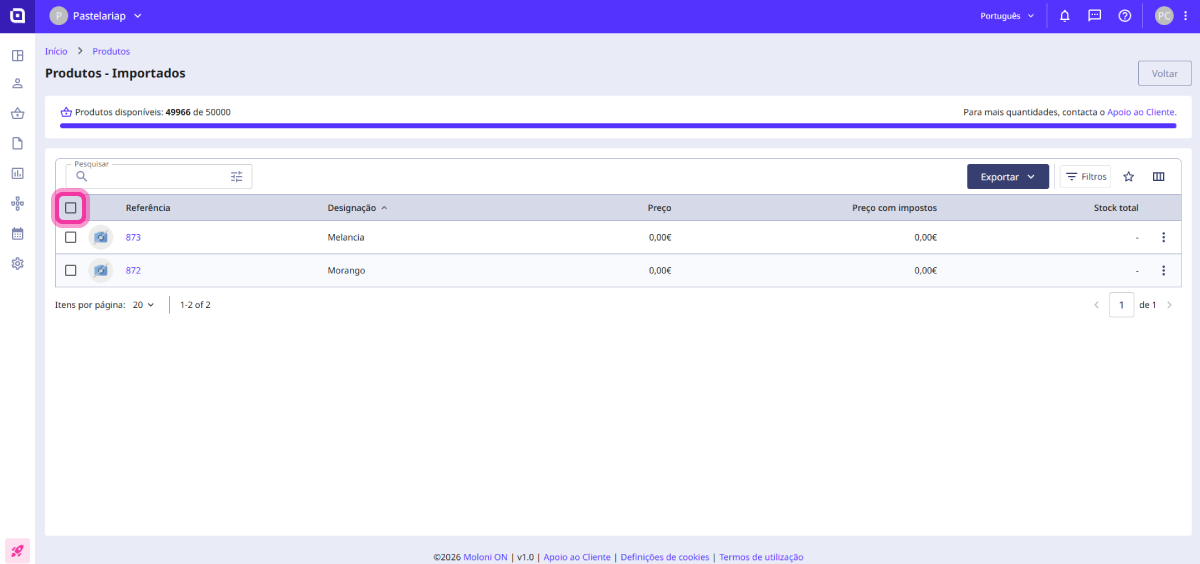
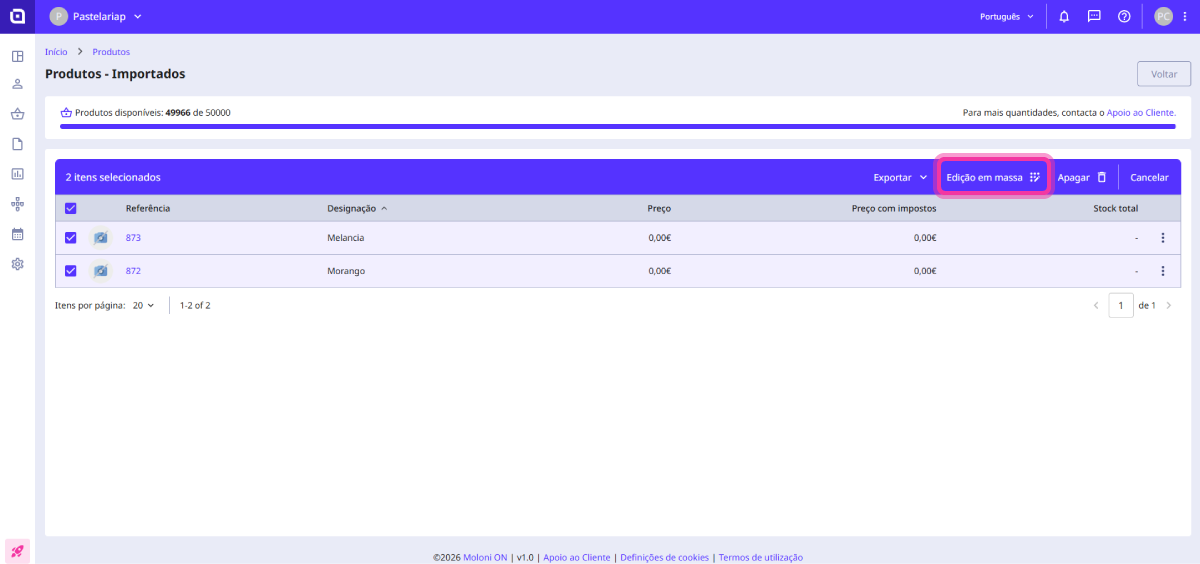
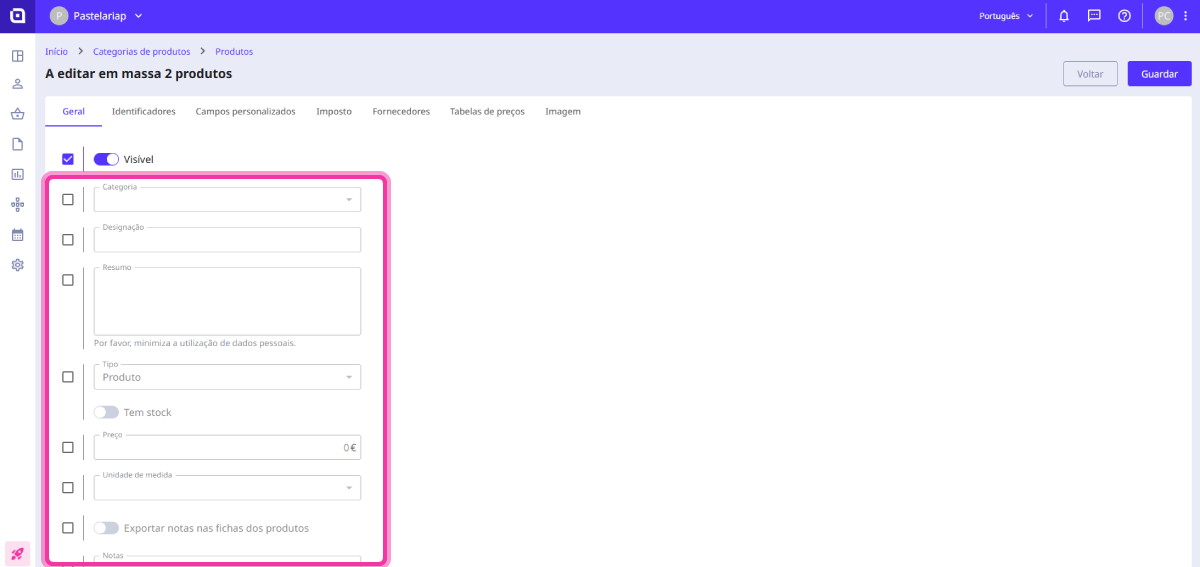
12. Select all imported products and click on Bulk edit. This feature allows you to update multiple pieces of data simultaneously.
13. Tick the checkbox for the Visible option.
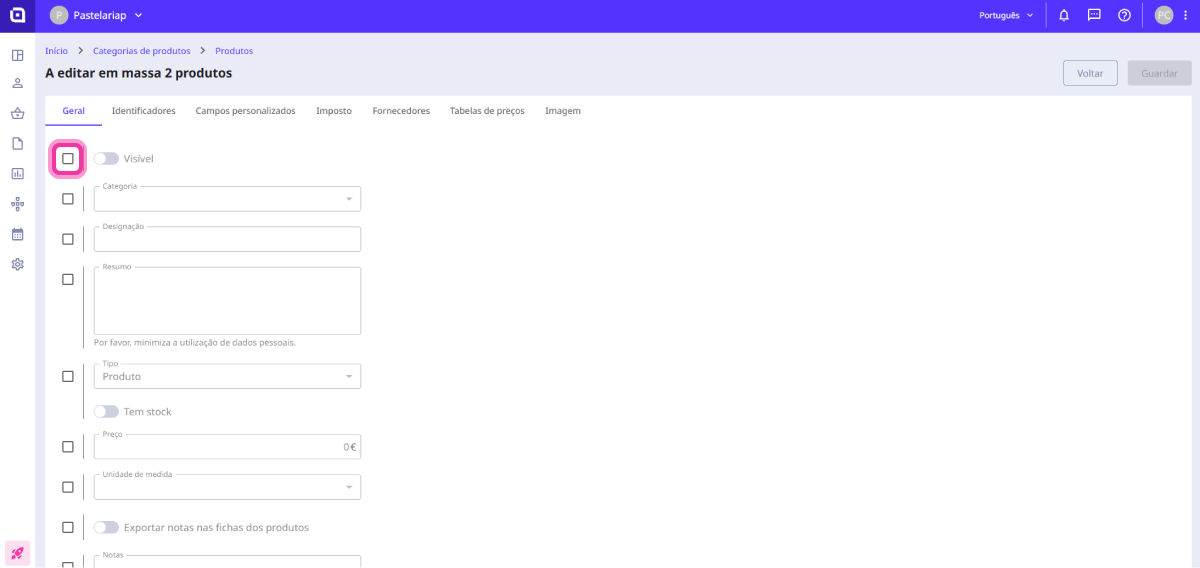
14. Enable the Visible option so that the products appear in the list.

15. To update other data simultaneously (e.g. Category), tick the respective checkboxes to the left of each field and fill in the desired information.
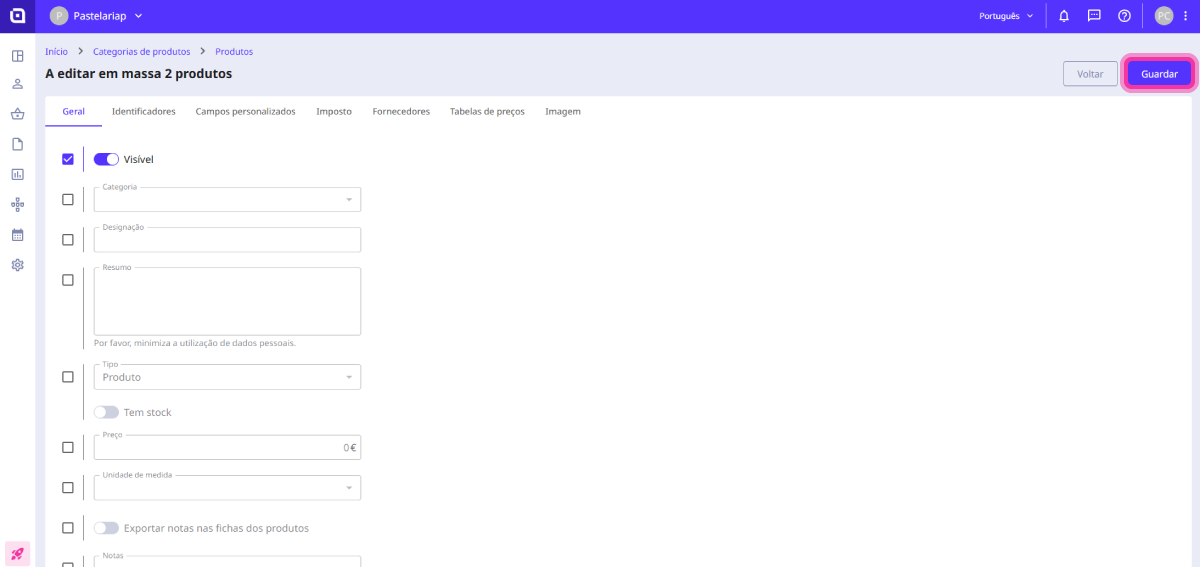
16. Confirm and click Save.
Import complete! Your products are updated and ready to be used in your documents.