How to Set Up easypay on Moloni ON
Integrating easypay with Moloni ON lets you automate and simplify the collection of your invoices and sales. By linking your easypay account to your invoicing software, you can offer your customers several payment methods and receive automatic, real-time notifications as soon as payments are made.
What is easypay and what is it used for?
easypay is a Portuguese payment institution, regulated by the Bank of Portugal, specialising in payment solutions and gateways for physical businesses, e-commerce, and invoicing platforms.
It is used to intermediate, process, and automate the collection of your sales or invoices quickly and securely. By integrating easypay with Moloni ON, you can offer your customers multiple payment methods.
Moloni ON offers three easypay gateways: easypay: PayByLink, easypay: Multibanco and easypay: Virtual IBAN. The steps below apply to all three gateways.
How do I activate easypay on Moloni ON?
Follow these steps:
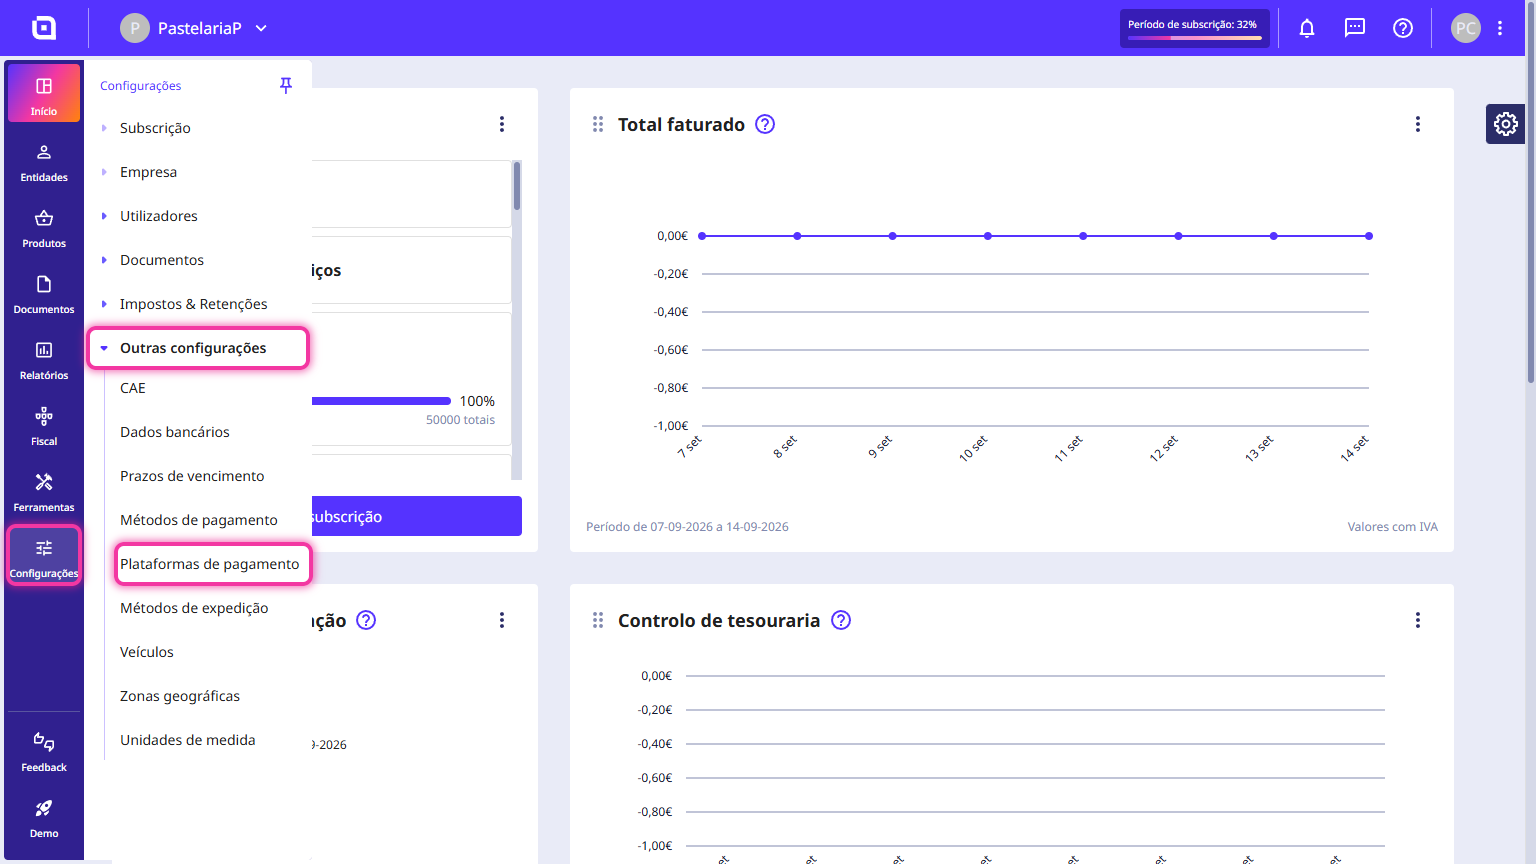
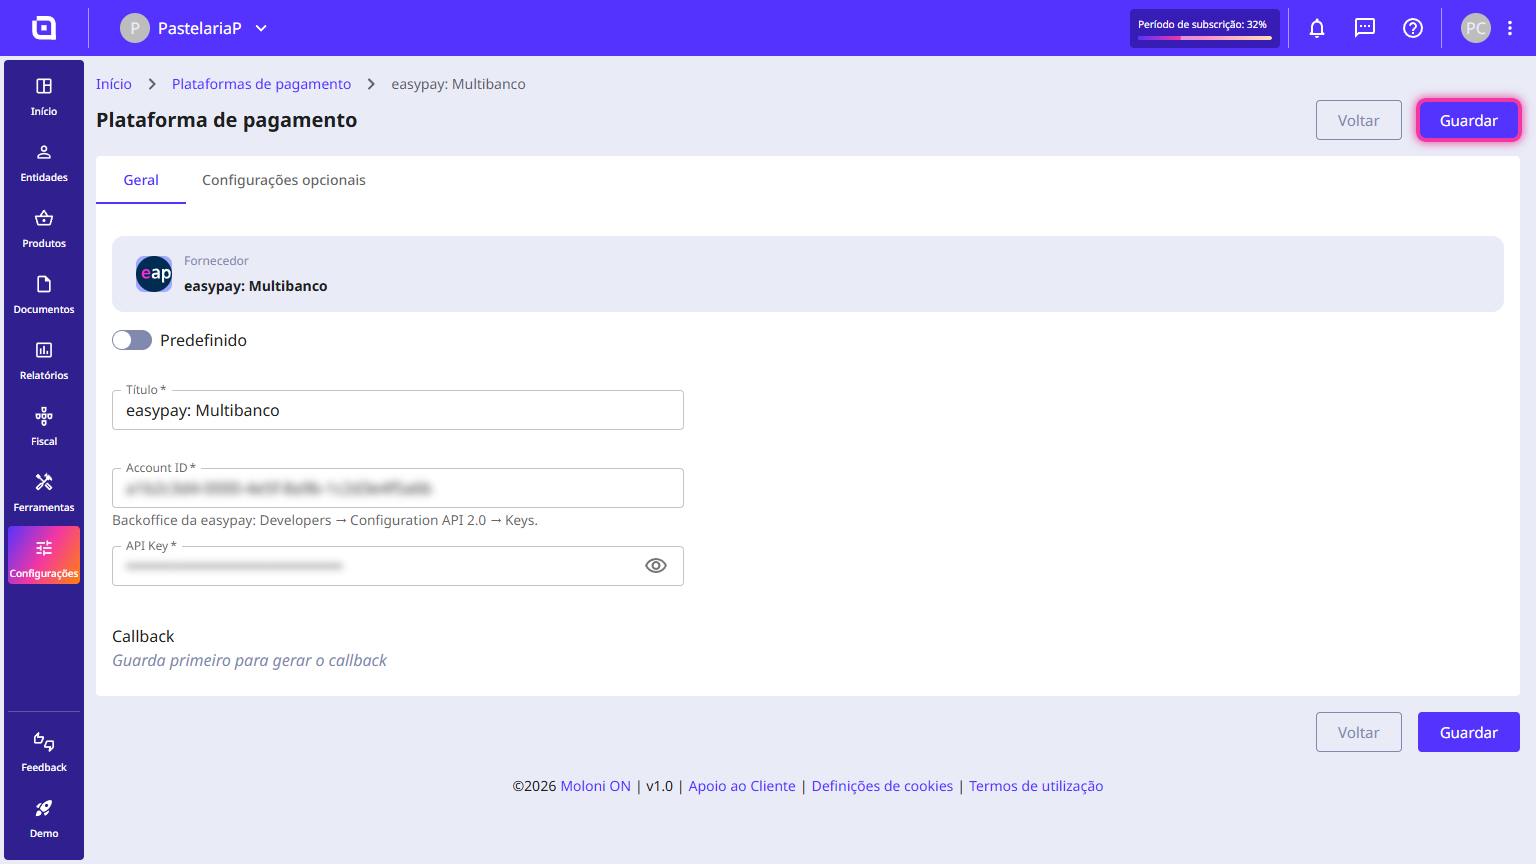
1. Access Settings on the left menu of Moloni ON, click Other settings, and select Payment gateways.
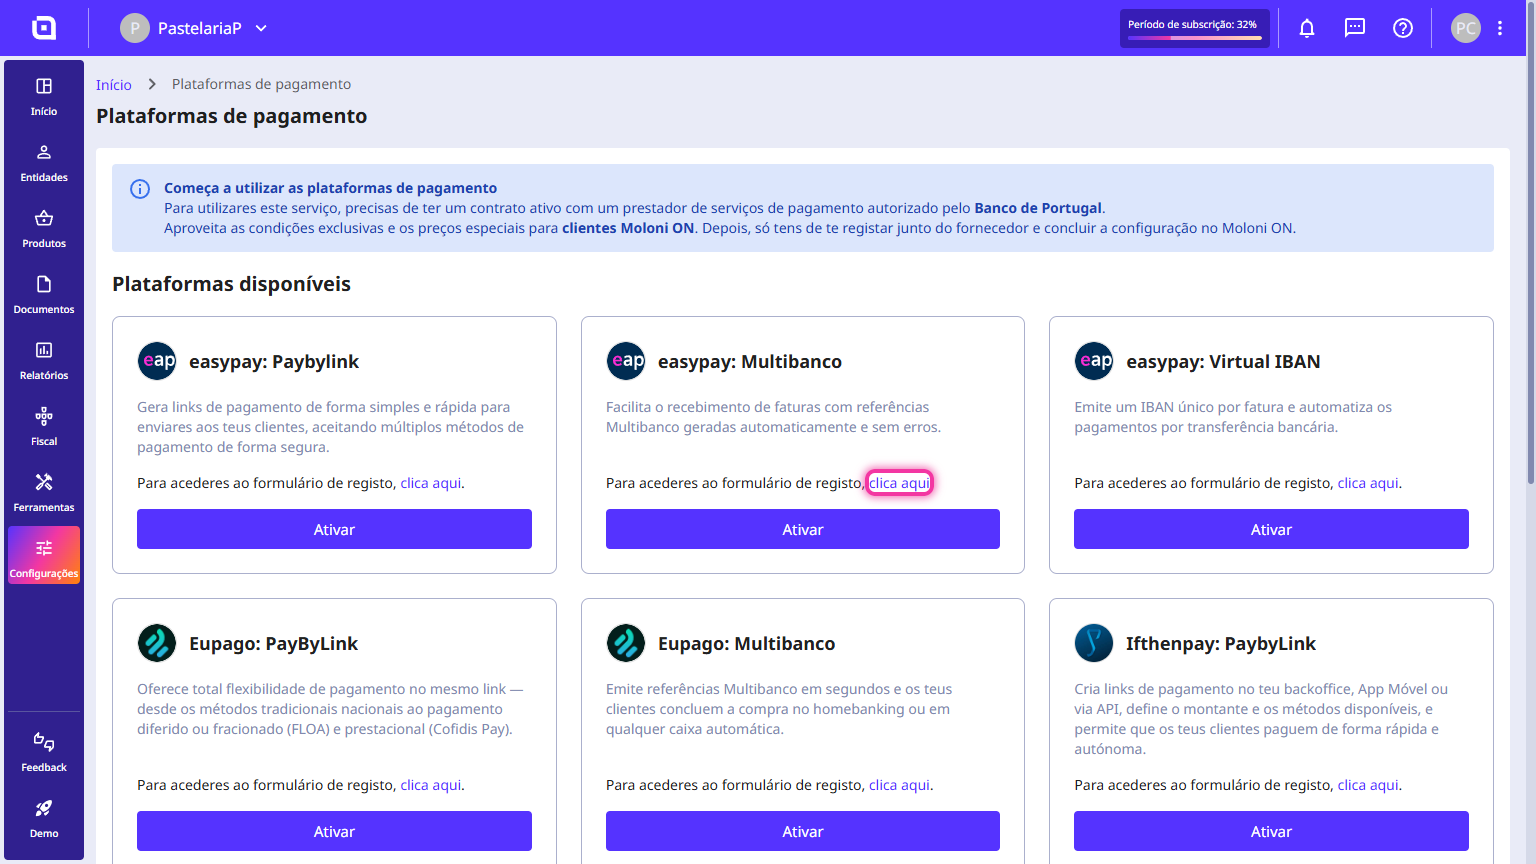
2. Review the available options on the page and, if you do not have an account or contract yet, open the easypay registration form through the link inside your desired method.
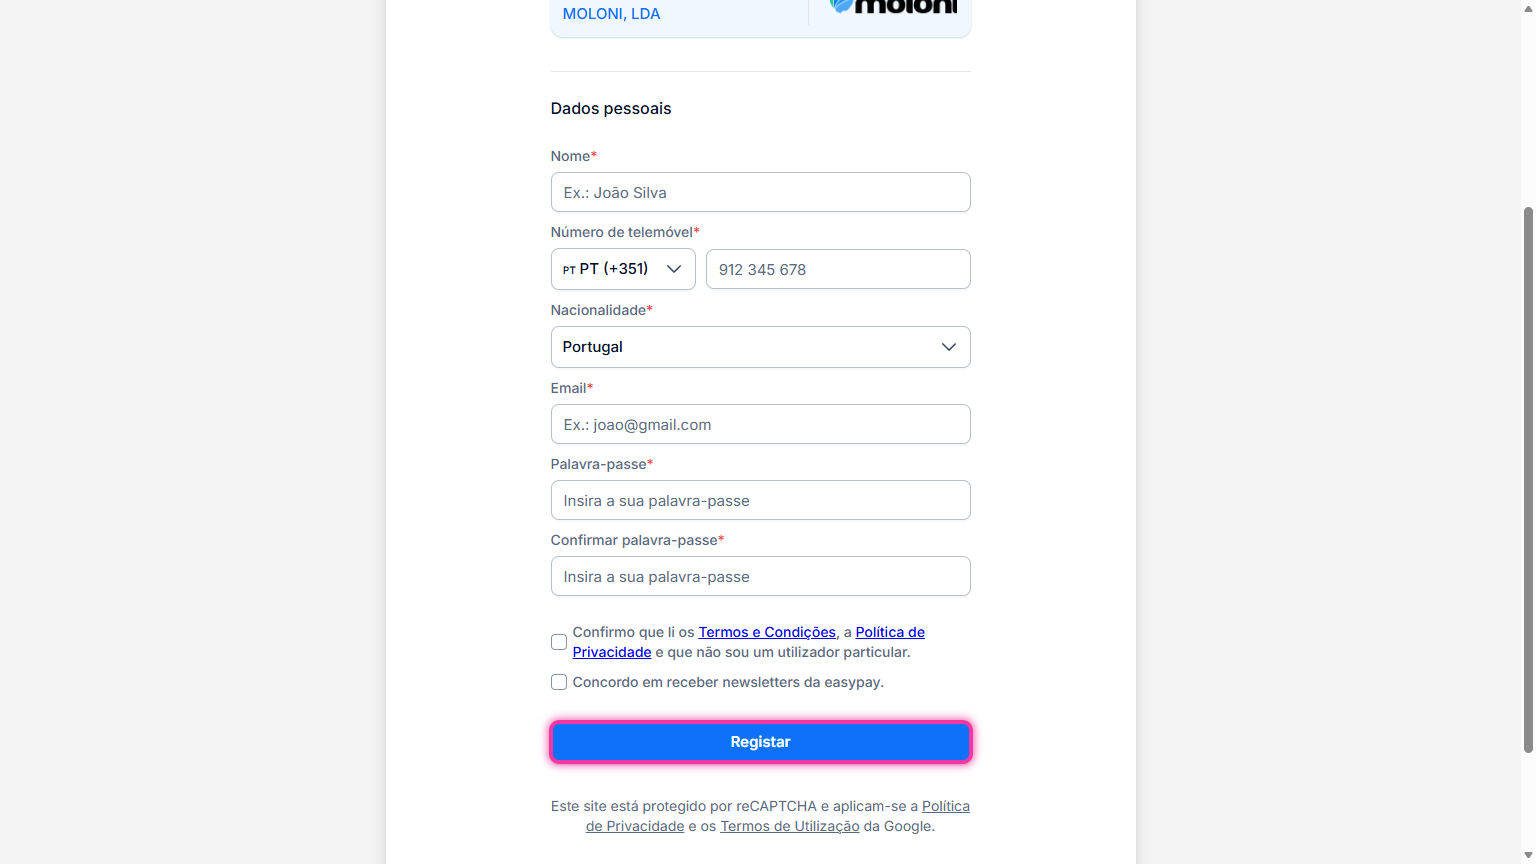
3. Fill in your Personal details, accept the Terms and Conditions, and click Register.
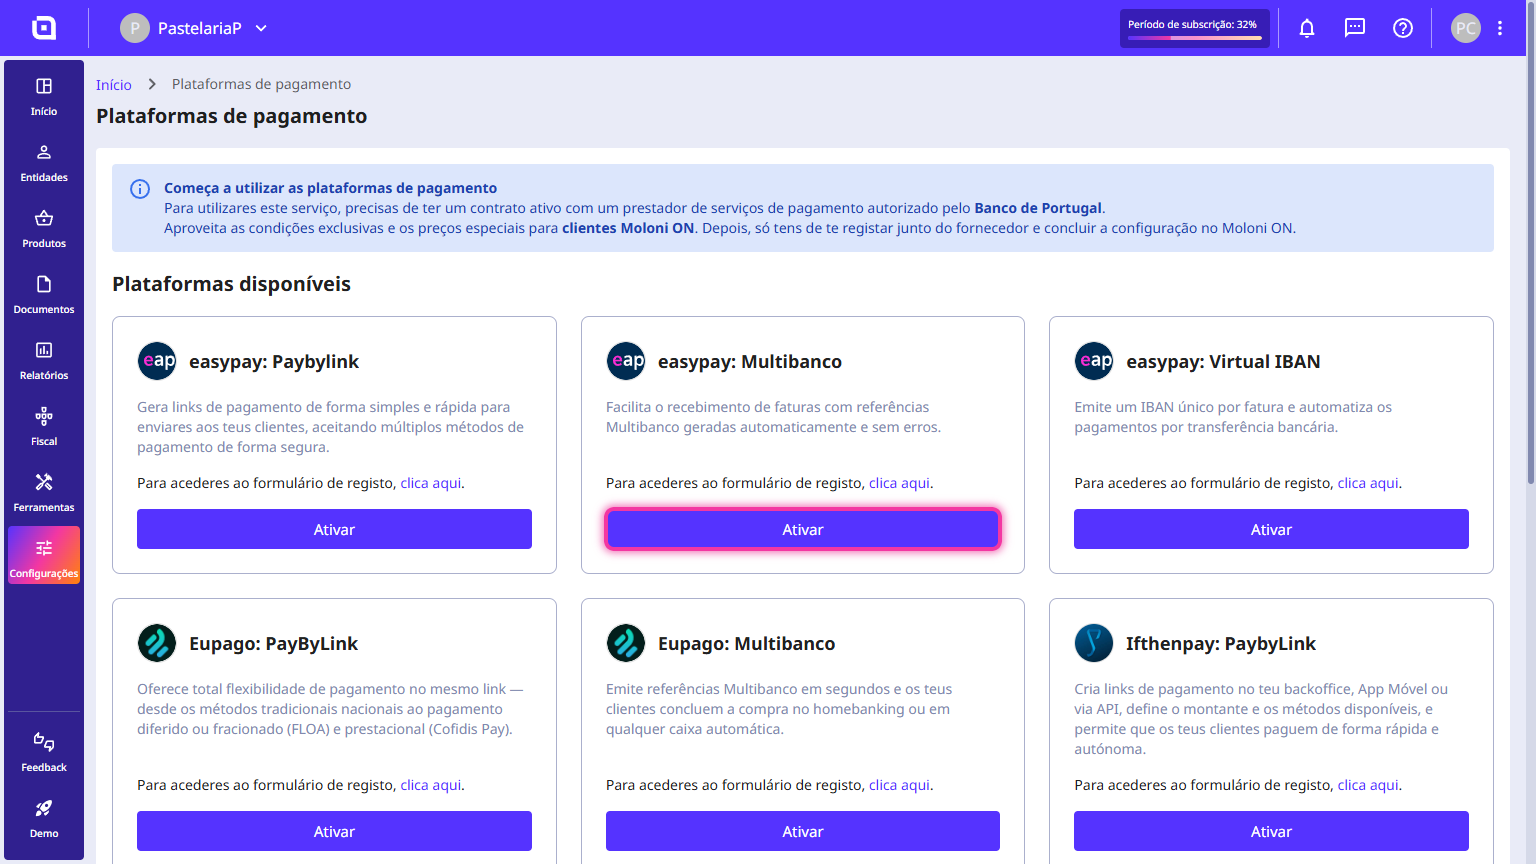
4. Return to Moloni ON and click the Activate button.
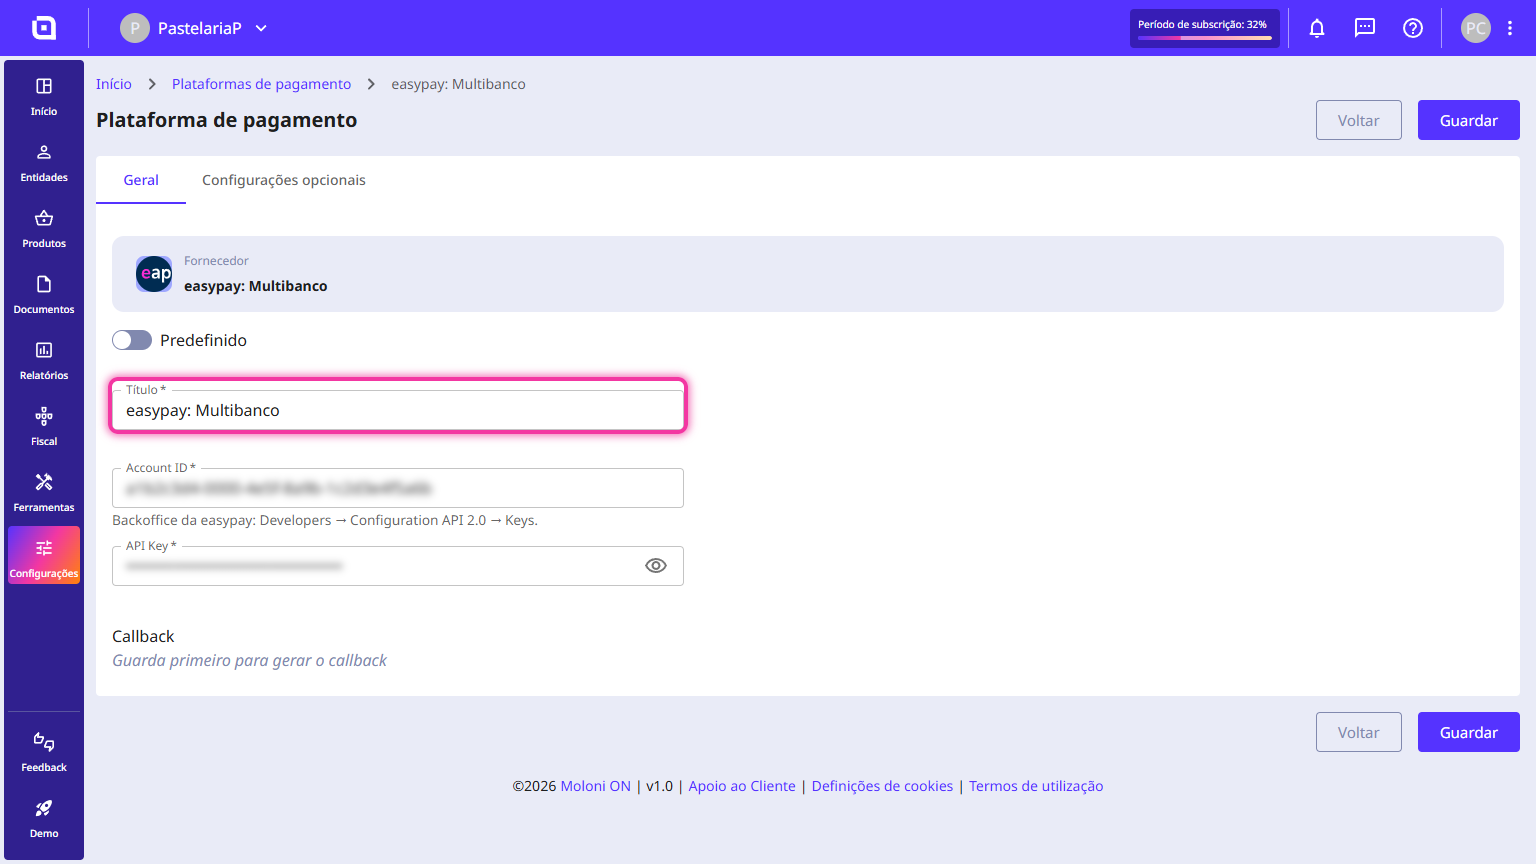
5. In the Title field, enter an identifying name for this configuration (e.g., "easypay Multibanco").
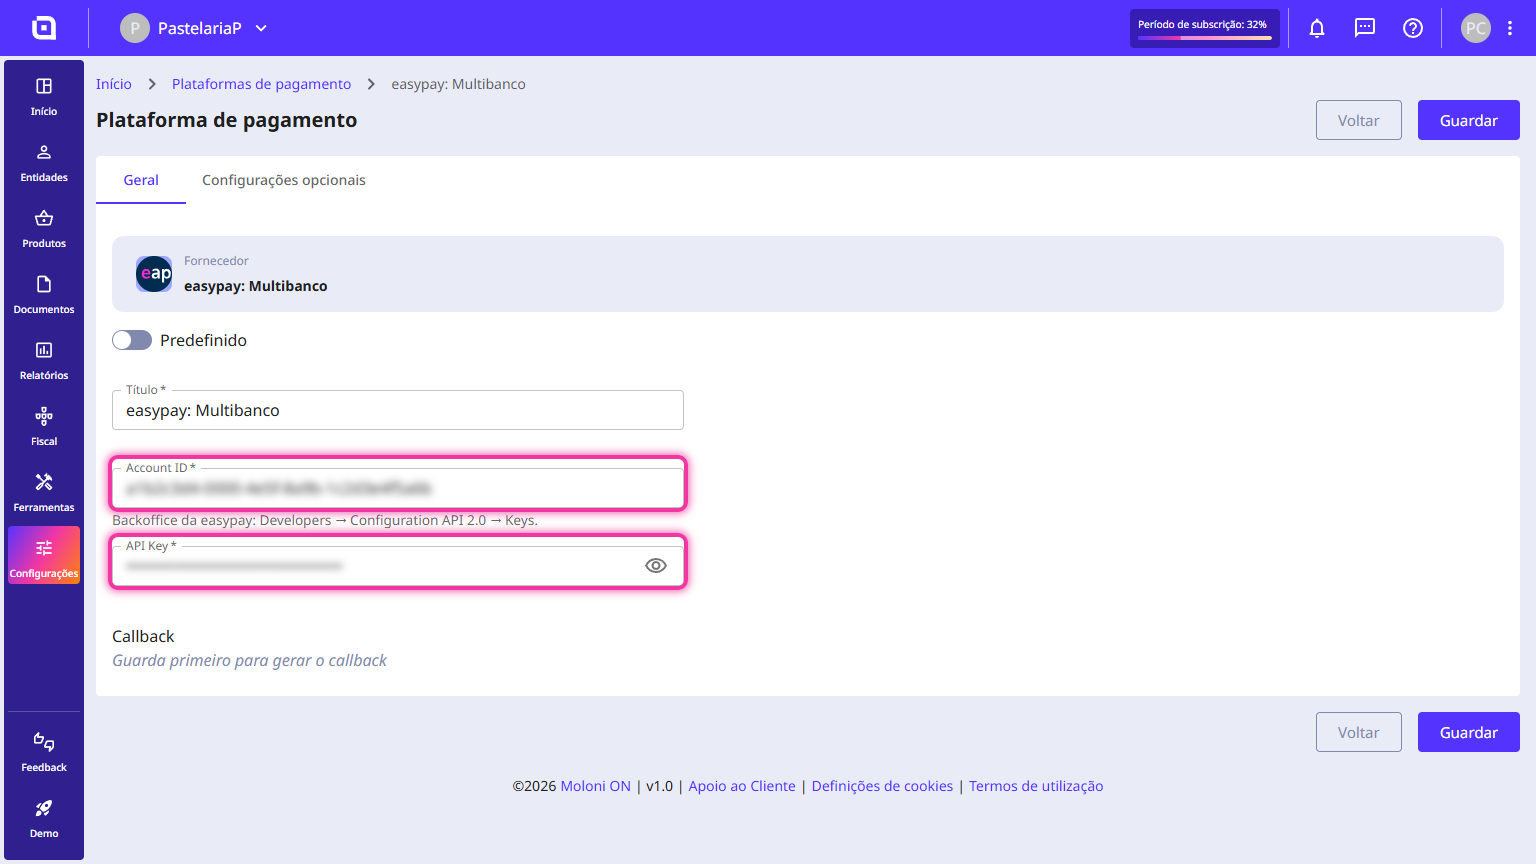
6. Enter the details provided by easypay in the Account ID and API Key fields.
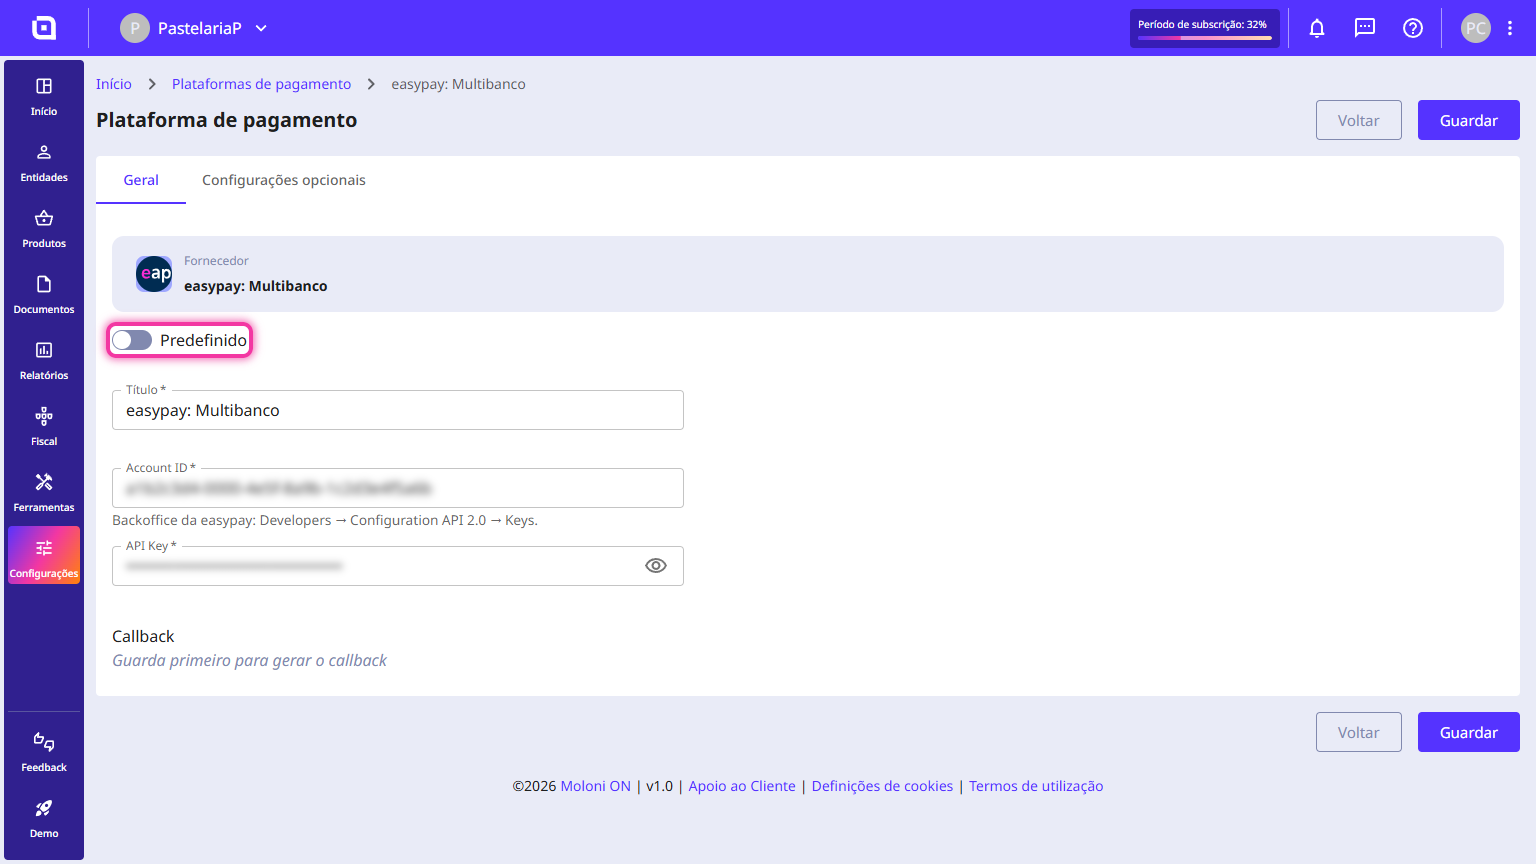
7. Enable the Default option if you want this to be the standard payment method suggested on your Moloni ON documents.
8. Click the Save button, in the top or bottom right corner.
How do I generate receipts automatically on Moloni ON?
Automating the issuing of receipts in Moloni ON through easypay is the ideal solution to save time and eliminate the manual work of financial management. As soon as you activate an easypay gateway, Moloni ON sets up the Callback automatically - easypay's real-time communication mechanism. Whenever a customer pays an invoice, easypay immediately notifies Moloni ON through this link, closing the invoice and issuing the receipt without manual intervention.
The Callback is automatic, but your receipts are only issued after you enable the Automatically generate receipts option and choose the document set for your receipts and the payment method.
Follow these steps:
1. Access Settings on the left menu of Moloni ON, click Other settings, and select Payment gateways.
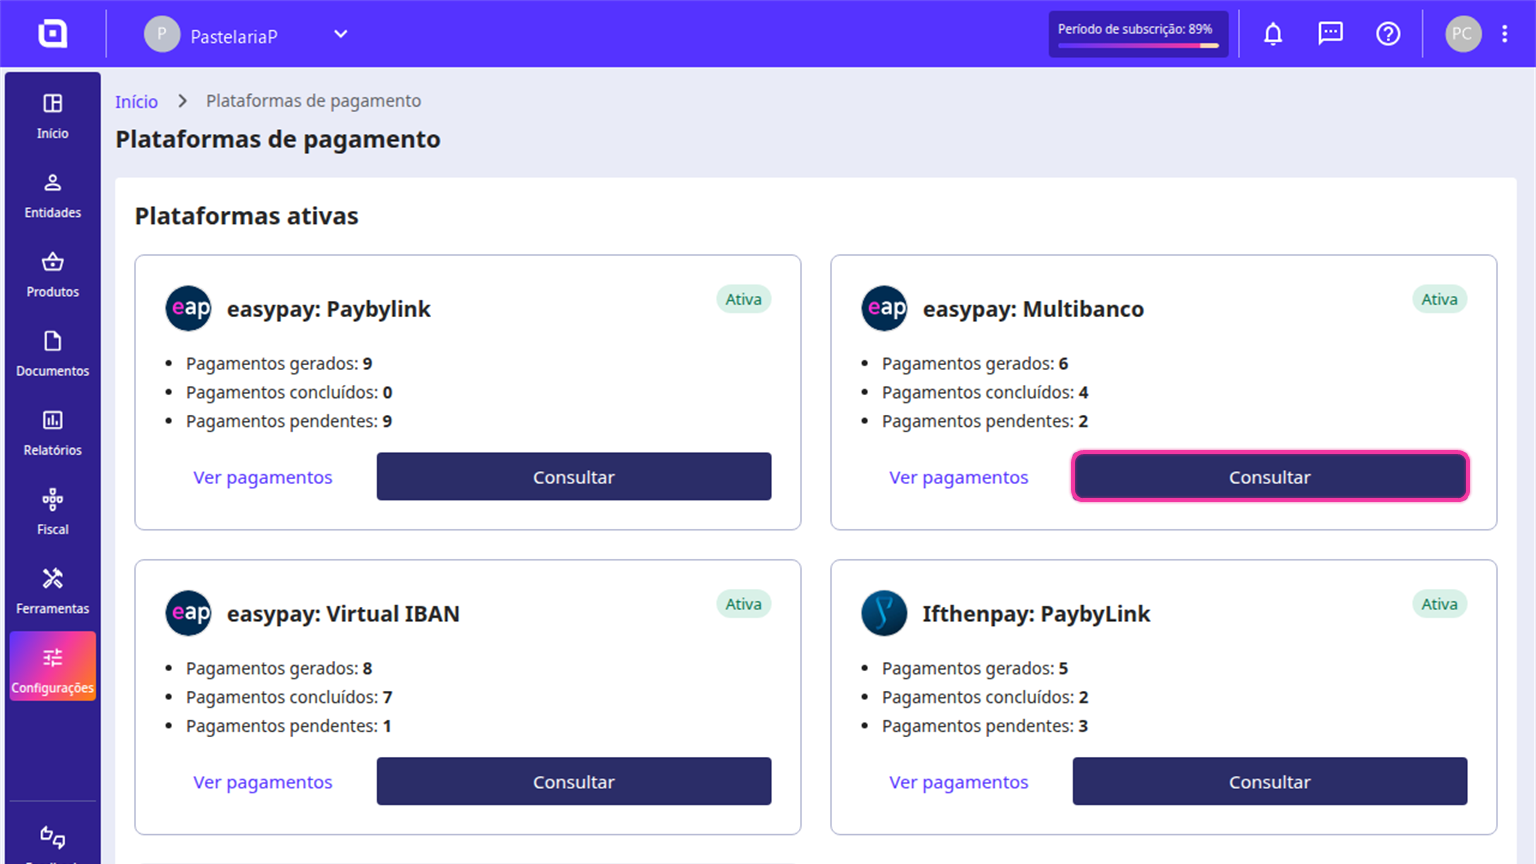
2. Under Active gateways, click View details on the block of the easypay method you wish to configure (e.g., easypay: PayByLink, easypay: Multibanco or easypay: Virtual IBAN).
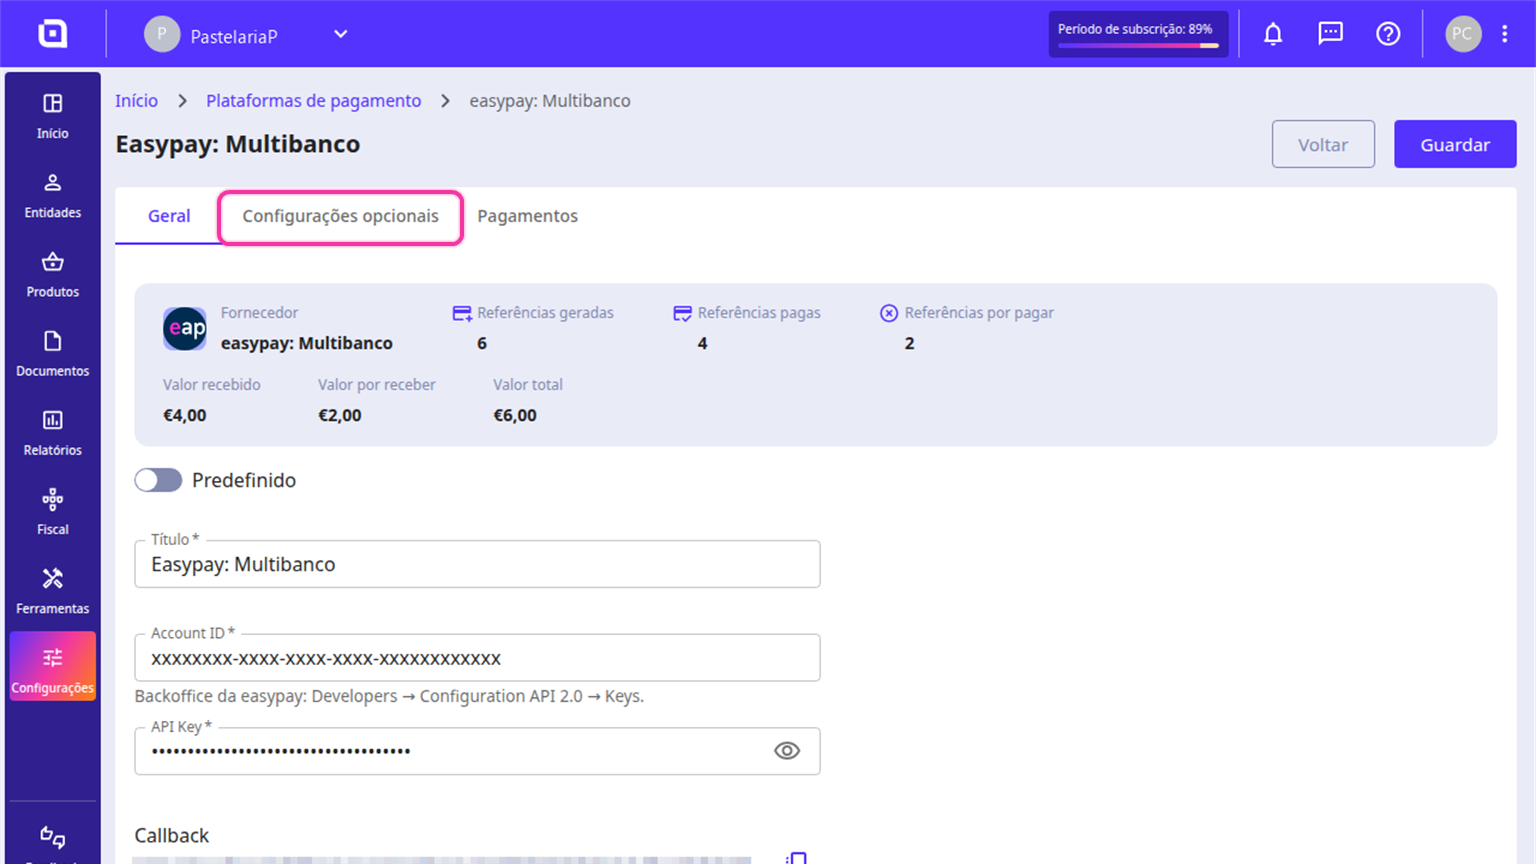
3. Select the Optional settings tab at the top of the screen.
4. Enable the Automatically generate receipts option.
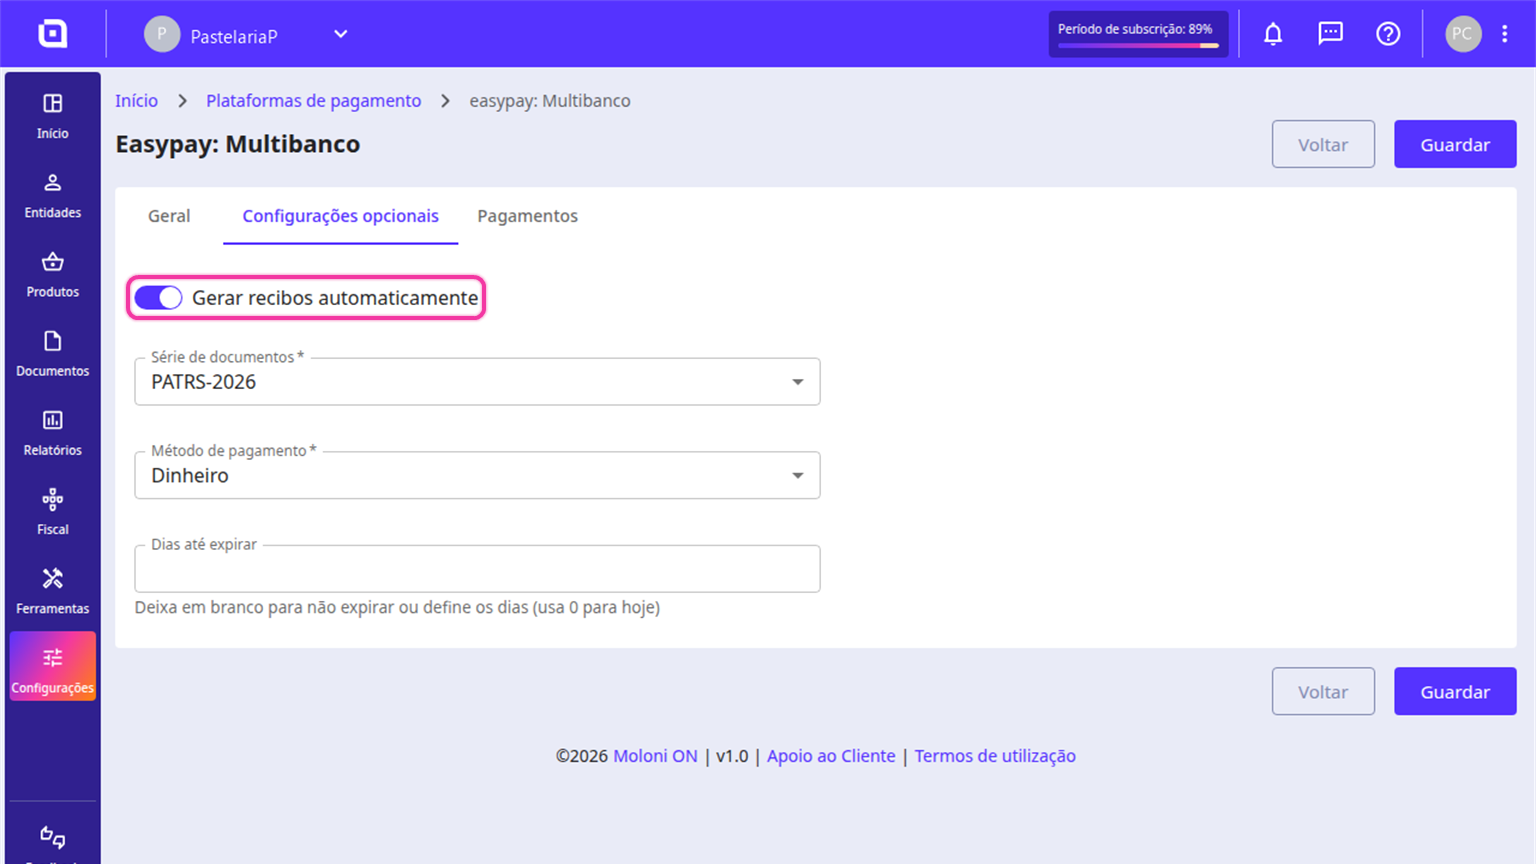
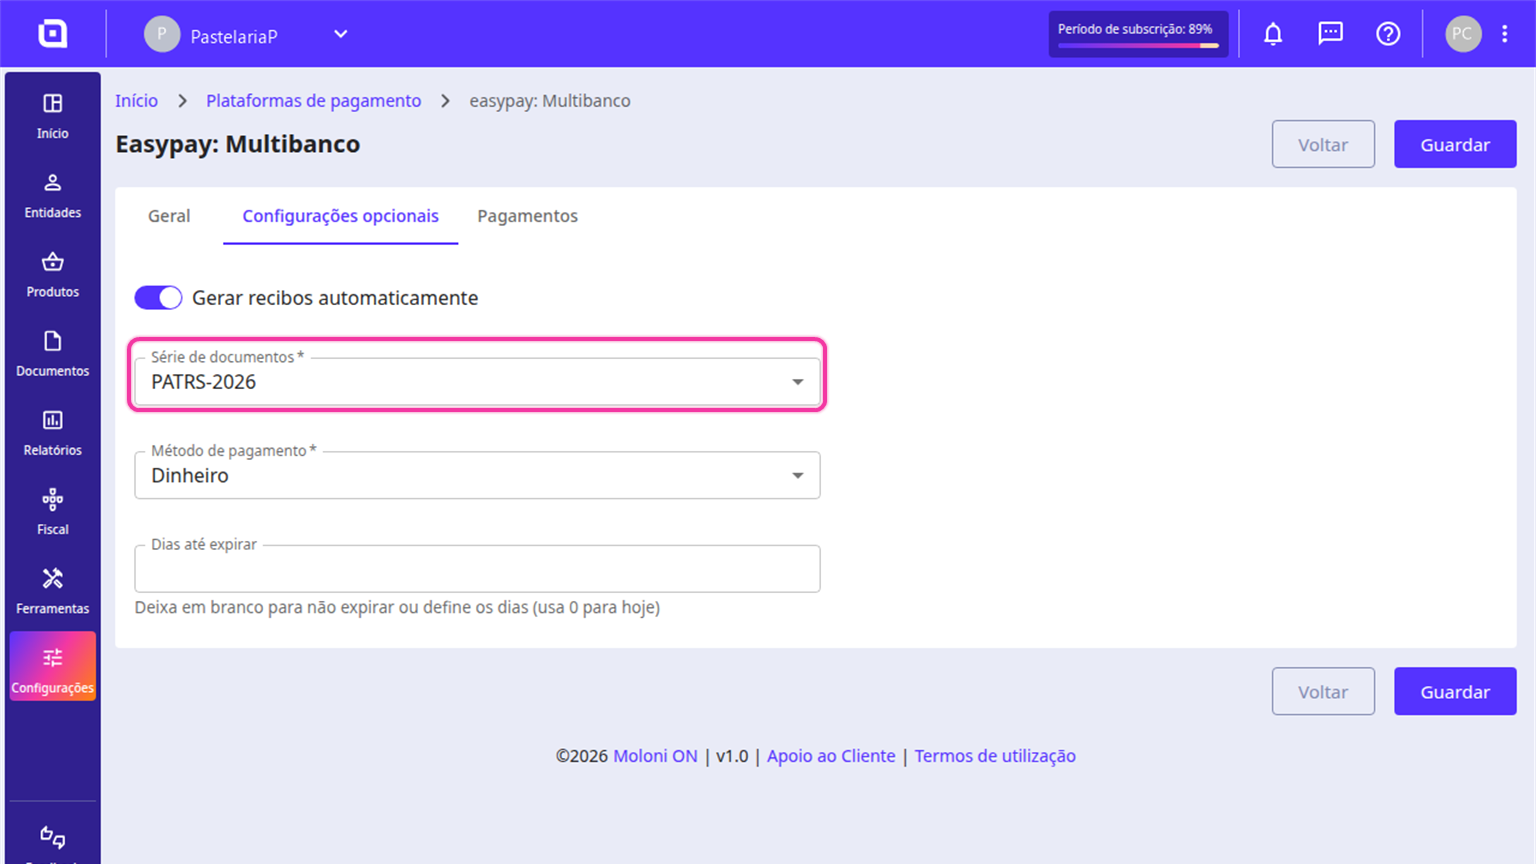
5. In the Document set field, select the billing series from the drop-down menu where you want your receipts to be issued.
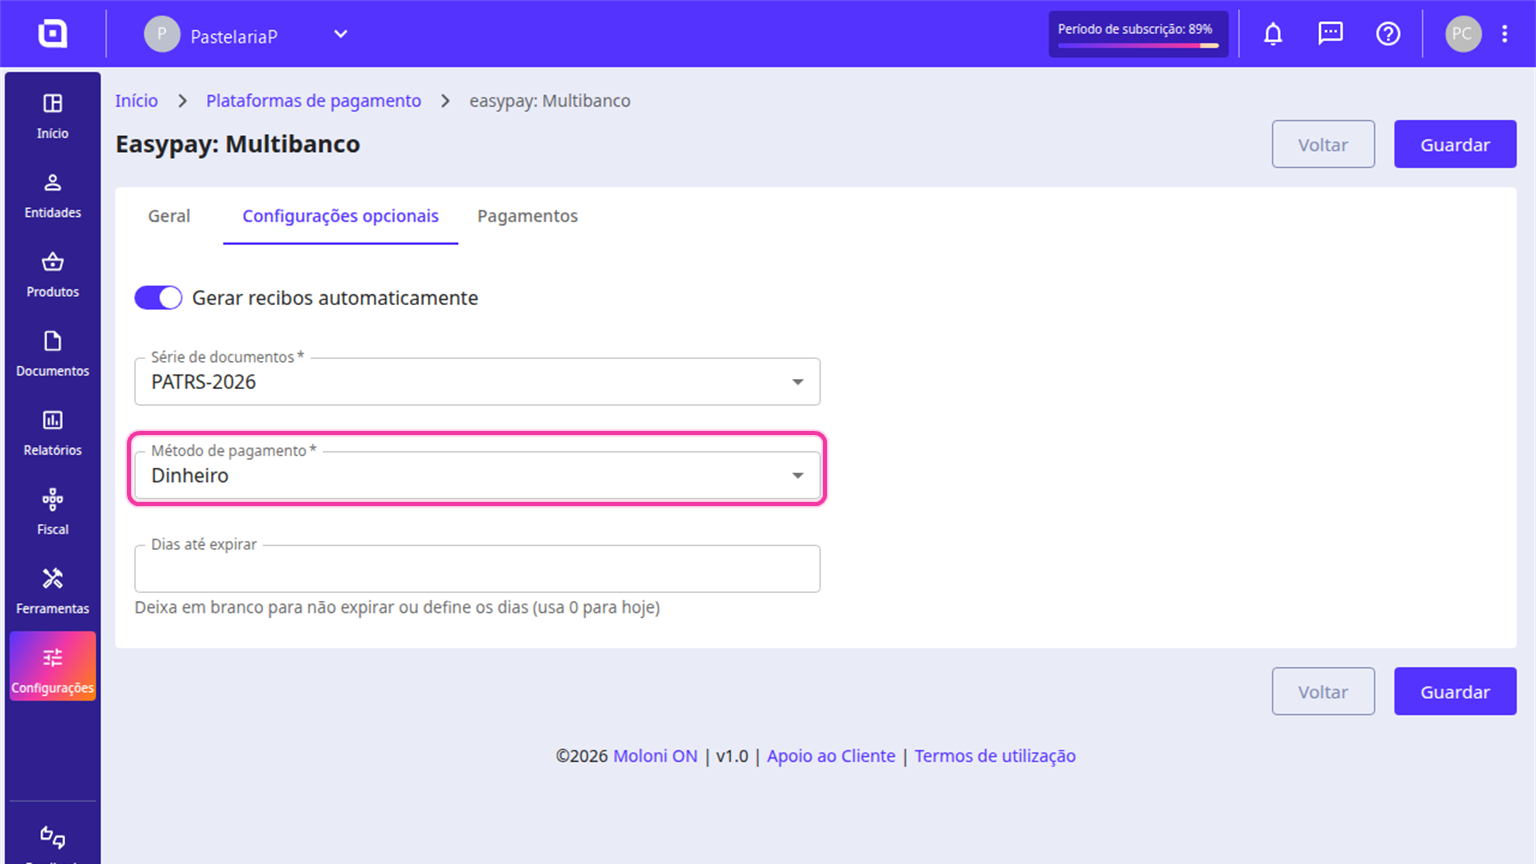
6. In the Payment method field, select your preferred method.
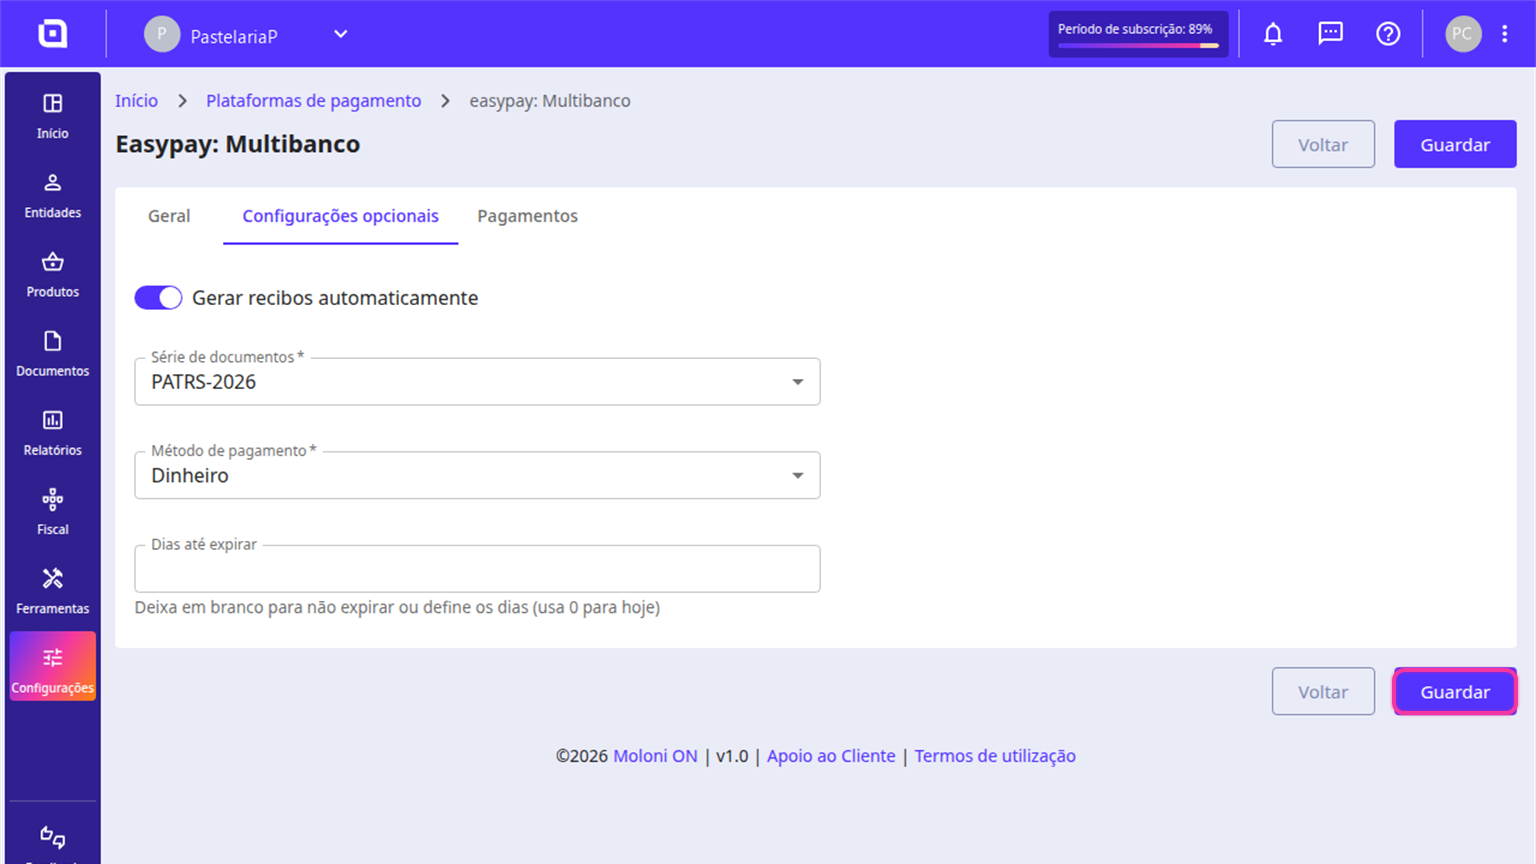
7. Click the Save button in the bottom right corner to complete the process.
How do I add payment details to a document?
To simplify the collection process and automate financial management, Moloni ON allows you to integrate payment gateways directly into your documents. When you activate this option, the system automatically generates the payment details associated with your configured financial entity - Multibanco references, direct links (PayByLink) or Virtual IBAN -, allowing your customer to pay with total convenience.
However, there are specific rules regarding where and when you can use this feature in Moloni ON. Make sure you meet the following requirements:
- Eligible documents: Payment details can only be added to Invoices and Regular/Recurring Invoices. They are not available for other document types.
- Workflow flexibility: You can include the payment right at the time of issuance or add it later to a document that has already been closed.
During the creation of a document
If you are issuing a new invoice or regular invoice and want the customer to receive the payment link straight away, follow these steps:
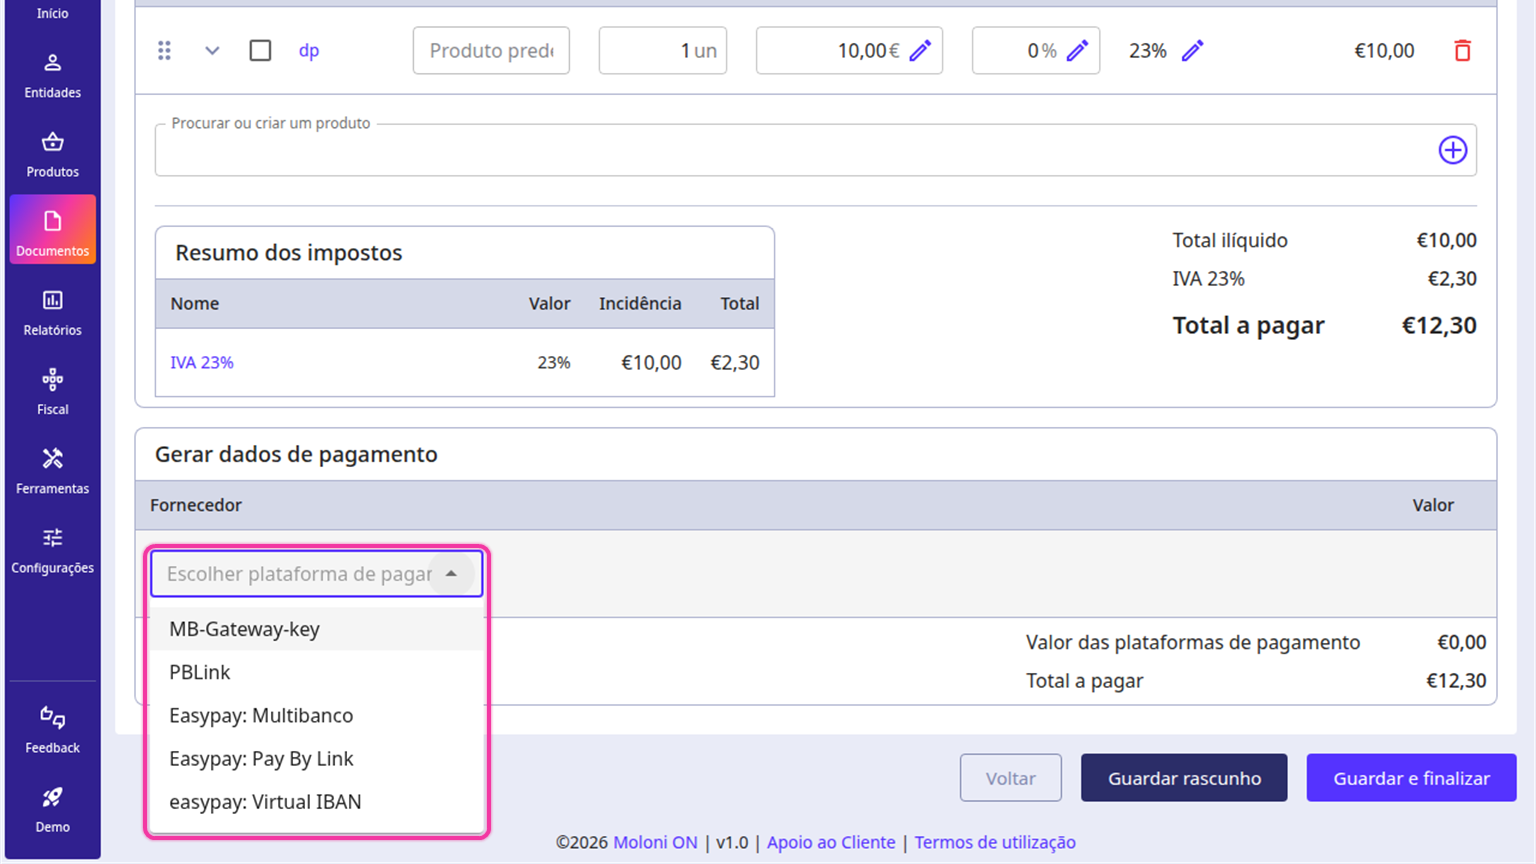
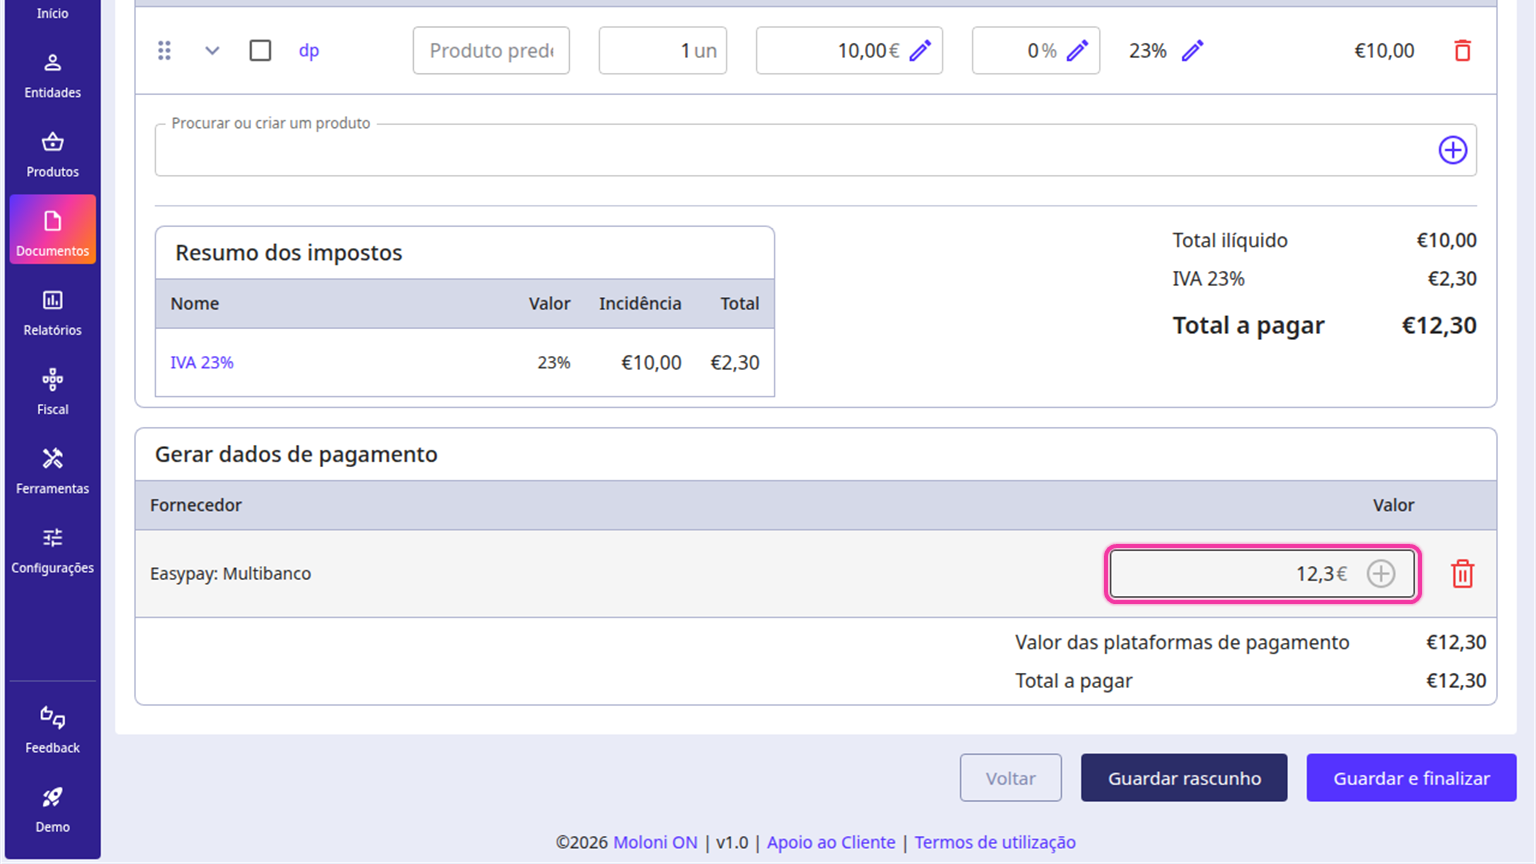
1. After filling in the Commercial information and Products, go to the Generate payment data section and select your desired payment gateway.
2. In the Value field, enter the exact amount to be charged through the gateway.
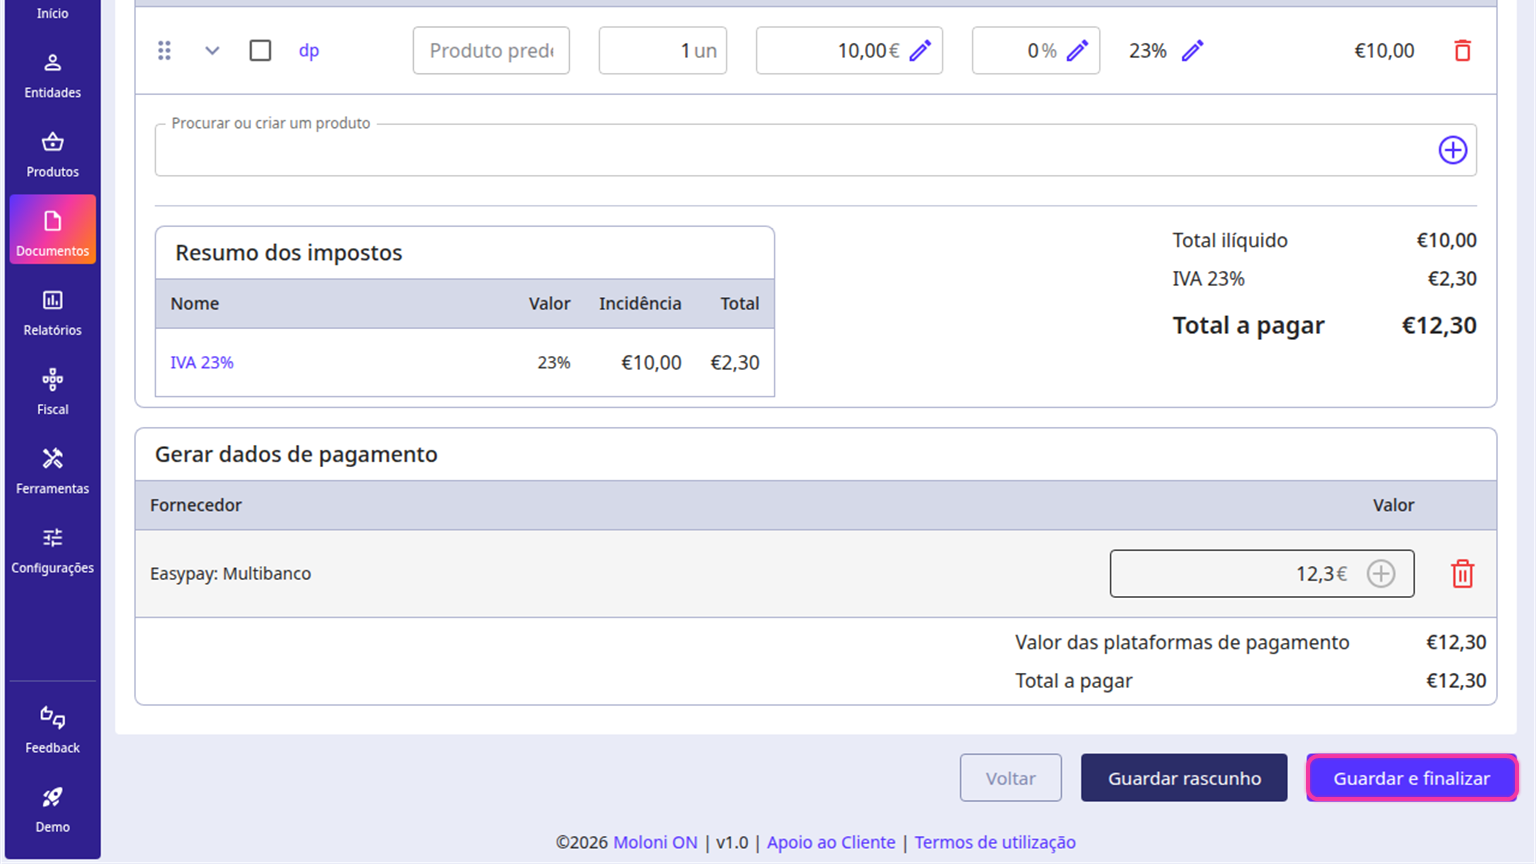
3. Click Save and finish in the bottom right corner. Moloni ON will issue the document and immediately create the payment details in the Payments tab with a Pending status.
On an already issued document
If the document has already been generated without payment details and you want to add the link now, follow these steps:
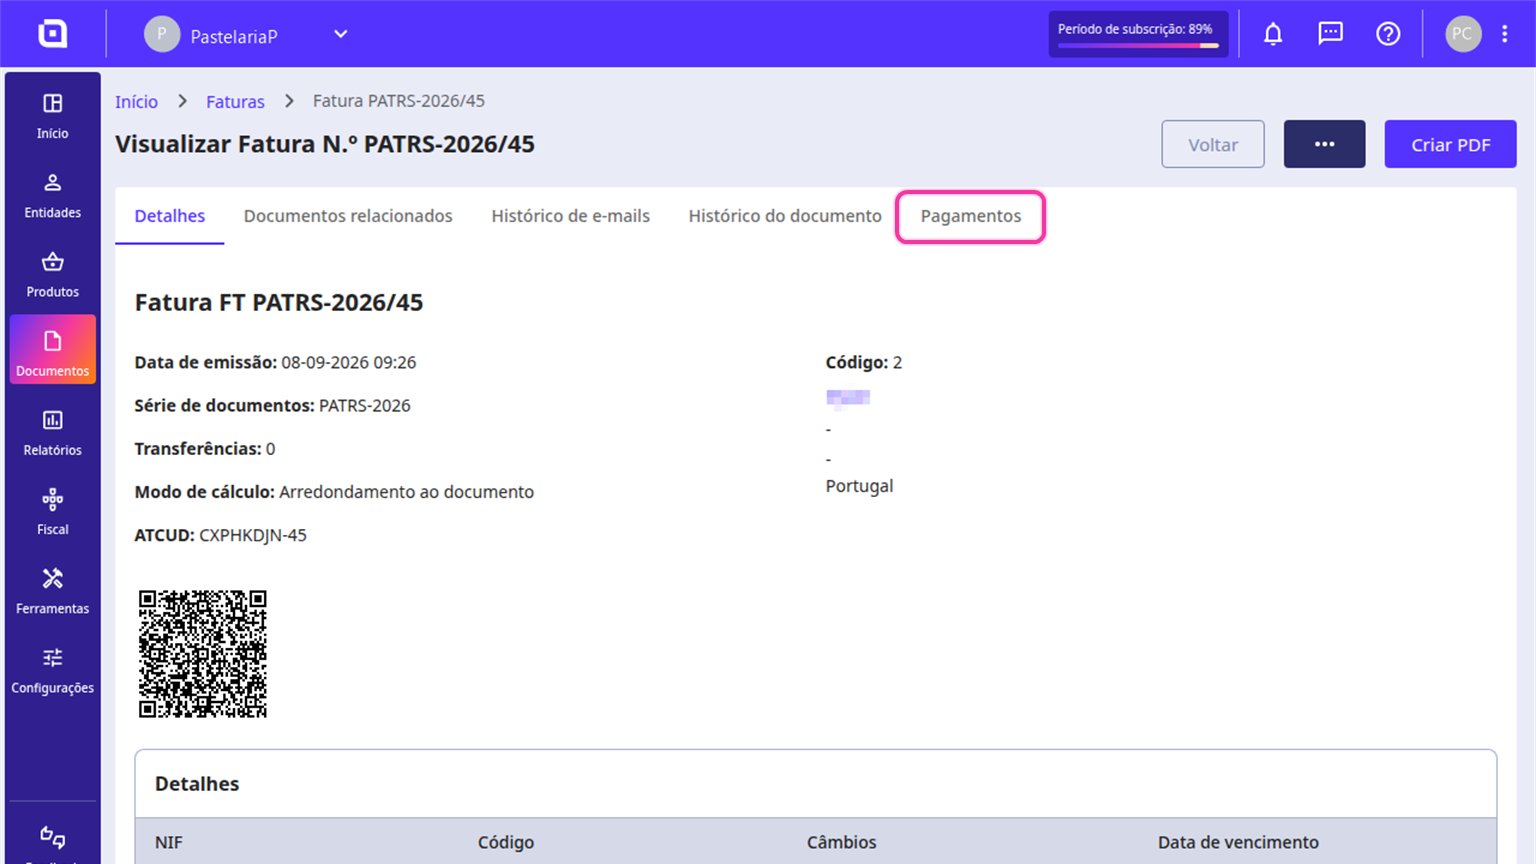
1. Open the desired invoice or regular invoice and click the Payments tab.
2. Click the Generate payment button in the top right corner.
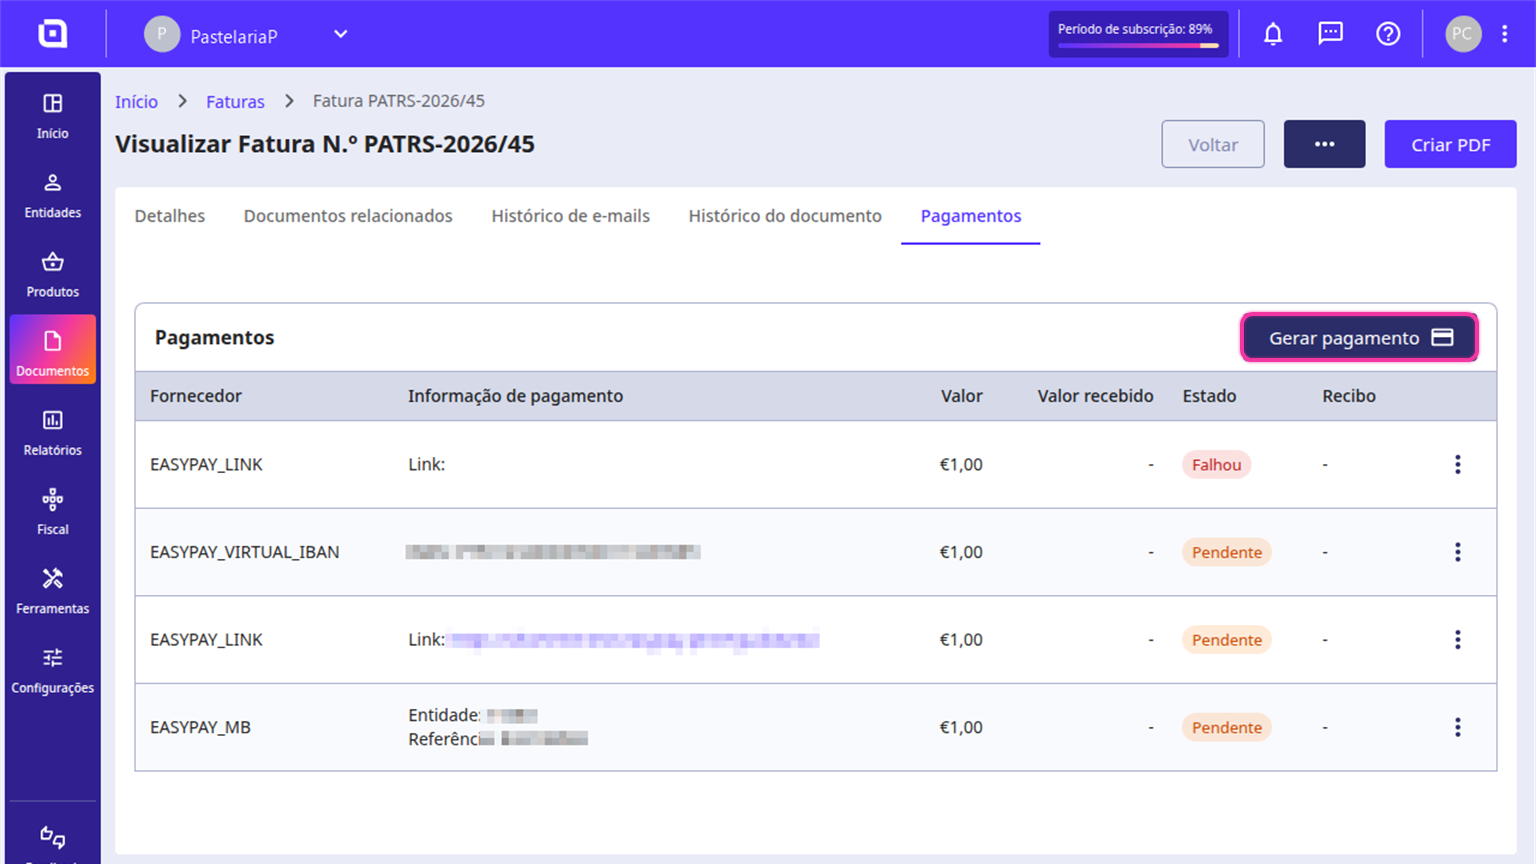
3. In the Generate payment data section, select your desired payment gateway.
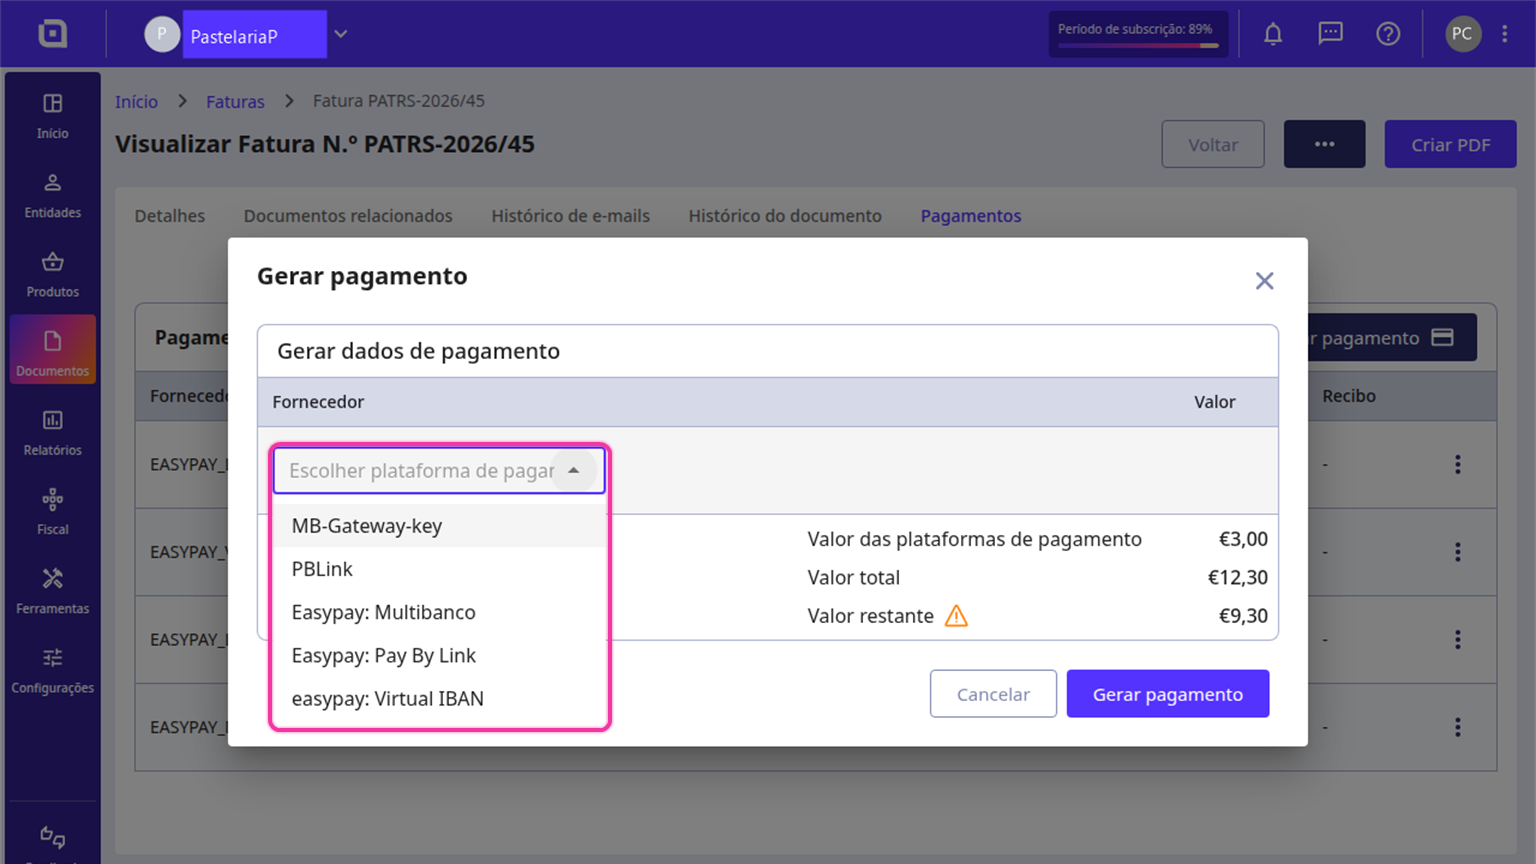
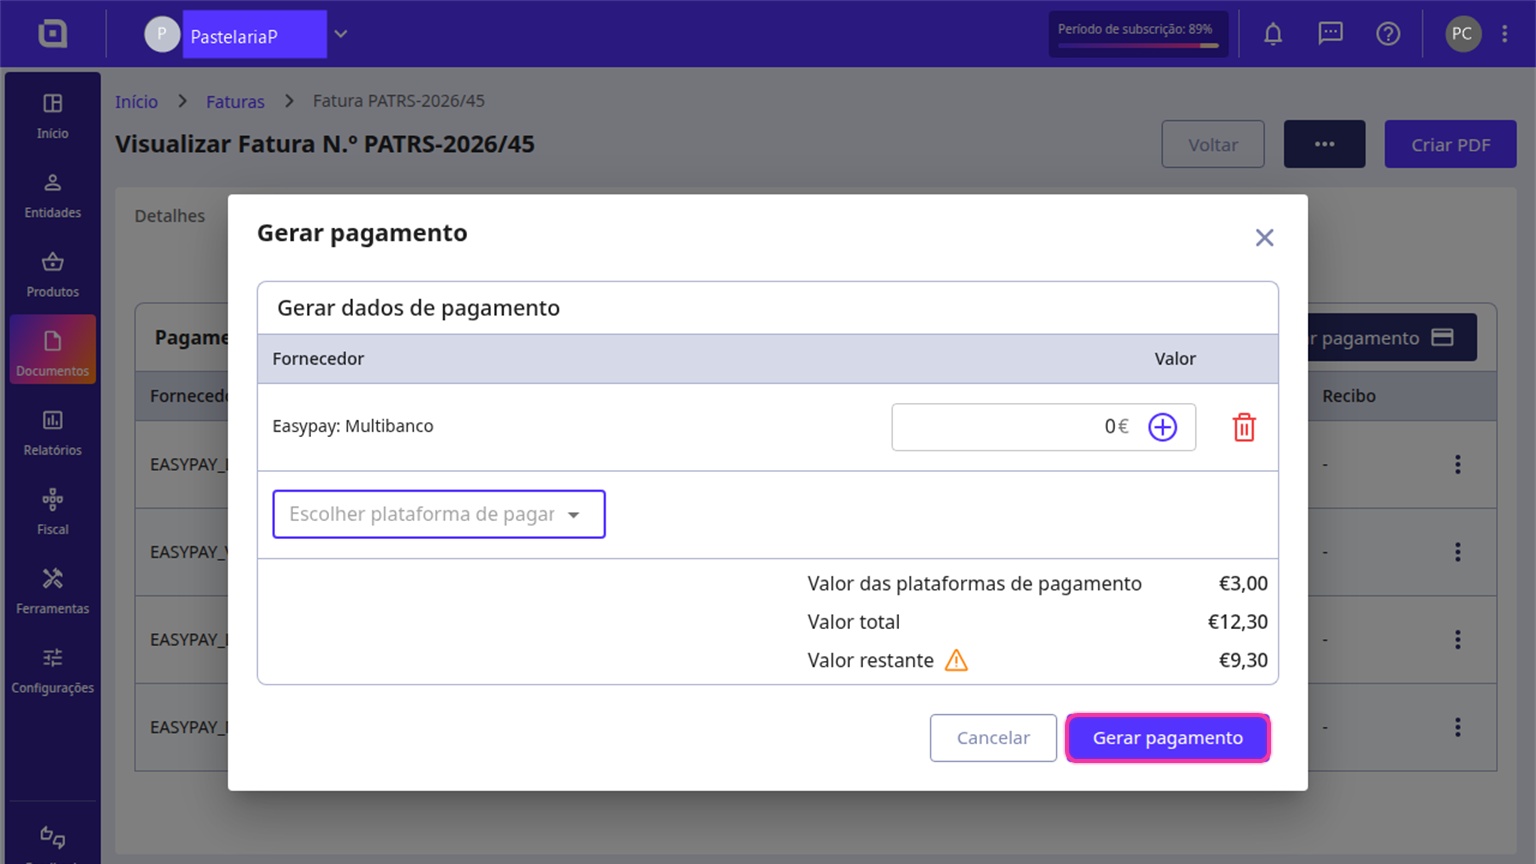
4. The system automatically takes the total outstanding amount of the document. Validate the details and click the Generate payment button to create the corresponding payment details.
What if the receipt is not issued after the payment?
Has your customer already paid, but the document still shows the Pending status in the Payments tab and no receipt was issued? In that case, the Callback may not have reached easypay. Check it in your easypay portal and, if it is missing, enter it manually.
Follow these steps:
1. In Moloni ON, access Settings, click Other settings, and select Payment gateways.
2. Under Active gateways, click View details on the easypay method's block.
3. Copy the link shown in the Callback field.
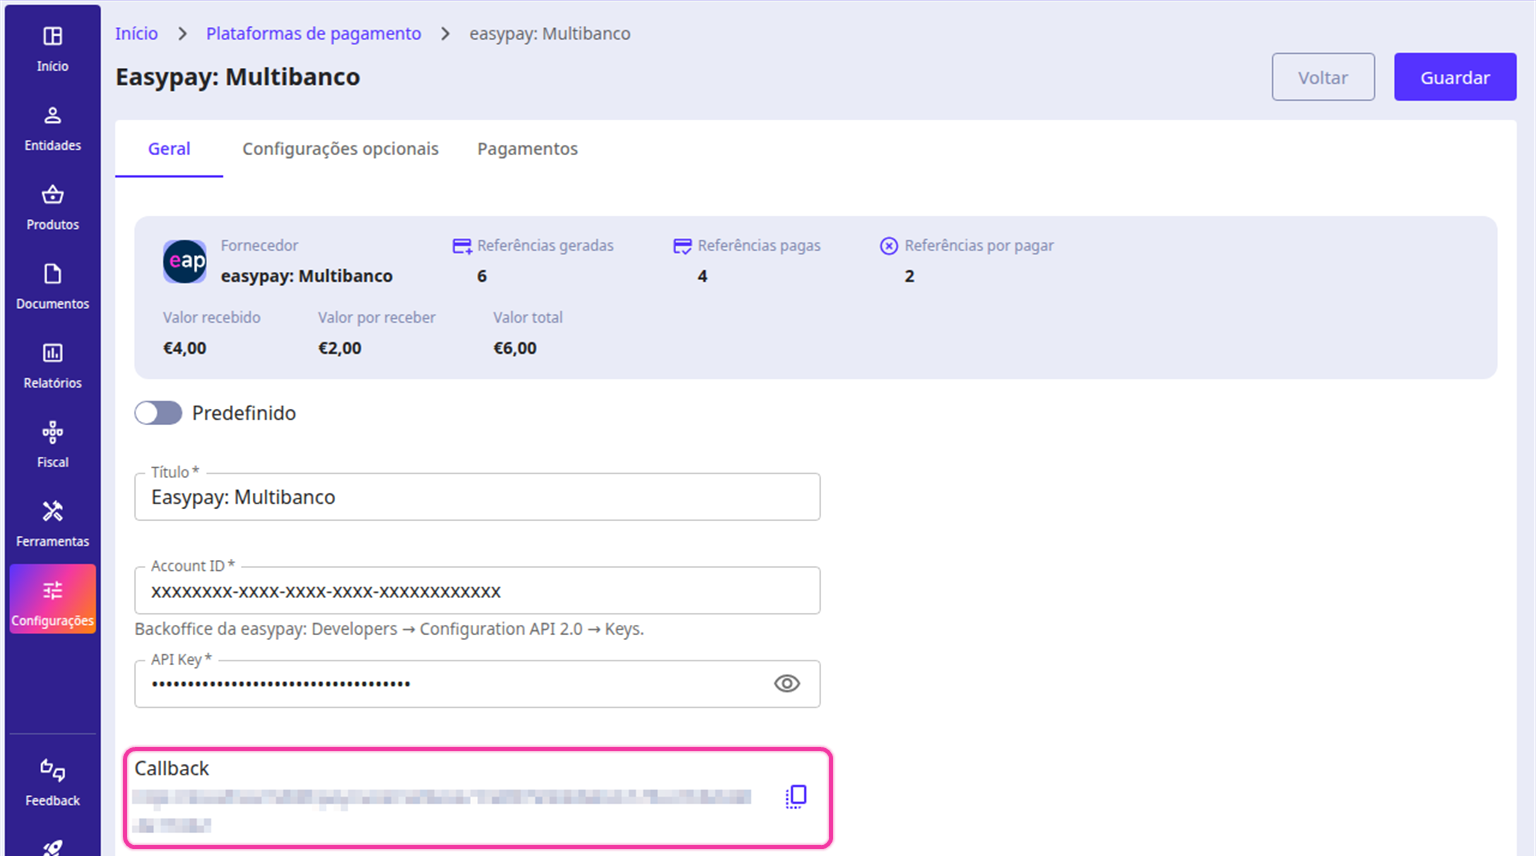
4. Go to your easypay customer portal and, on the left side menu, click Developers and select Configuração API 2.0.
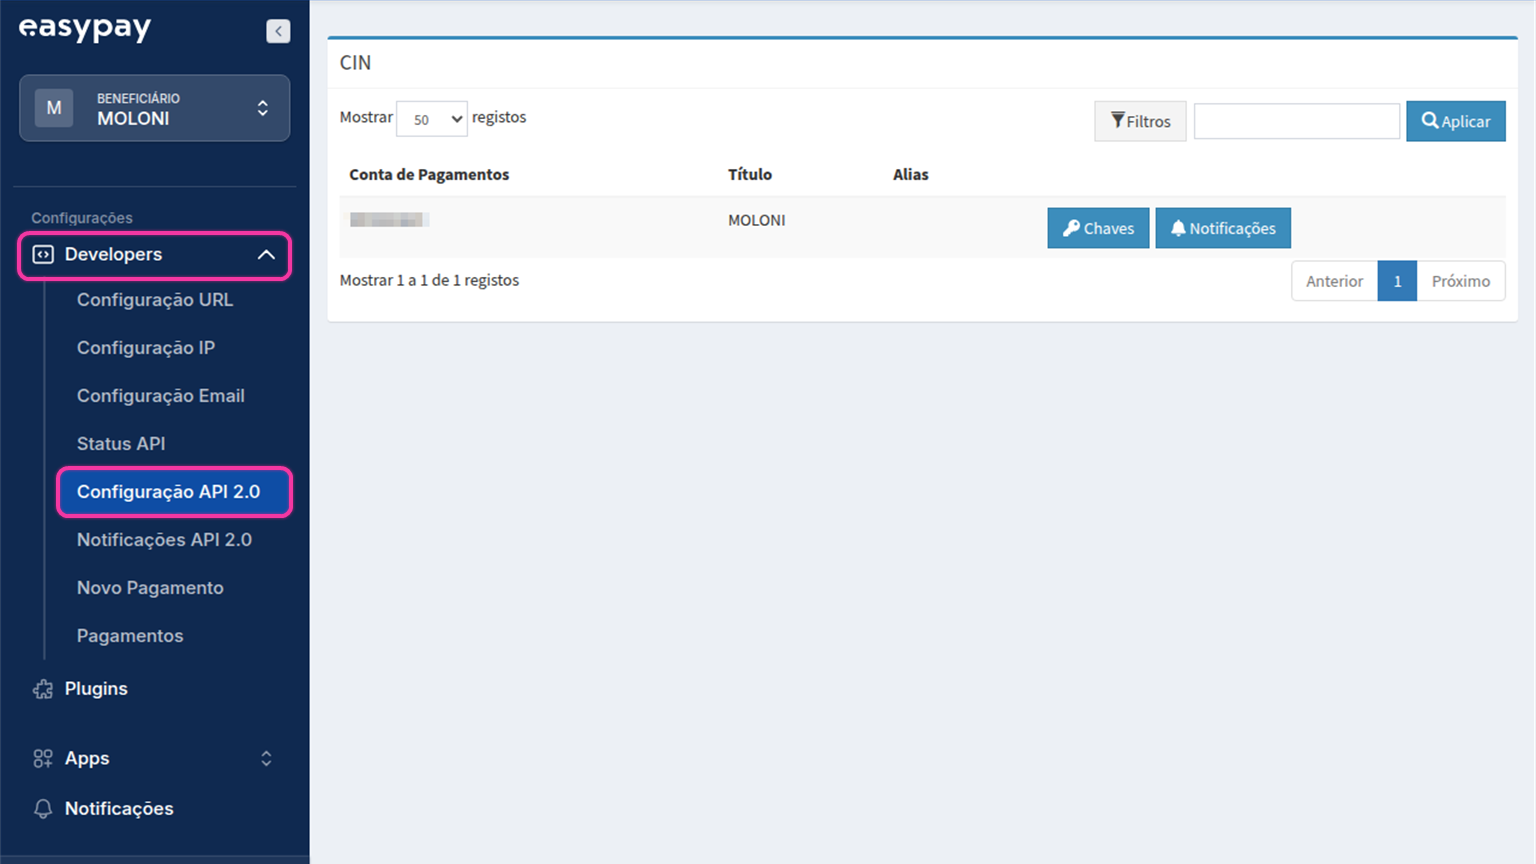
5. Find the relevant account in the table and click Chaves.
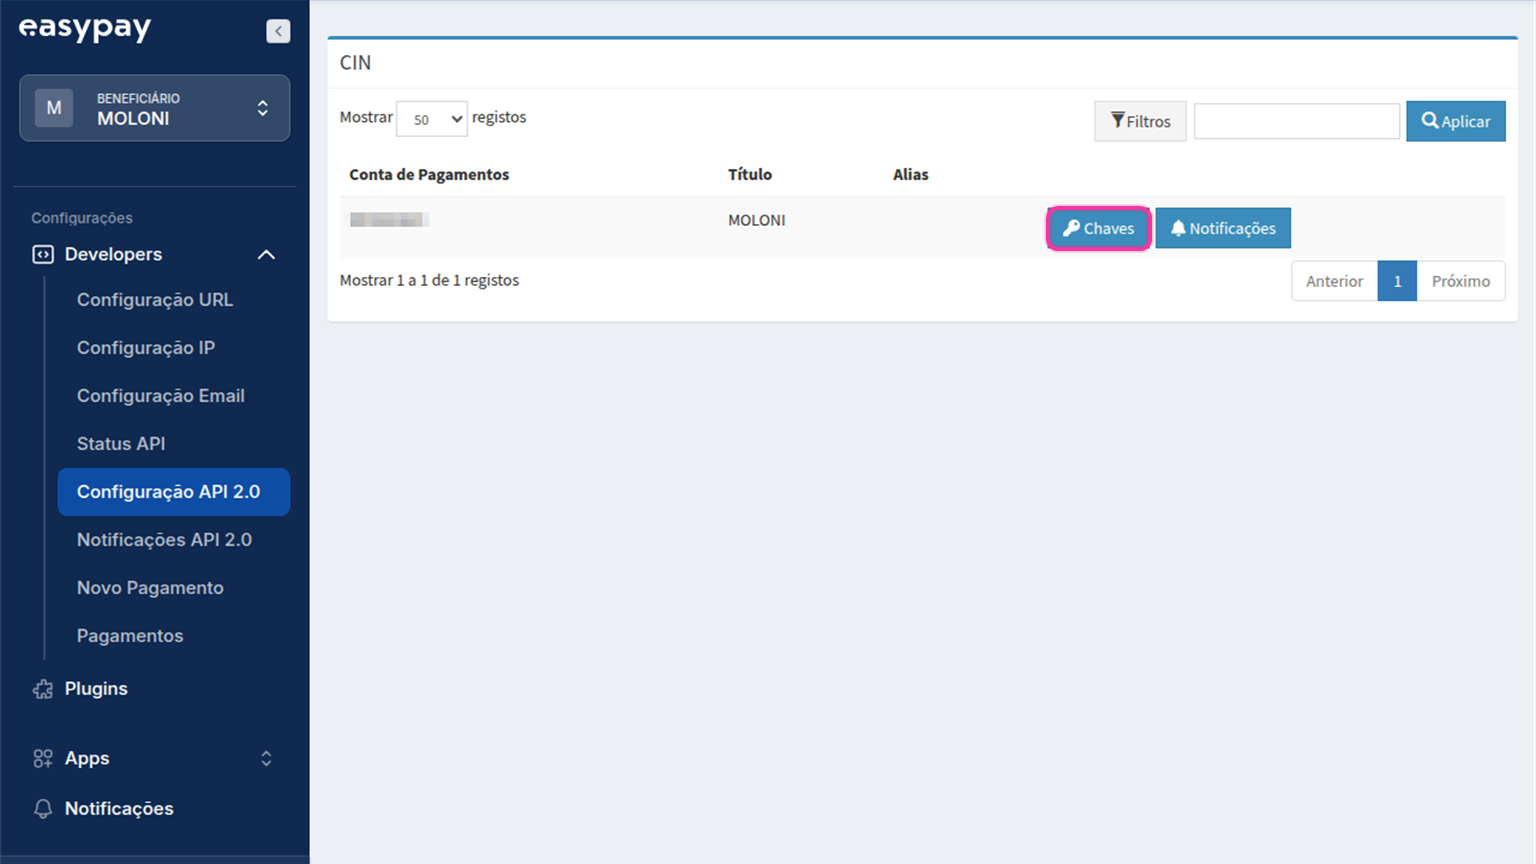
6. To add the key, click + Nova.
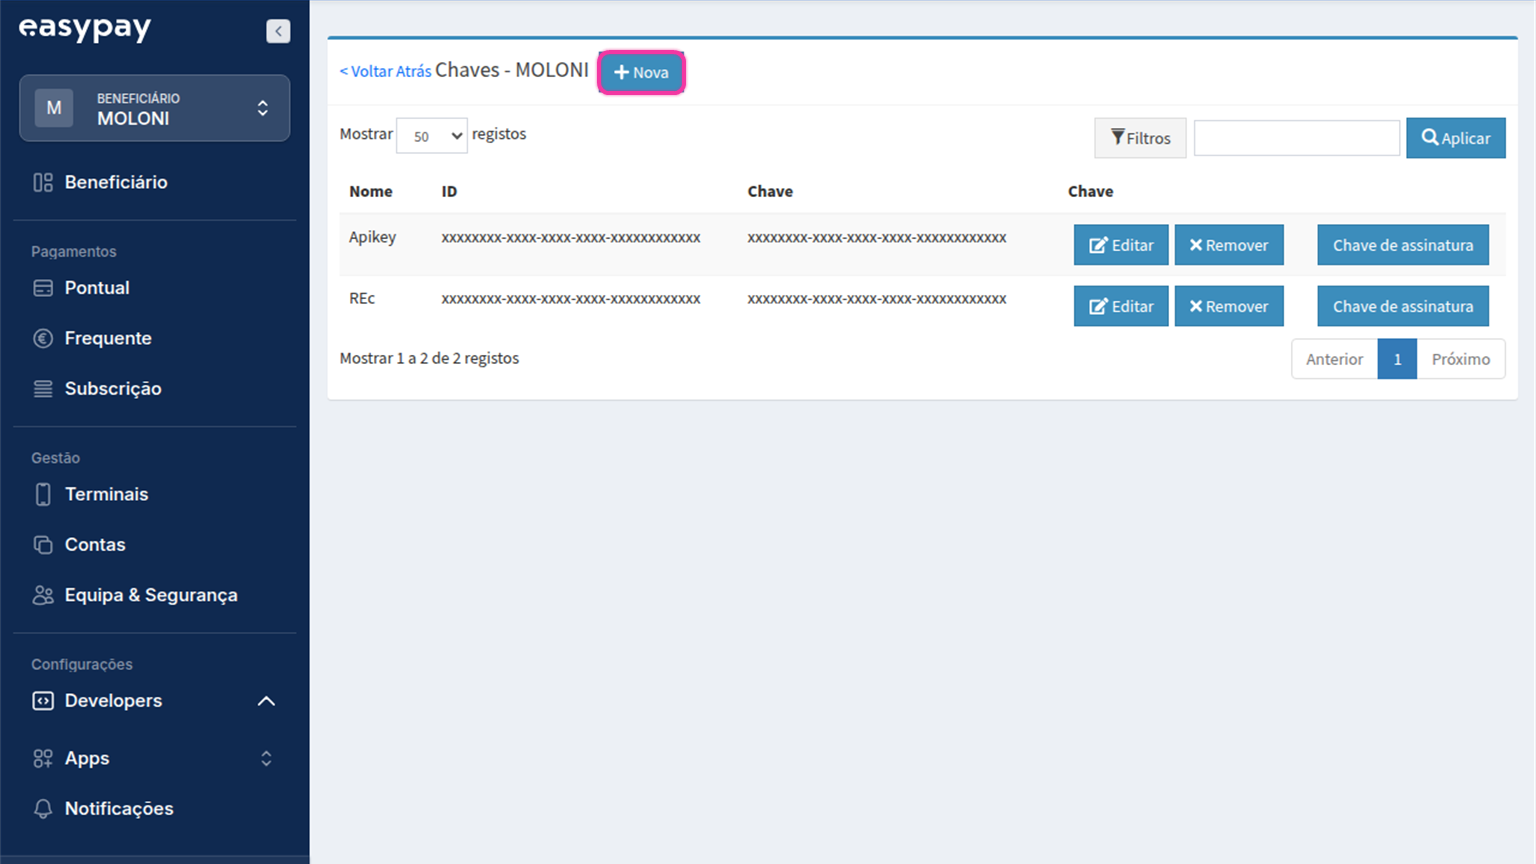
7. Enter the name you want to give the key and click Salvar.
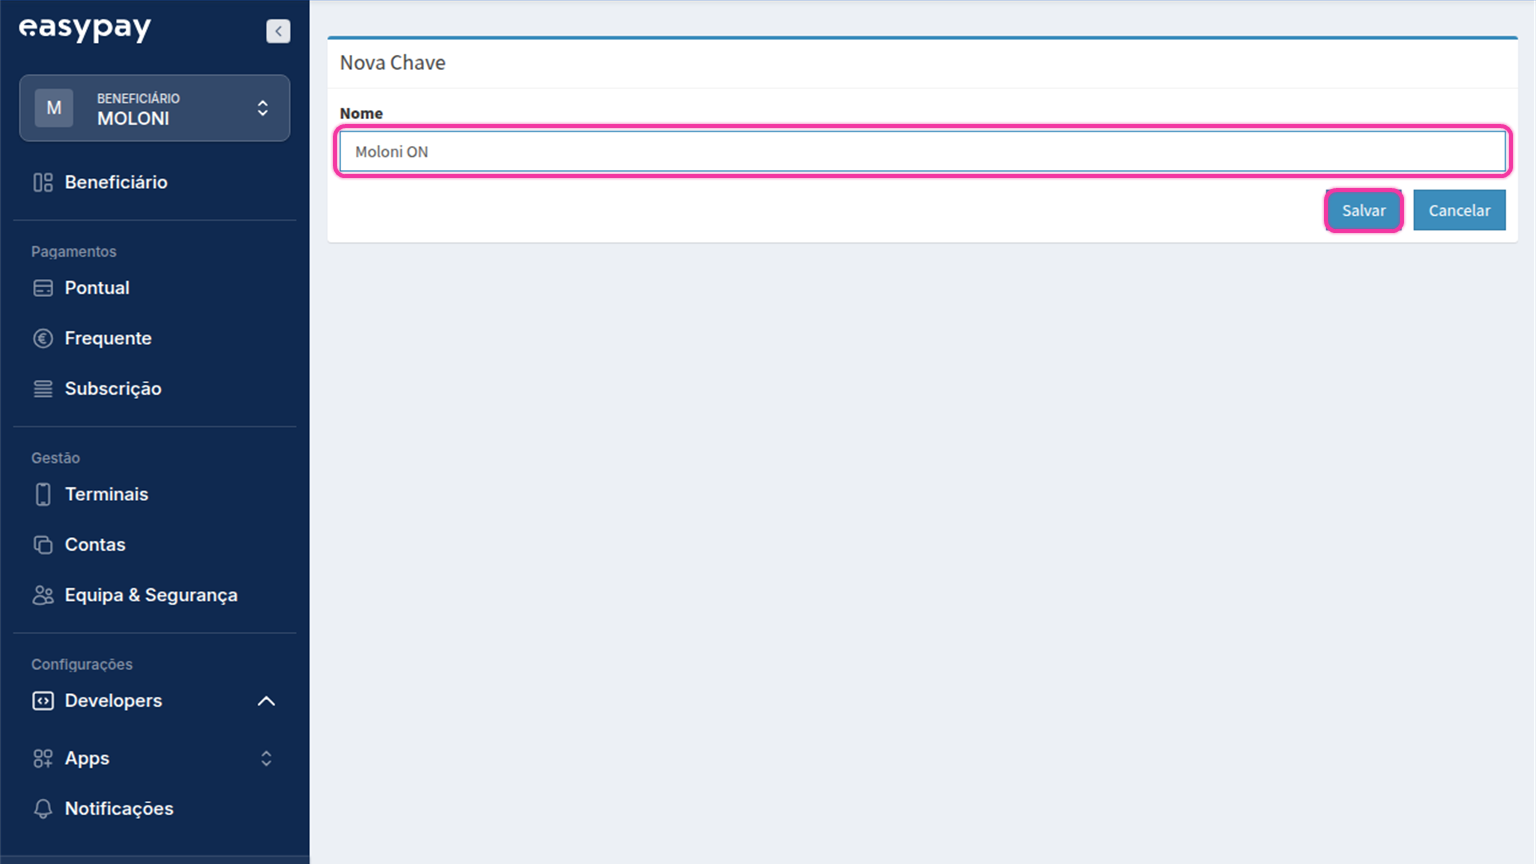
8. Click Voltar atrás.
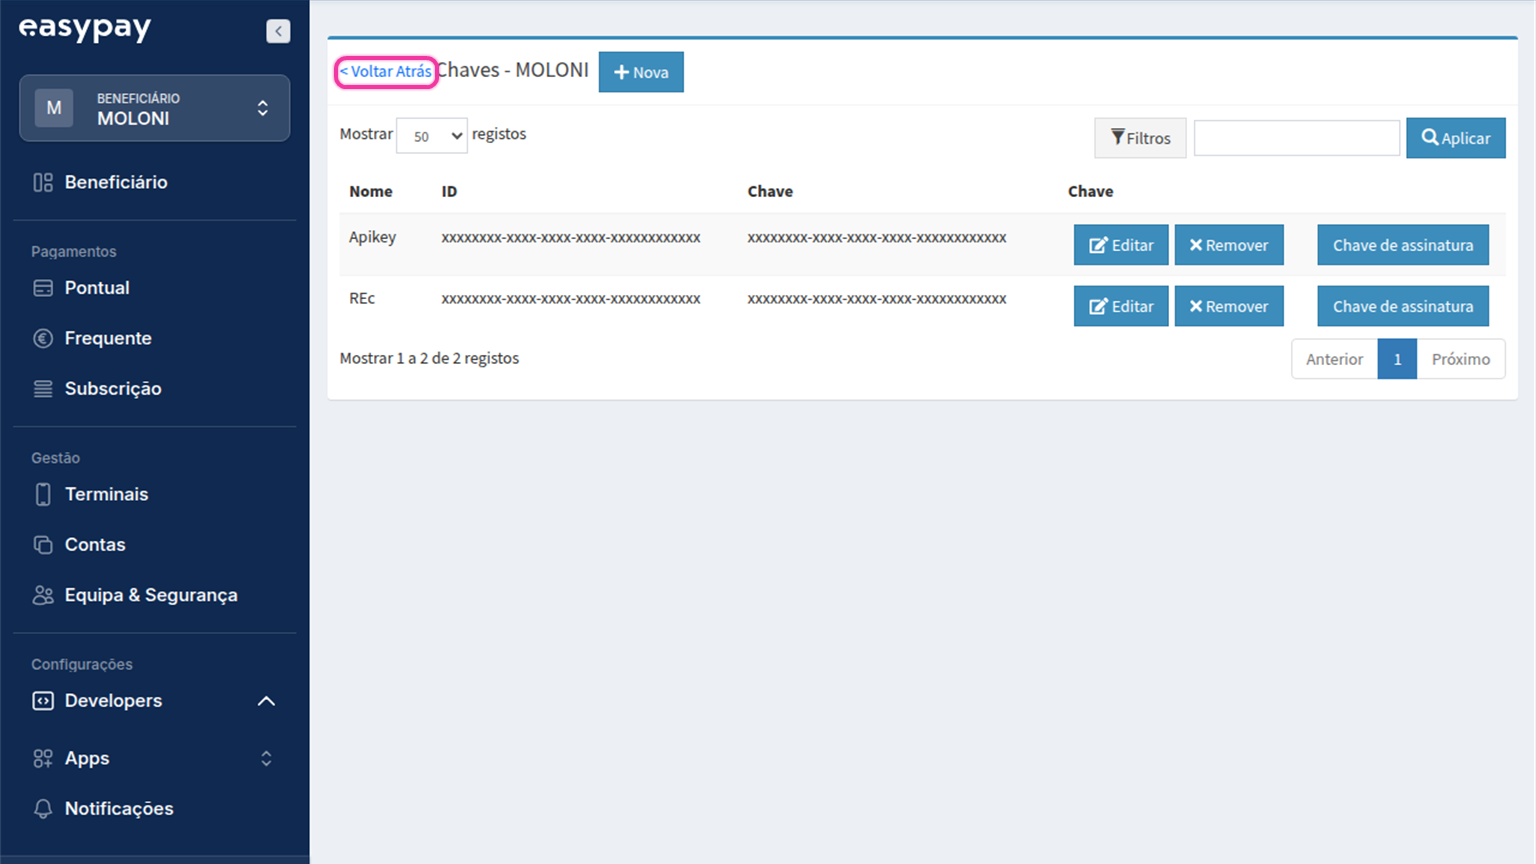
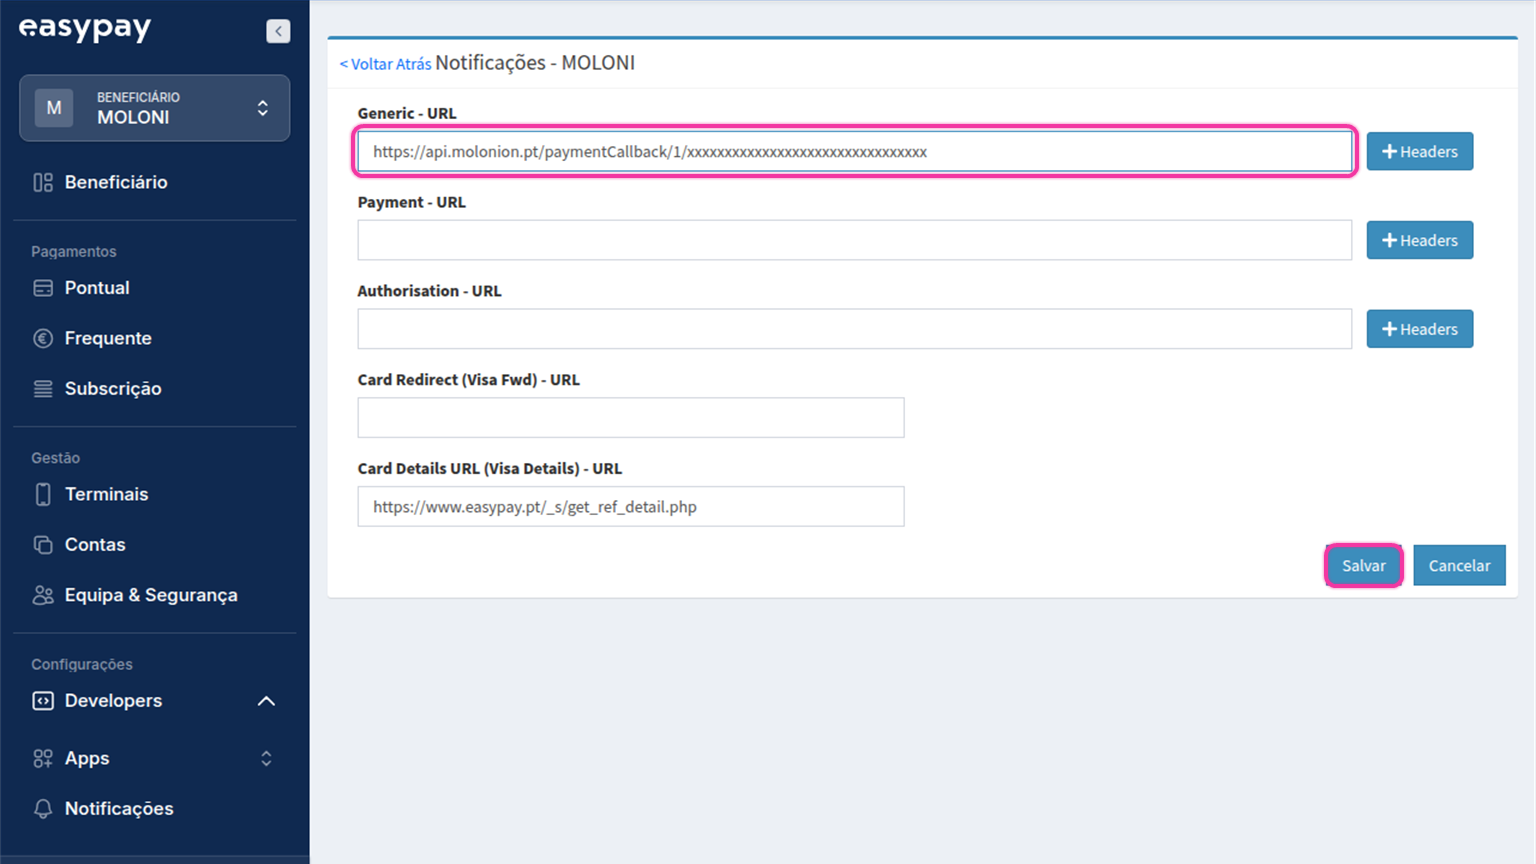
9. Click the Notificações button.
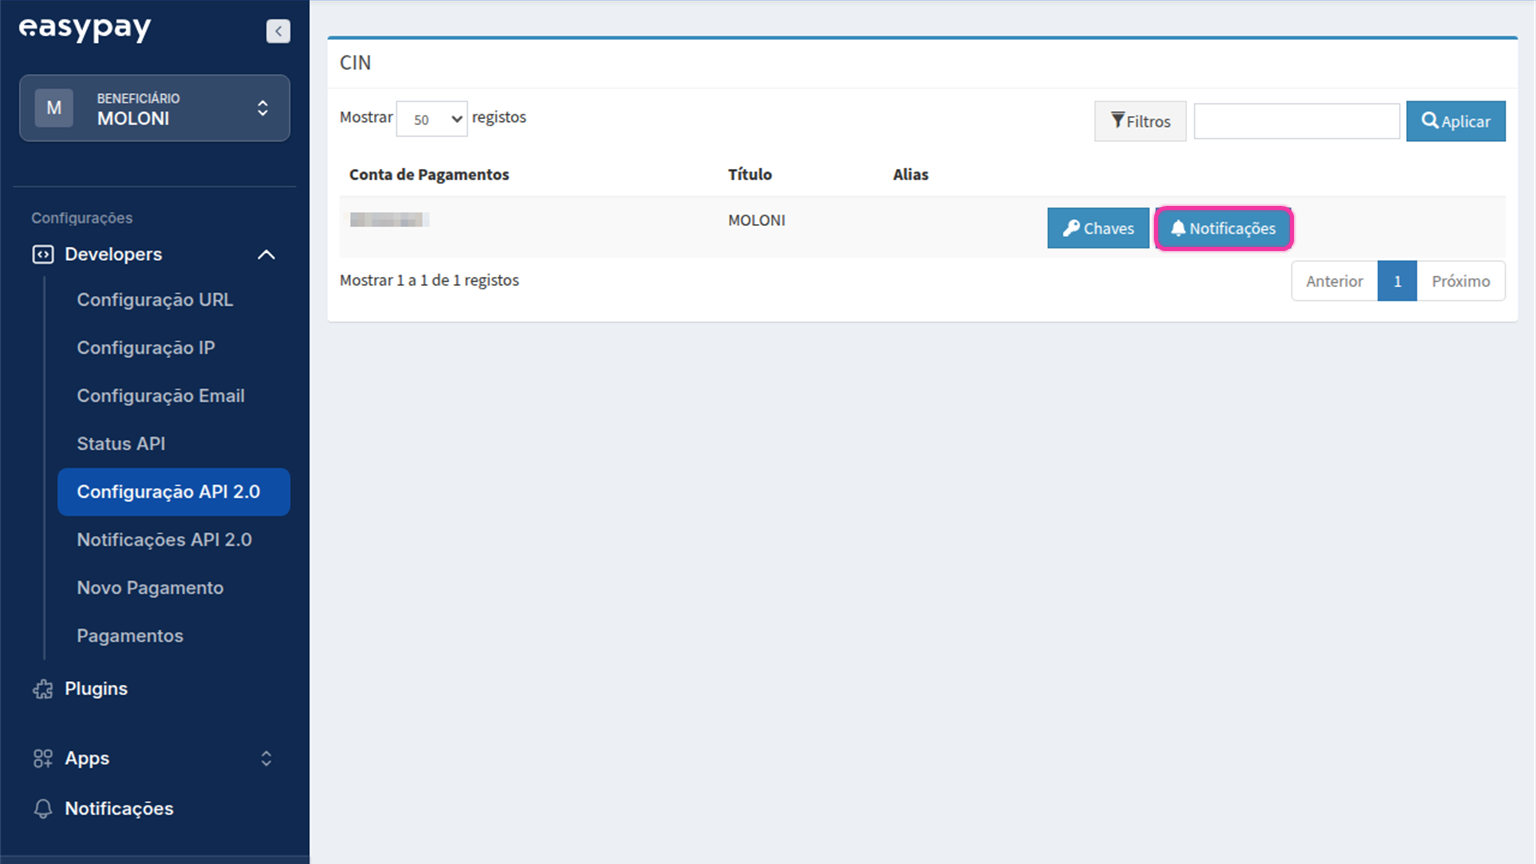
10. Check the Generic URL field: if it is empty or shows a different address, paste the callback you copied in Moloni ON and click Salvar.