How to add stock movements
Product stock levels consist of stock movements, which can be incoming or outgoing. It is only possible to add stock movements to products that have the Has stock option enabled.
Manual stock movements
By creating a product
Follow these steps:
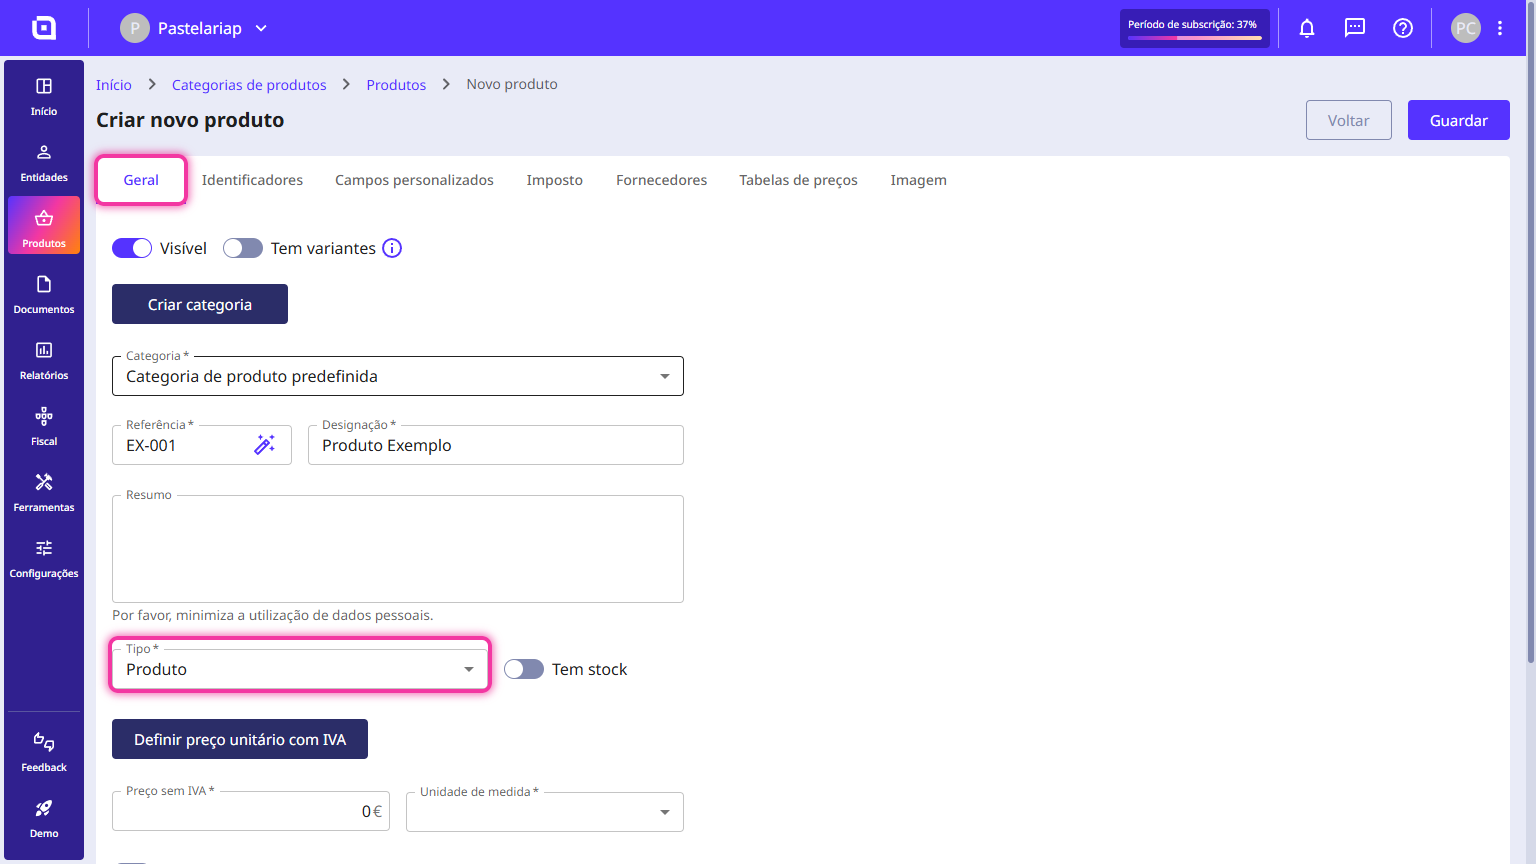
1. When creating a product, go to the General tab and in the Type field, select the Product option.
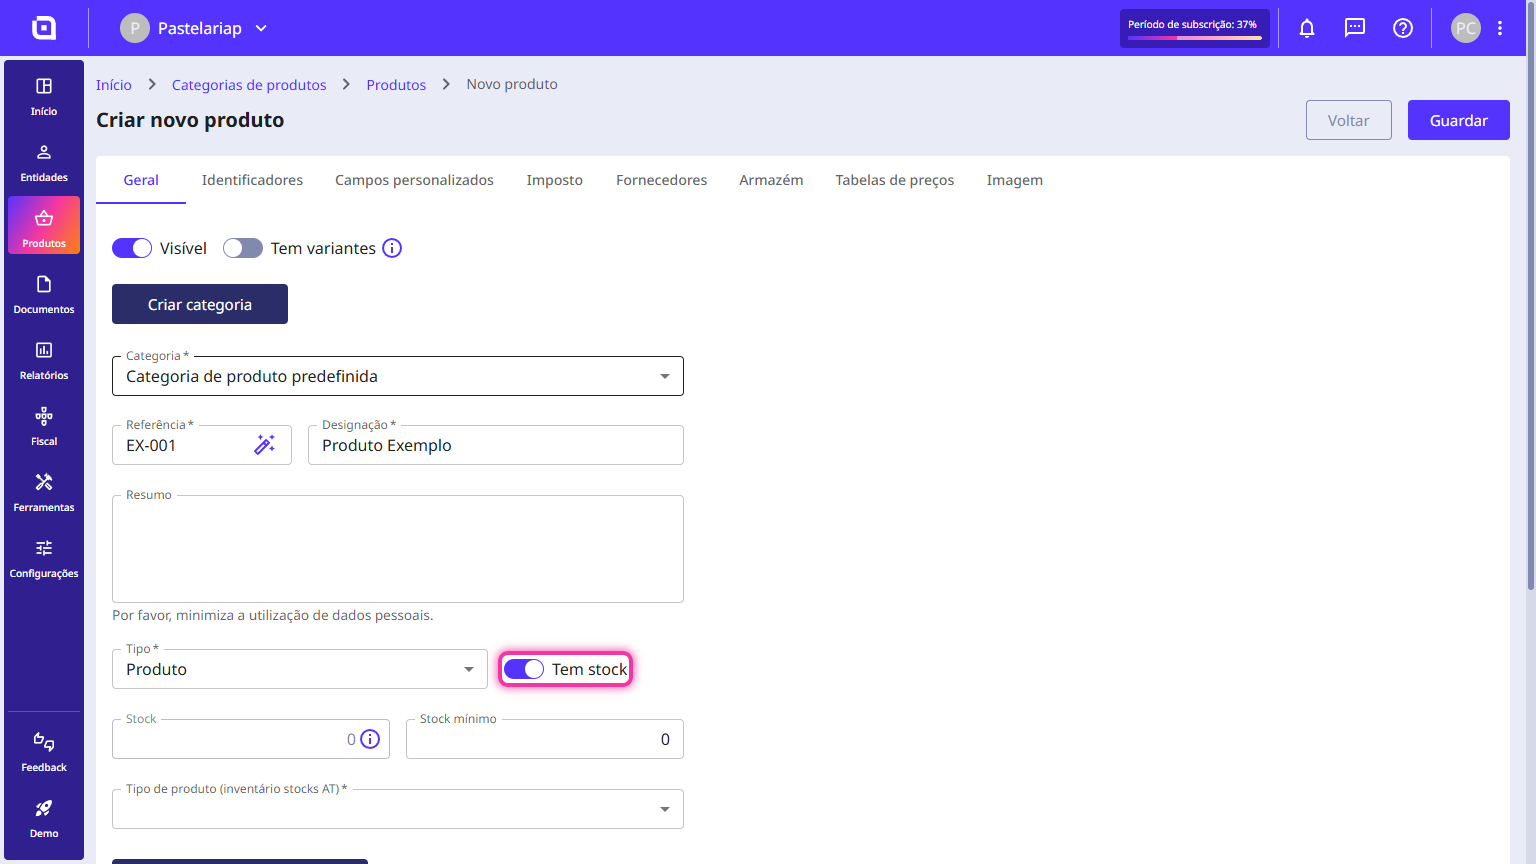
2. Enable the Has stock option.
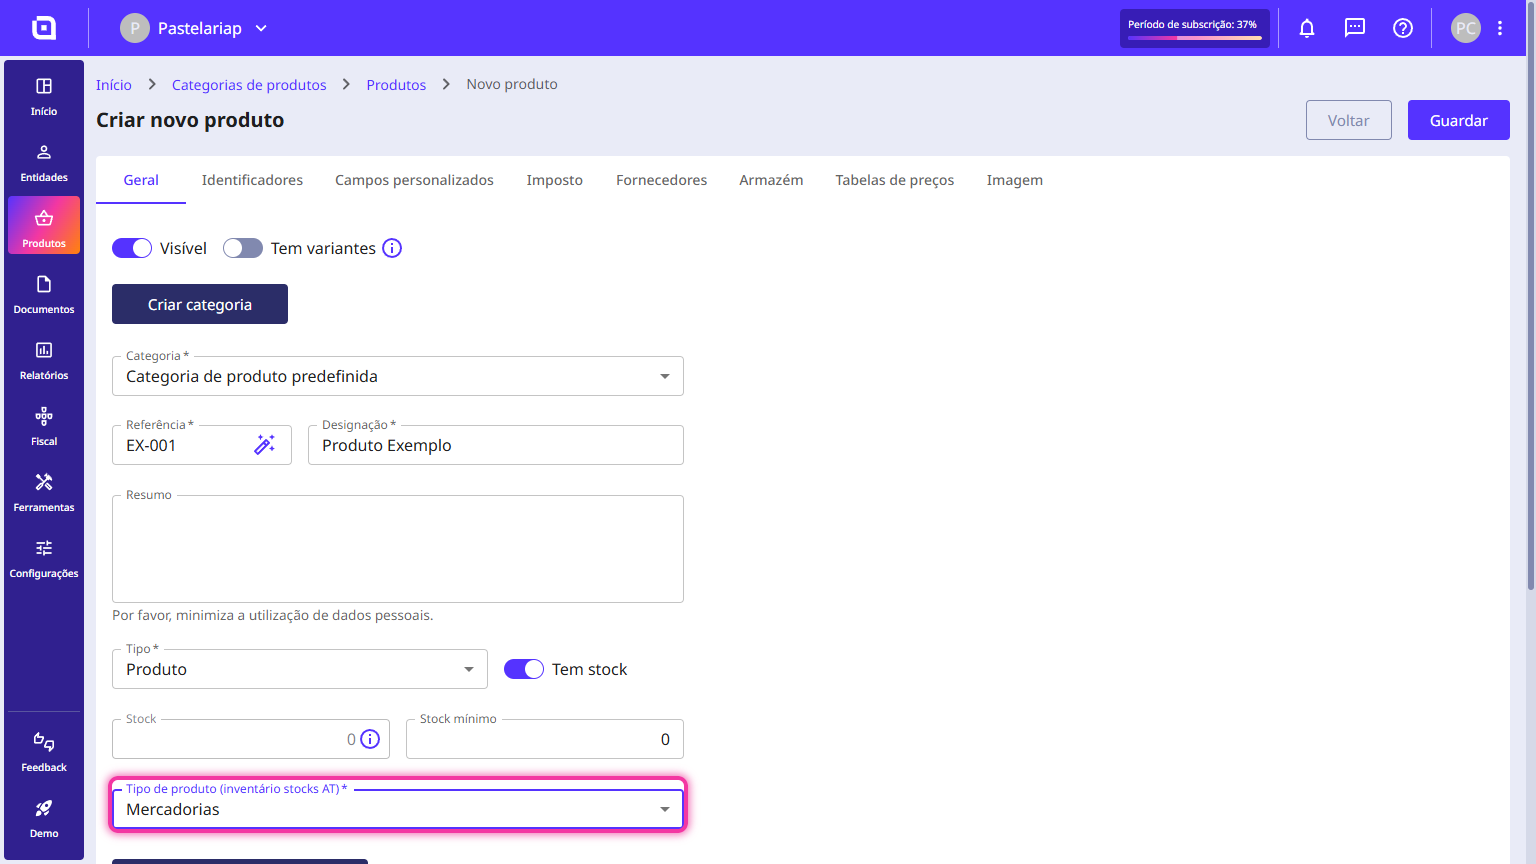
3. Fill in the Product type (TA stocks inventory) field with the corresponding option.
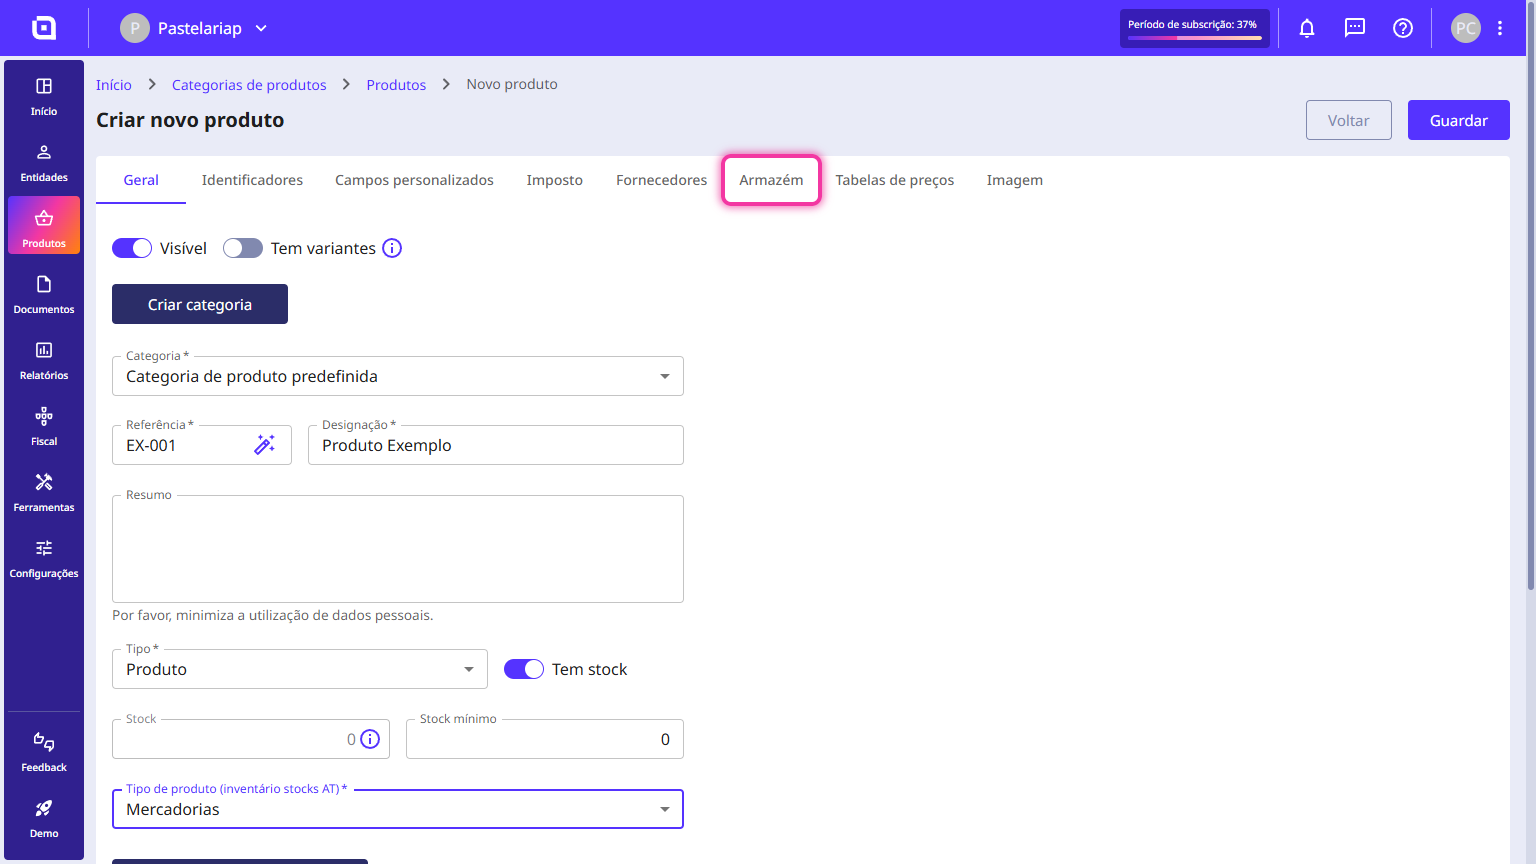
4. Go to the Warehouse tab.
5. In the Warehouses field, select the desired warehouse for the movement.
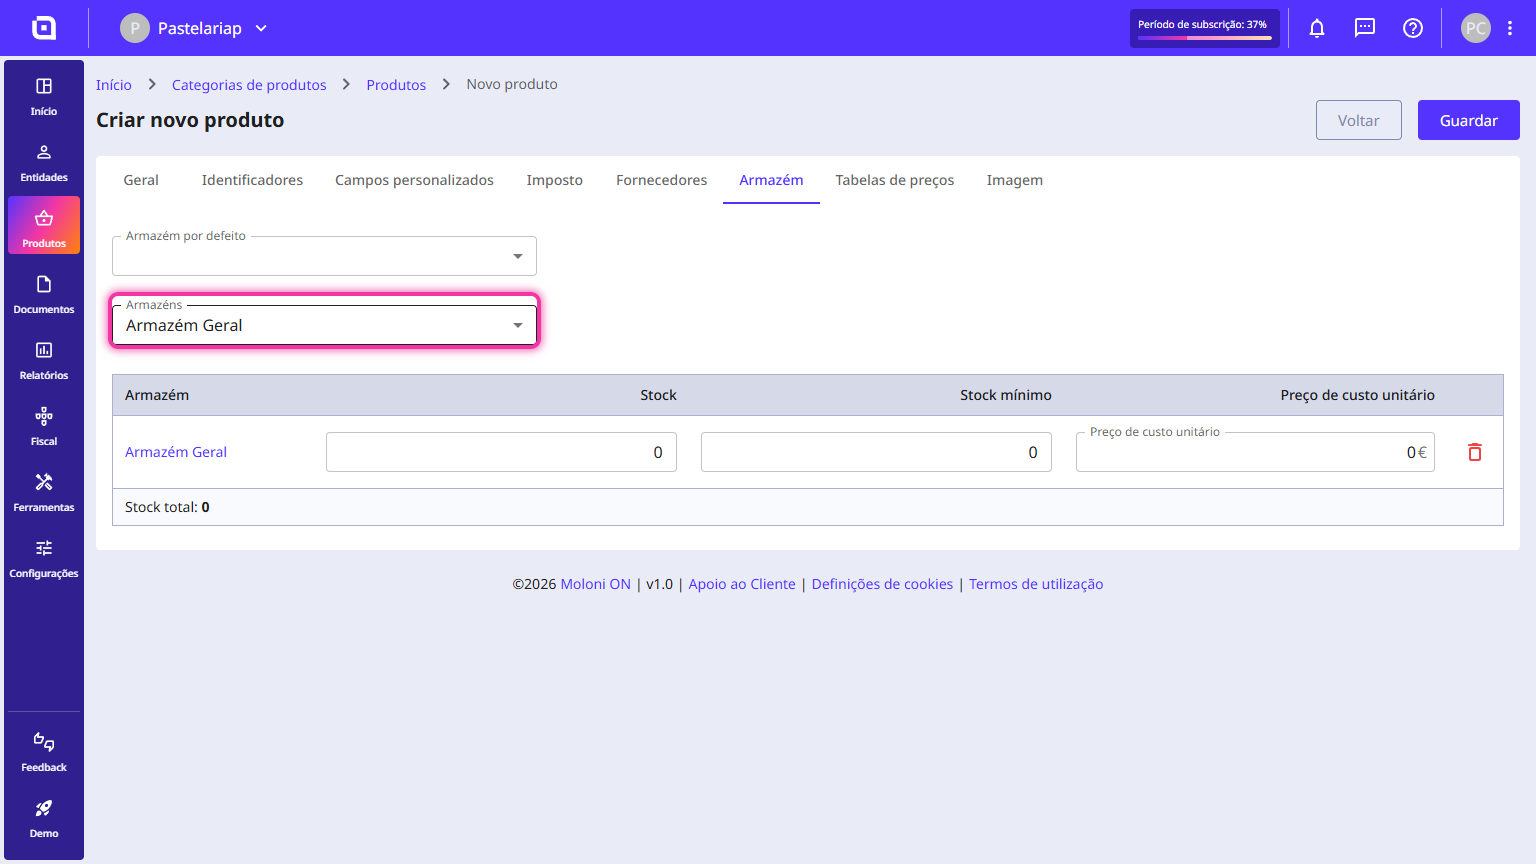
6. In the Stock column, enter the desired value.
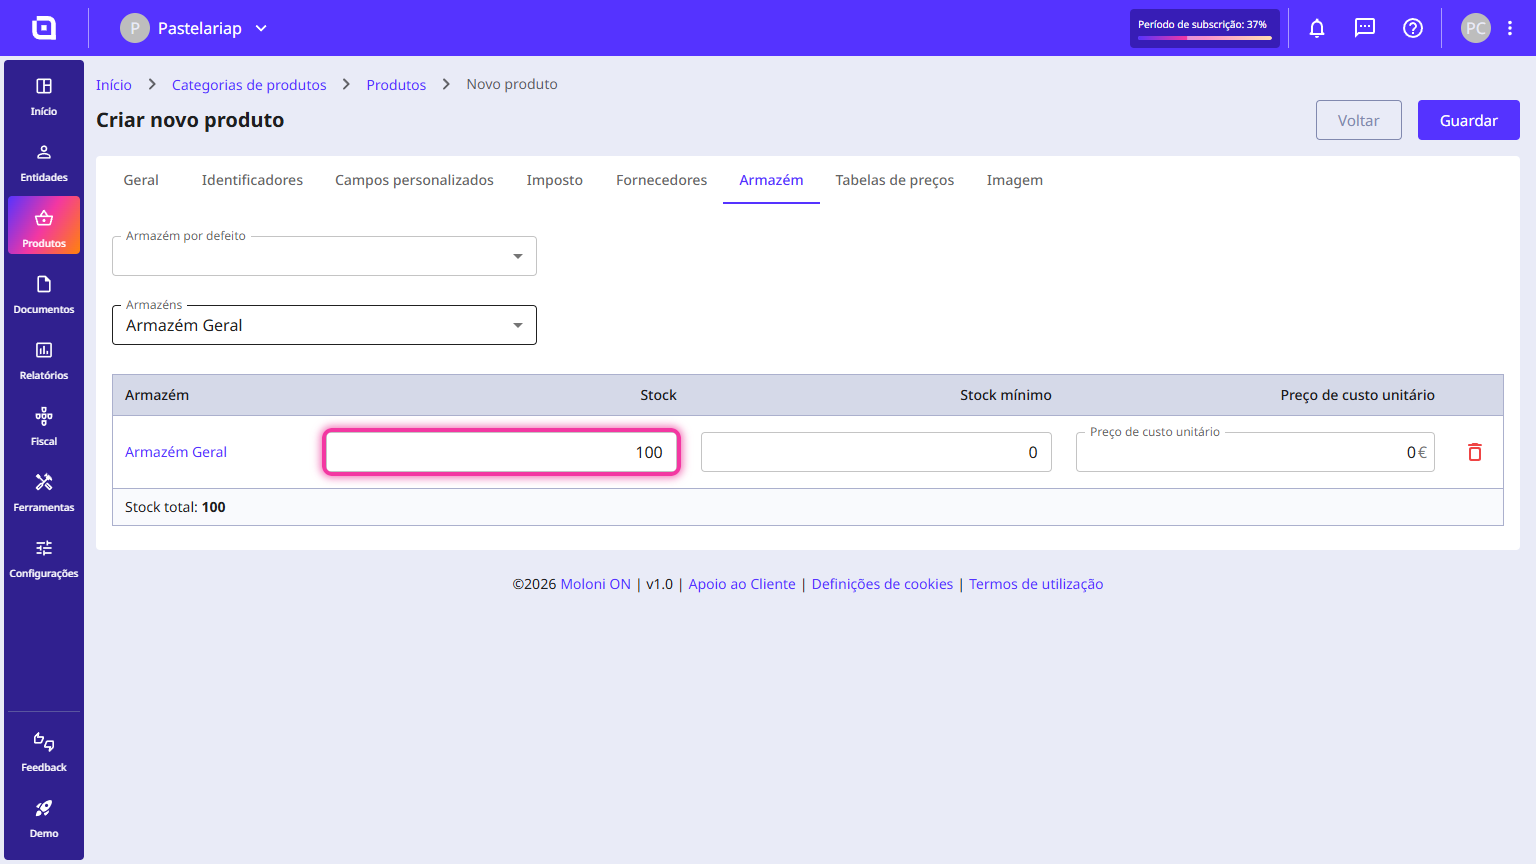
7. In the Minimum stock column, you can define the minimum number of units the product should have in stock. When this value is reached, a minimum stock alert is issued.
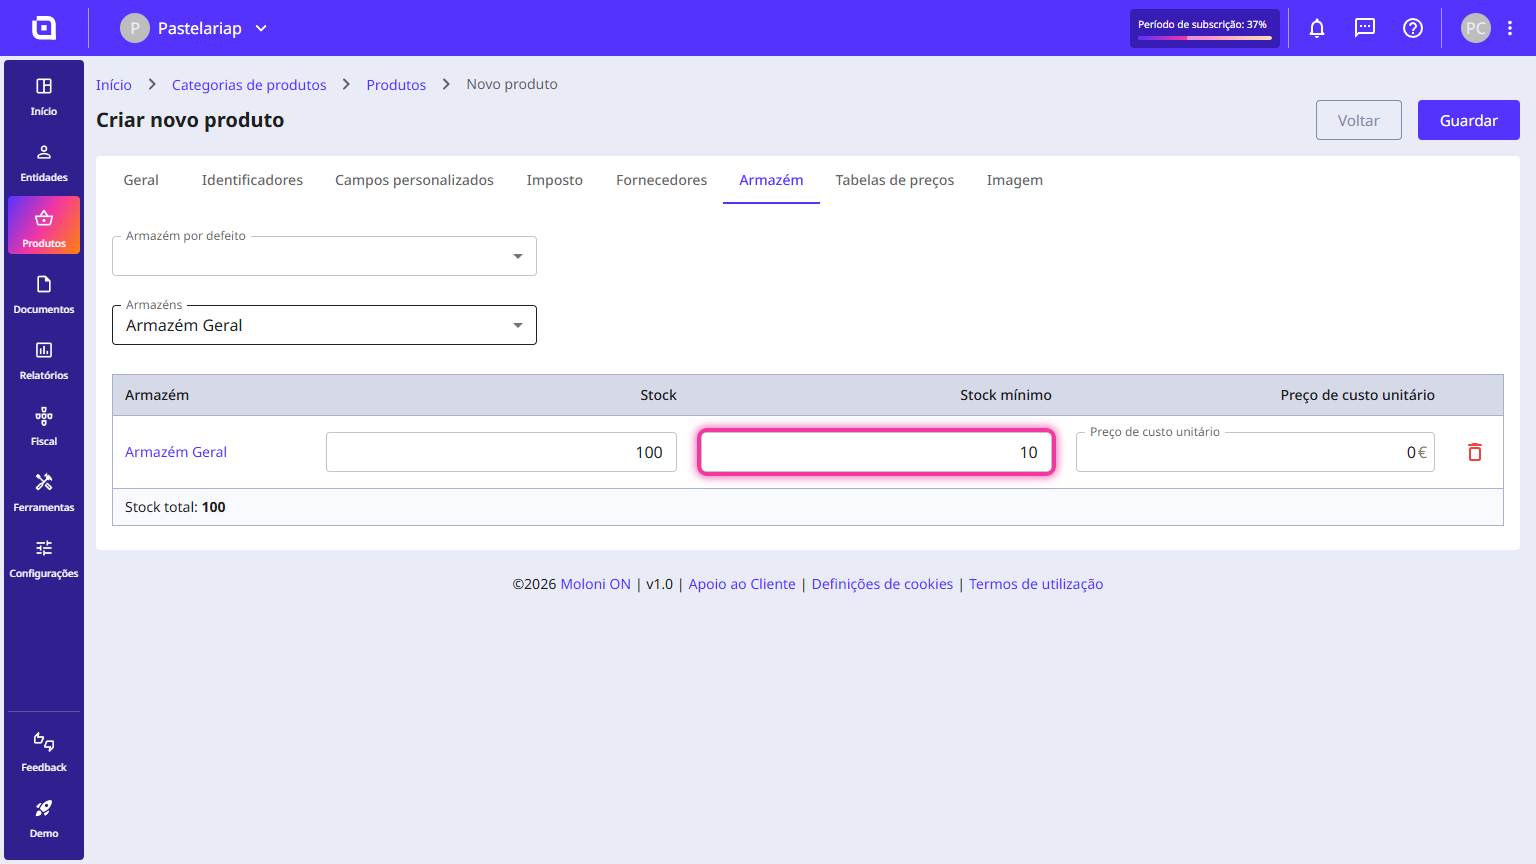
8. In the Unit cost price column, you can define the total value spent to produce or acquire one unit of your product.
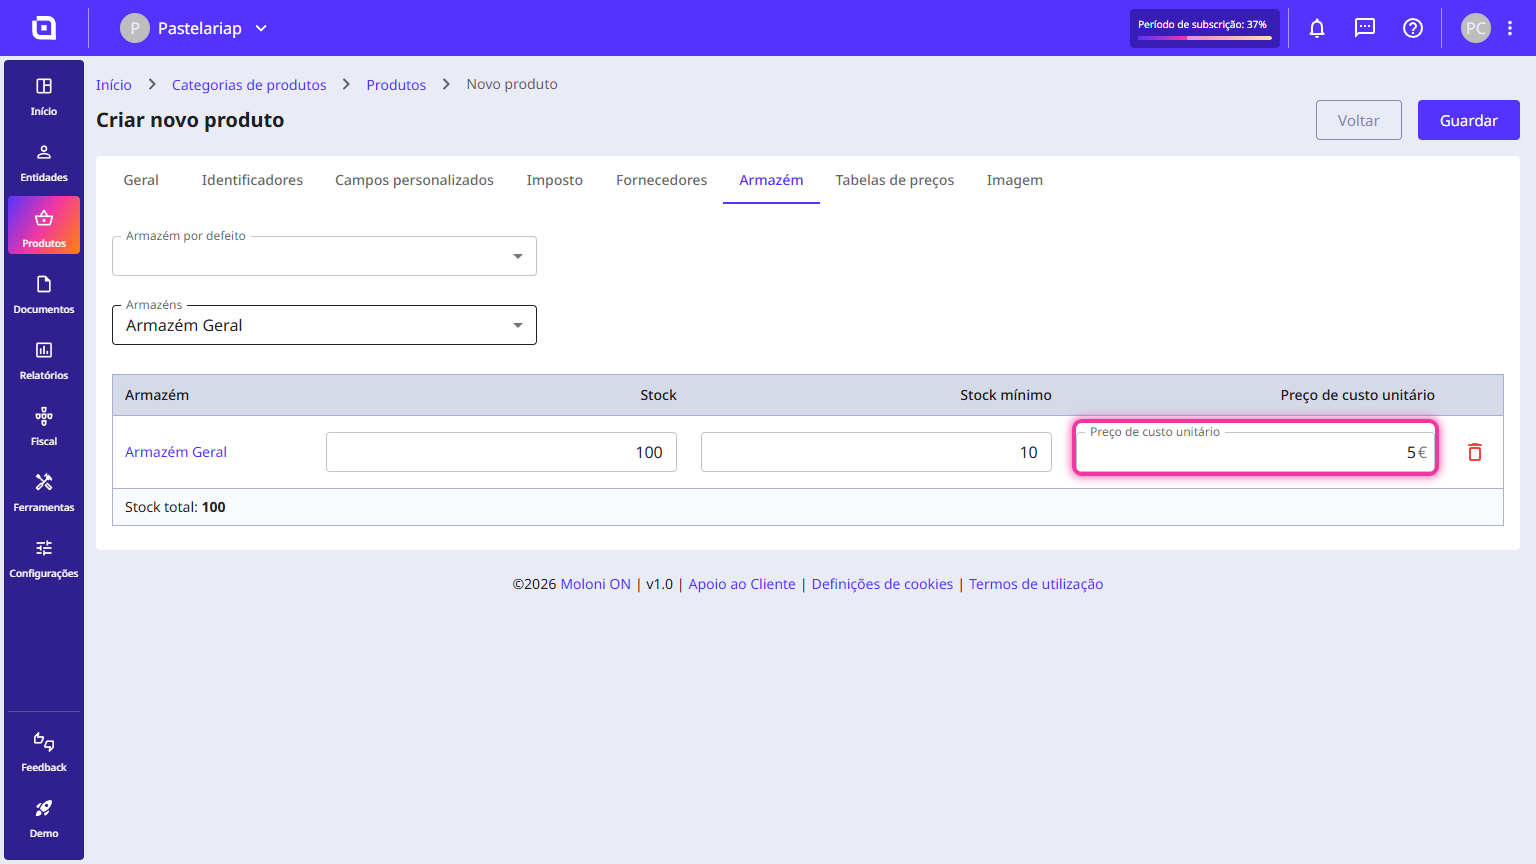
9. Click Save.
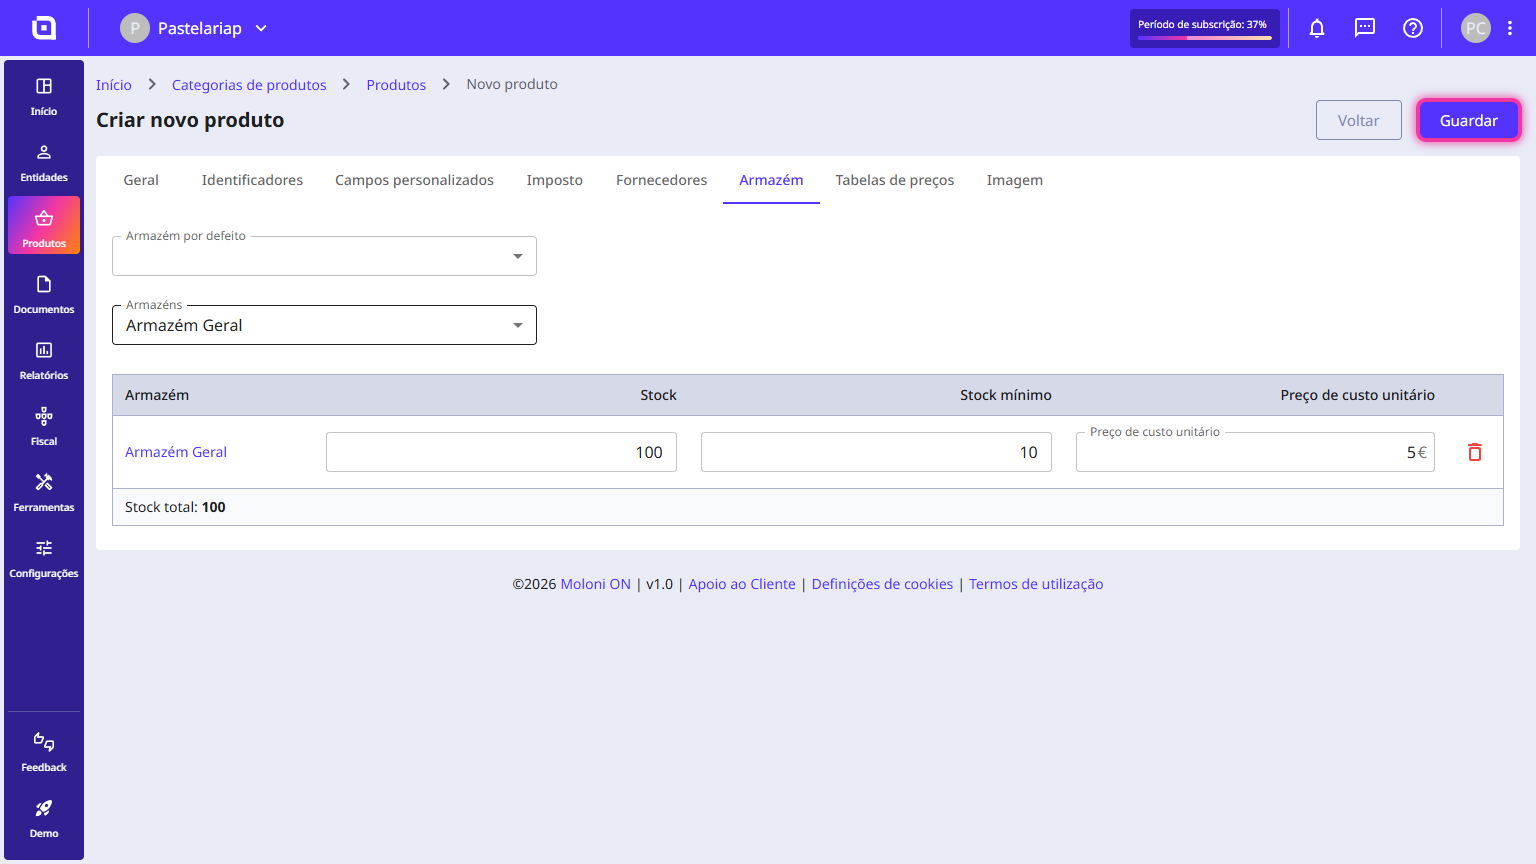
The stock has been added to your product. You can check the movement via the stock channel.
Through the Stocks channel
Follow these steps:
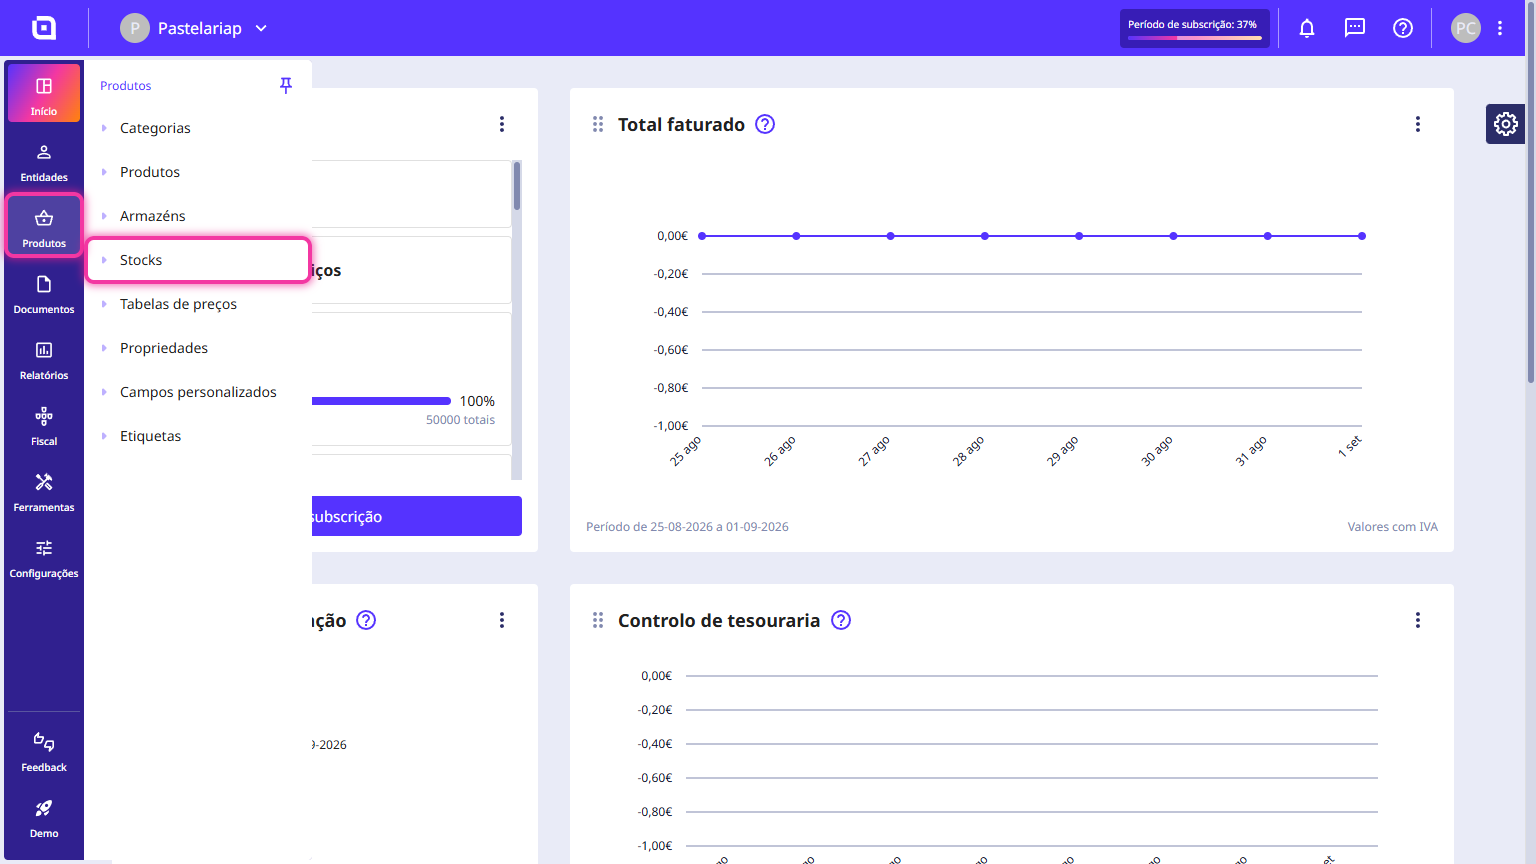
1. Go to the Products menu and select Stocks.
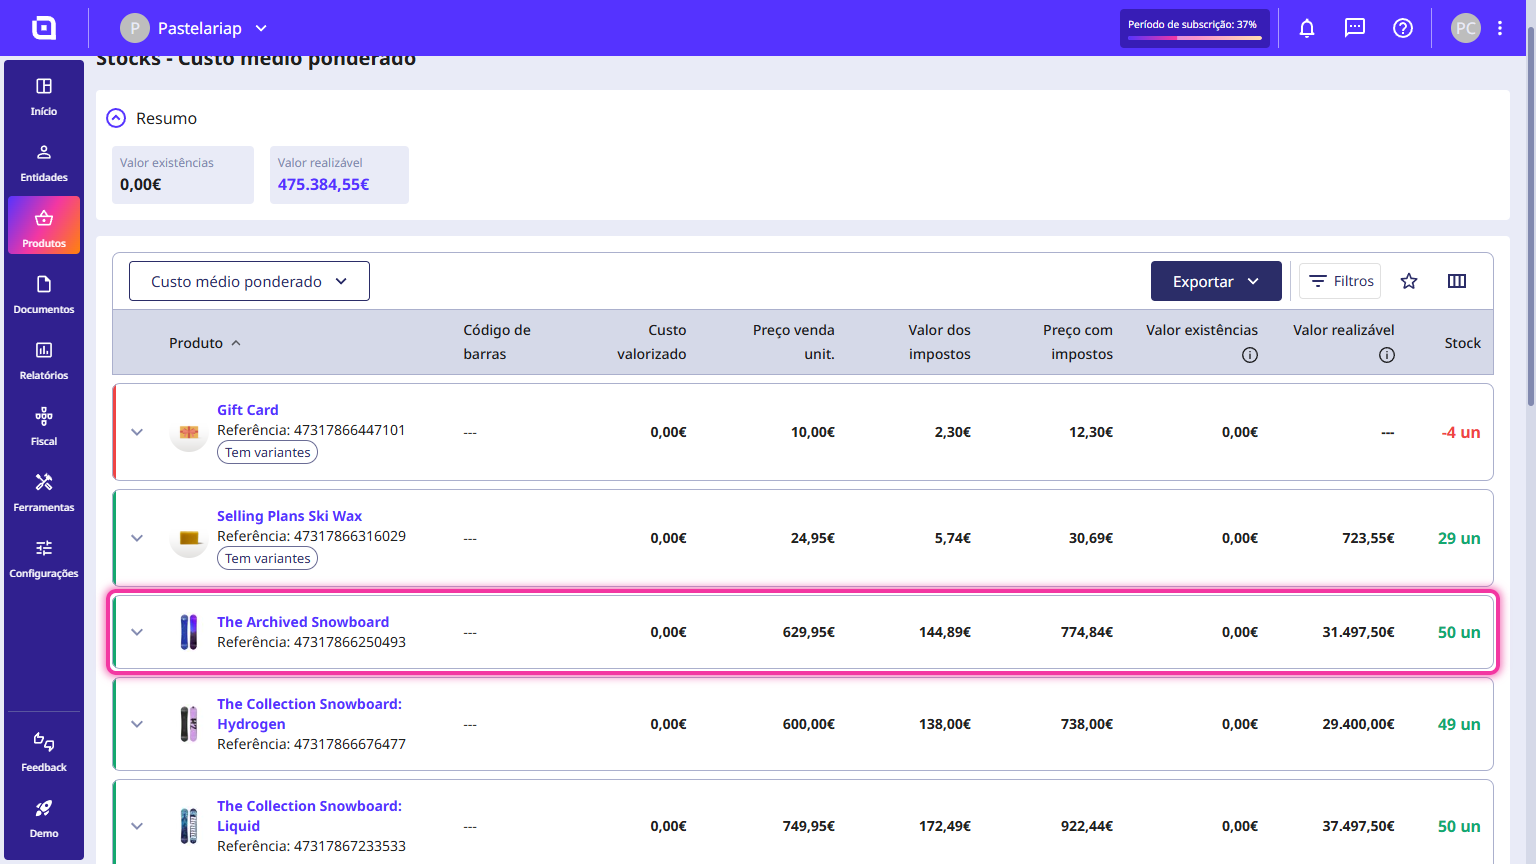
2. This page displays a list of products configured to have stock. Click on the product to add stock.
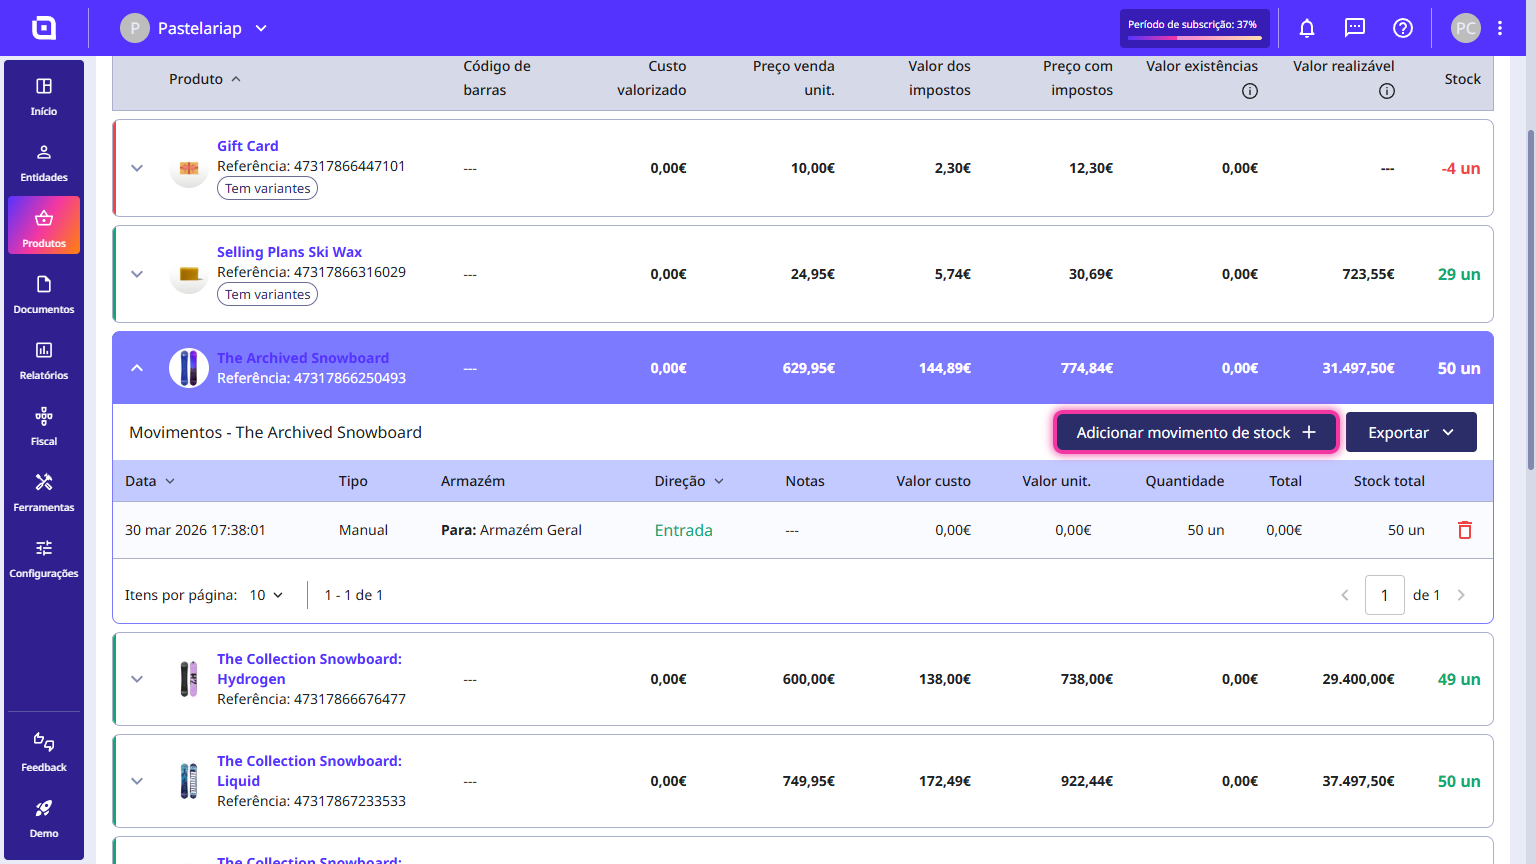
3. Click the Add stock movement button.
4. In the Movement field, select the type of stock movement (entry or exit).
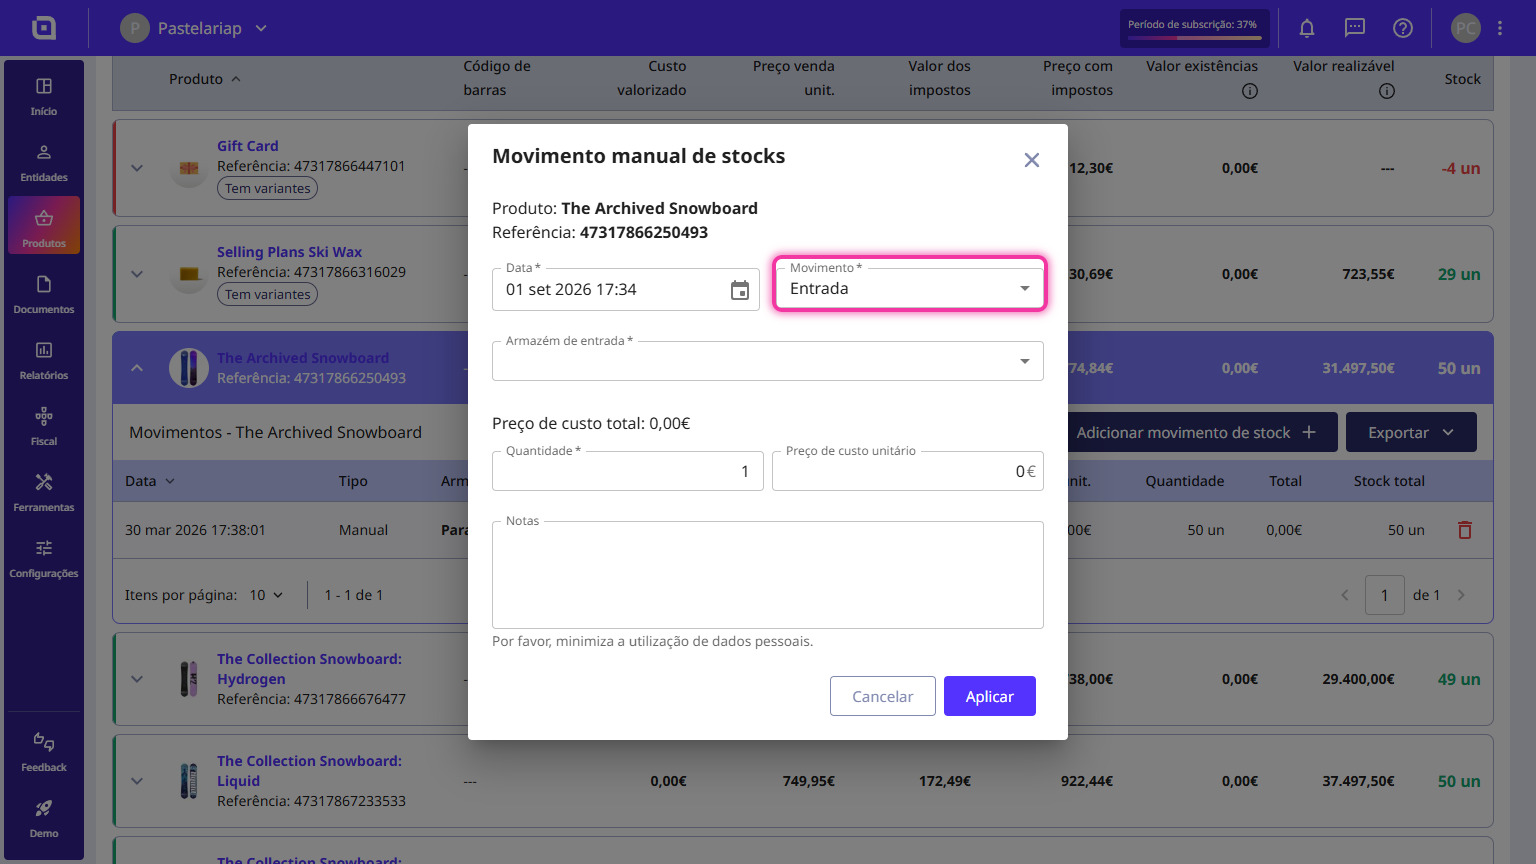
5. Select the warehouse in the Entry/Exit warehouse field.
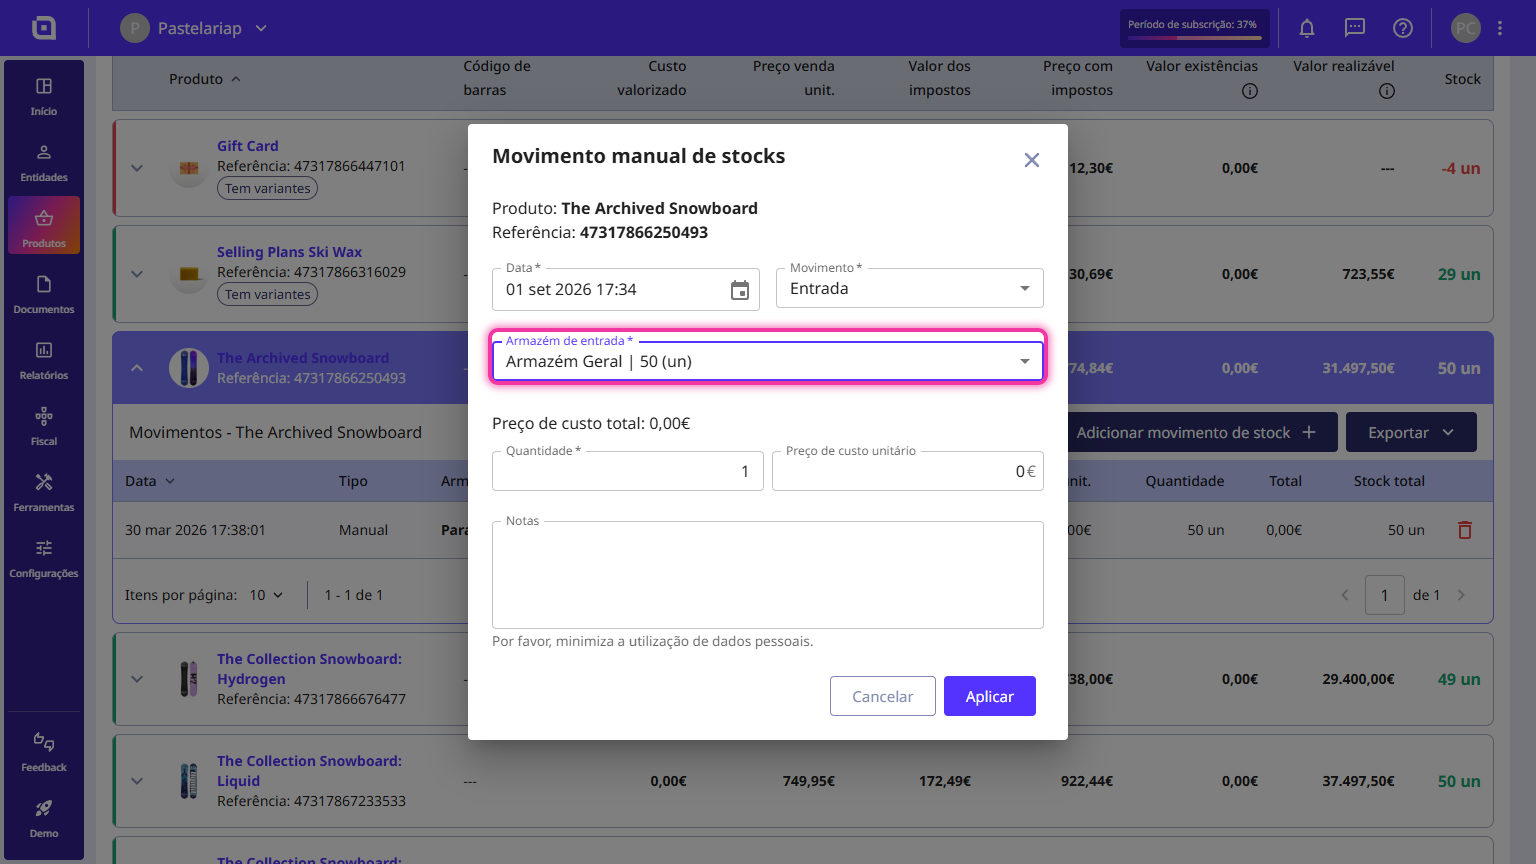
6. In the Quantity field, enter the desired value.
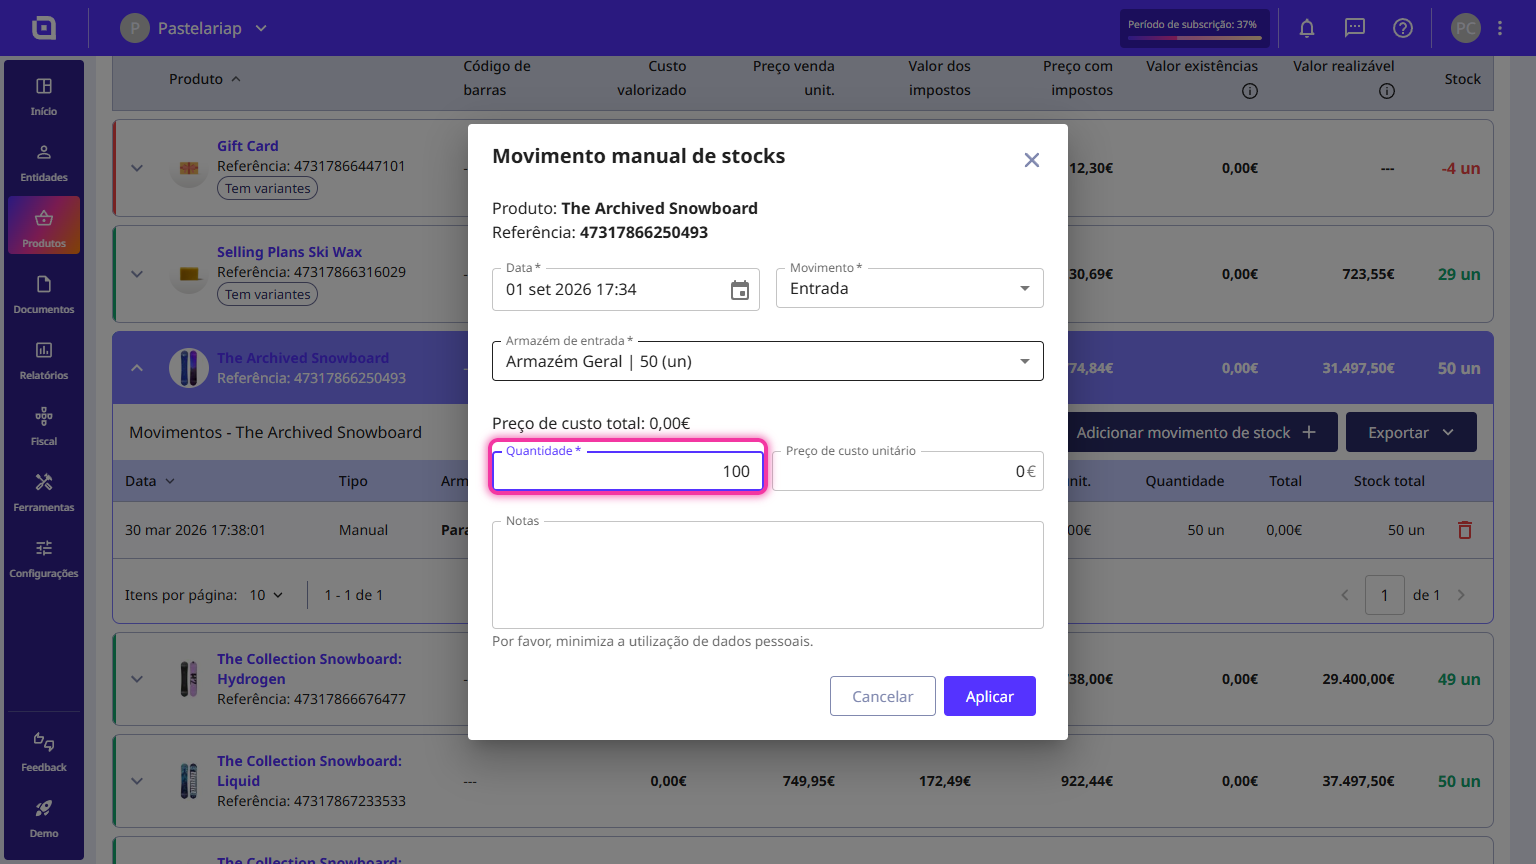
7. In the Unit cost price field, you can define the total value spent to produce or acquire one unit of your product.
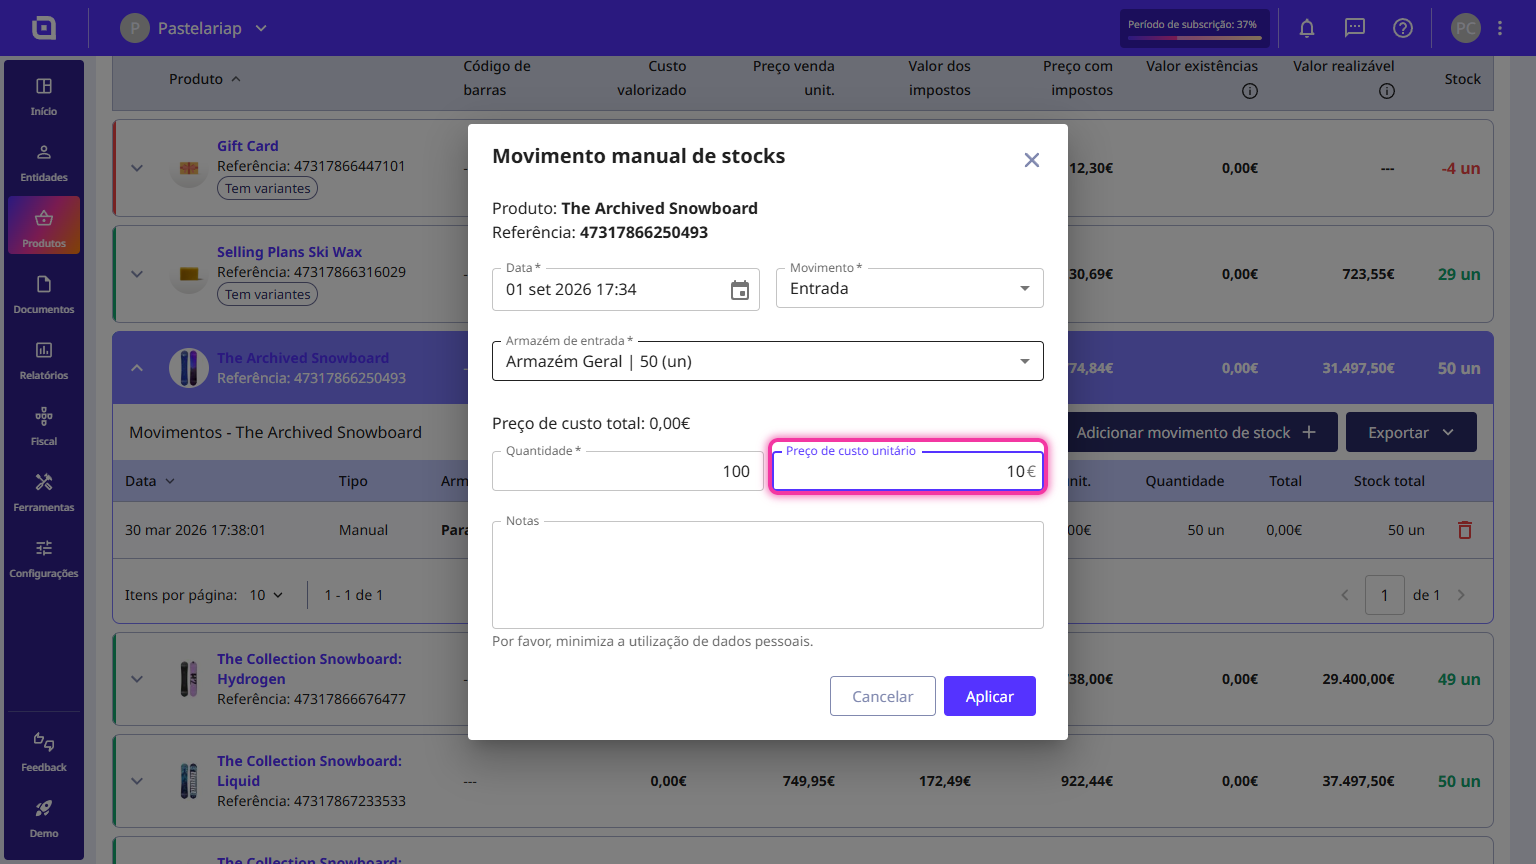
8. Click the Apply button.
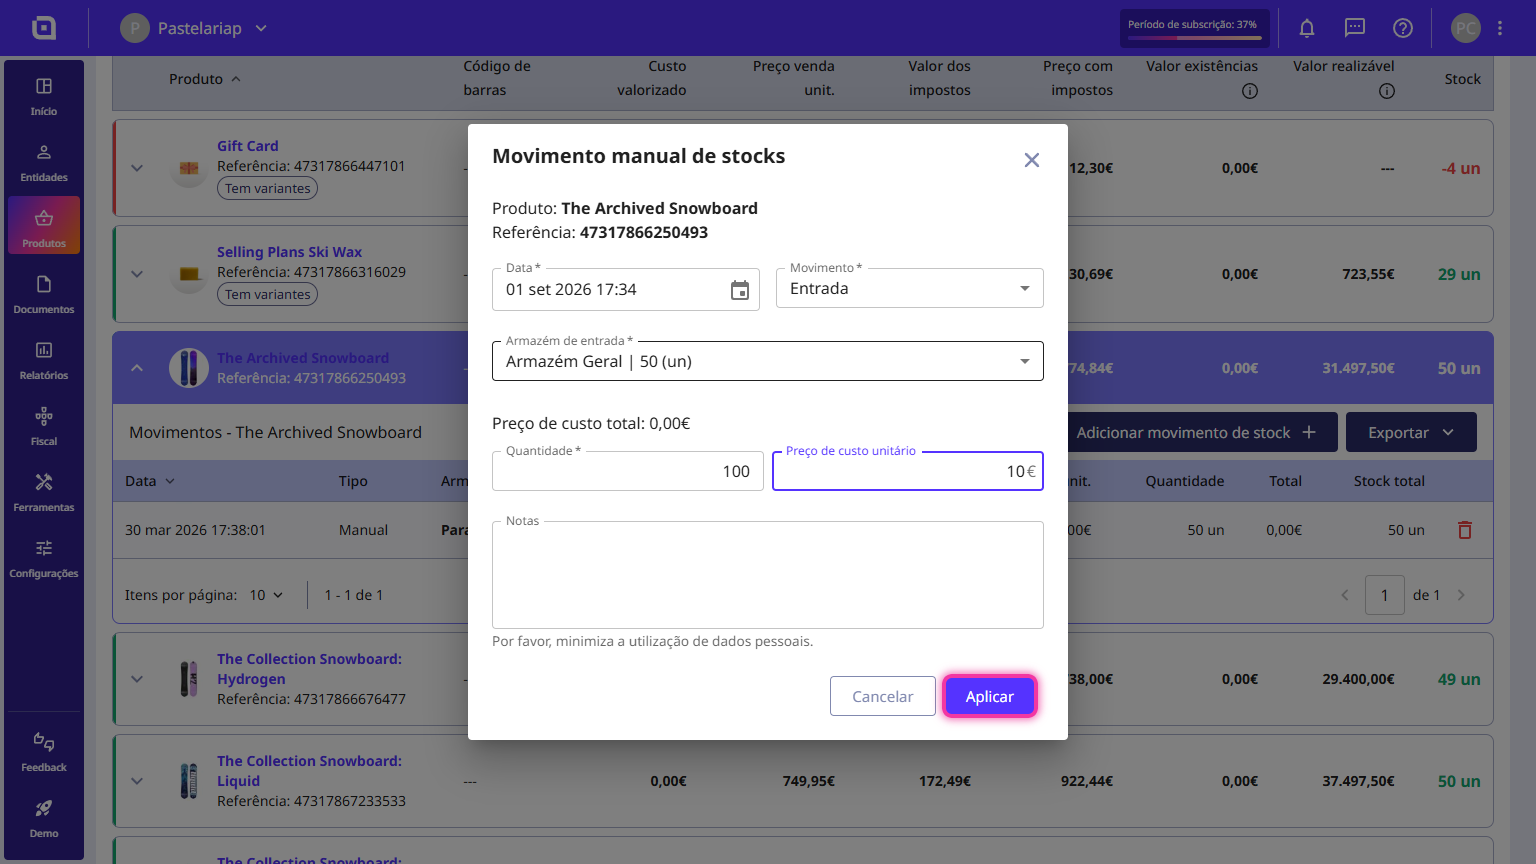
The stock has been added to your product. You can check the movement in the list.
Automatic stock movements
Automatic stock movements are generated by creating purchase or sales documents, provided the products have the Has stock option enabled.
Documents that generate outgoing stock movements:
- Invoice;
- Simplified Invoice;
- Invoice/Receipt;
- Supplier Credit Note;
- Transport Note (if the Transport documents move stock option is enabled).
Documents that generate incoming stock movements:
- Credit Note;
- Supplier Invoice;
- Supplier Simplified Invoice.