How to create an account
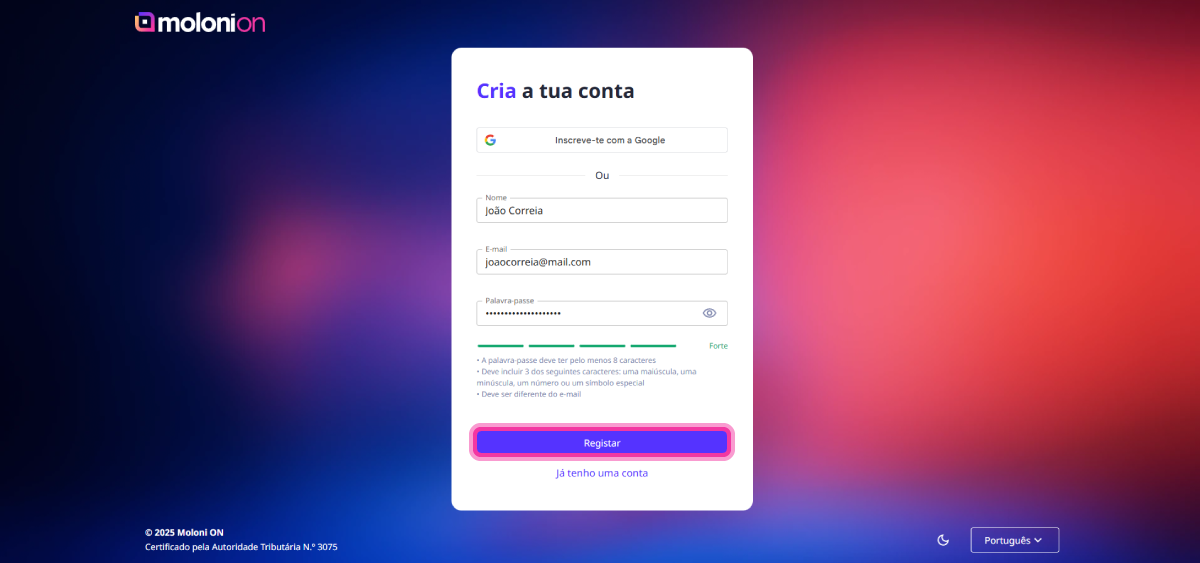
Create your account
To create an account on Moloni ON, you must register and then create your company, as explained in the steps below.
Follow the steps:
1. Go to www.molonion.pt and click on Get your free trial, located at the bottom center of the page.

2. Enter the requested information such as name, email, and password.

3. Click on Sign up.
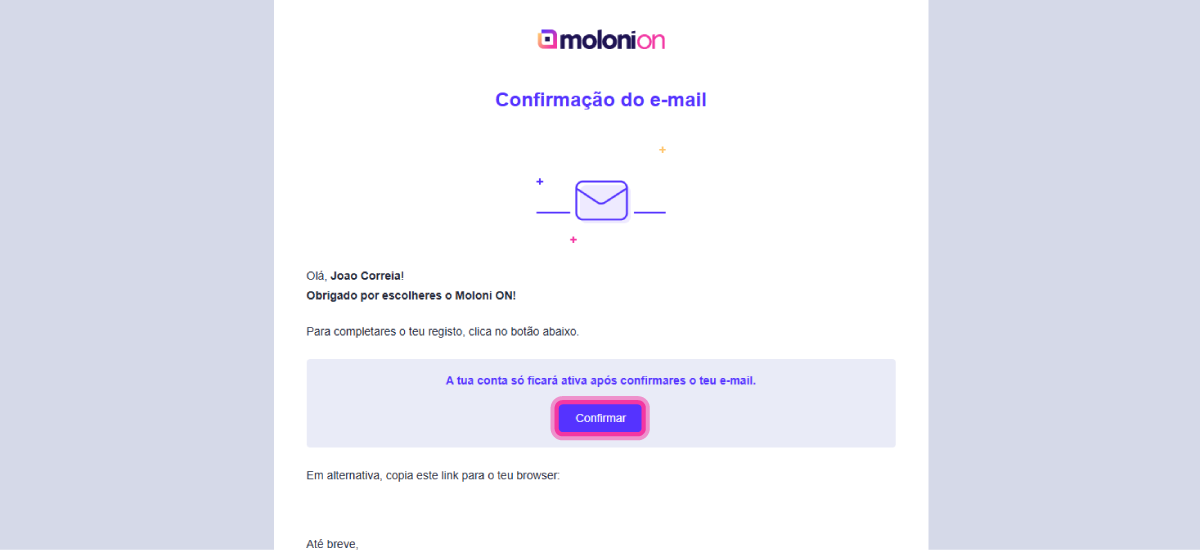
4. Check your email and confirm your account by clicking on the button Confirm.
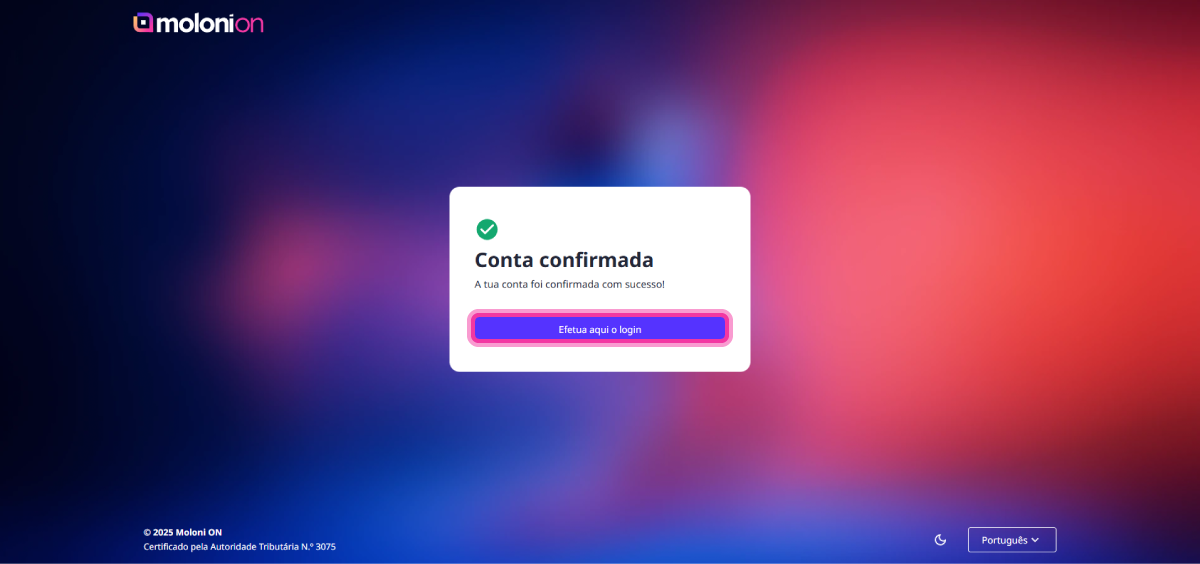
5. Your account has been successfully confirmed. Click on Go to login.
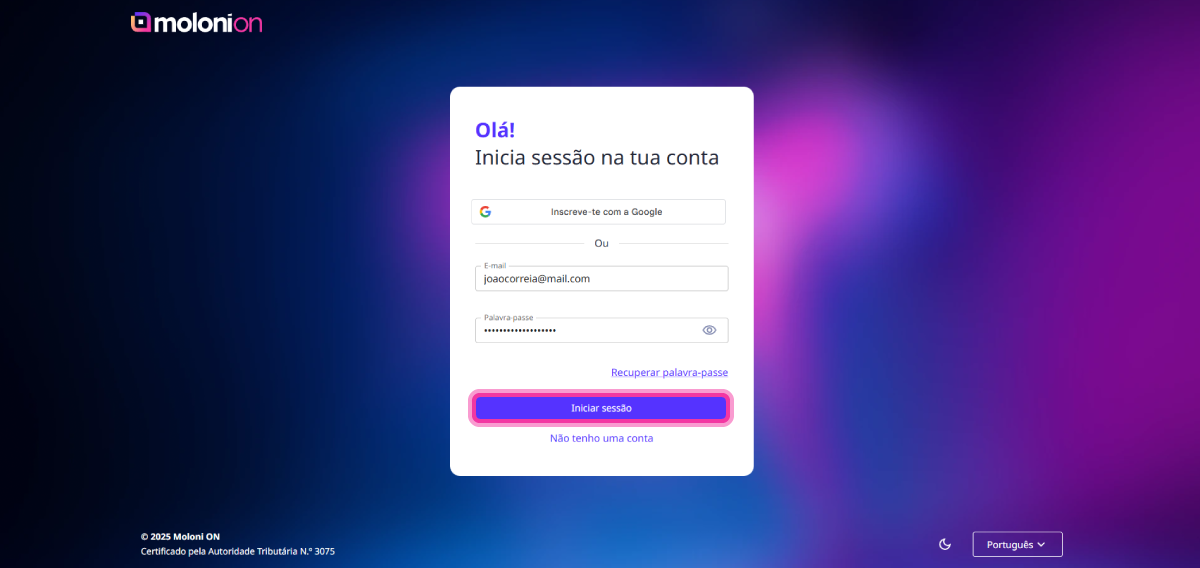
6. Enter your login details again and click on Log in.
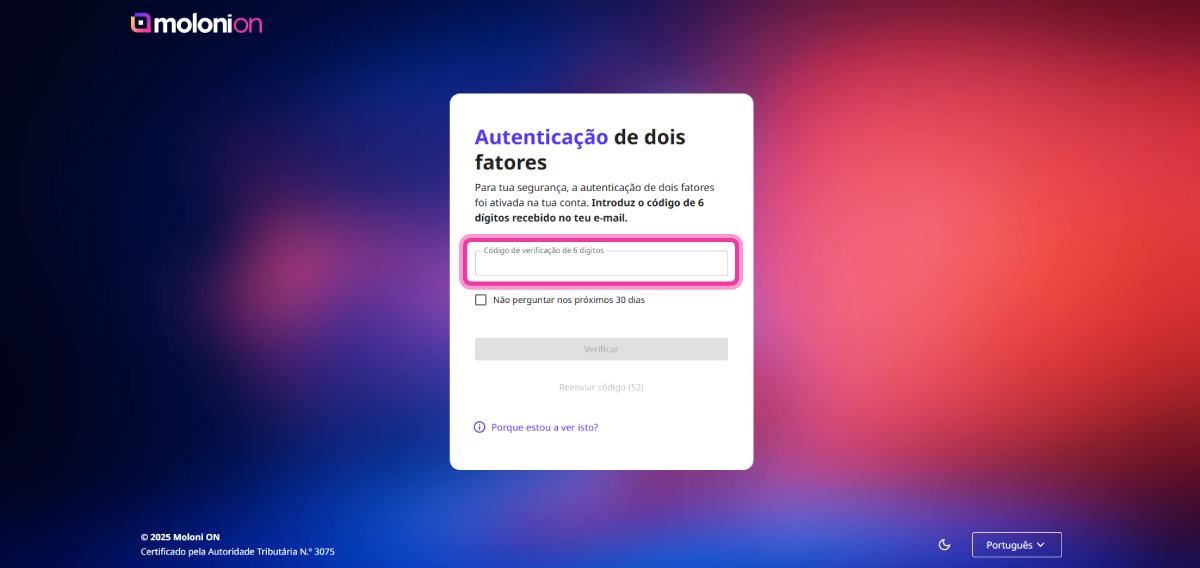
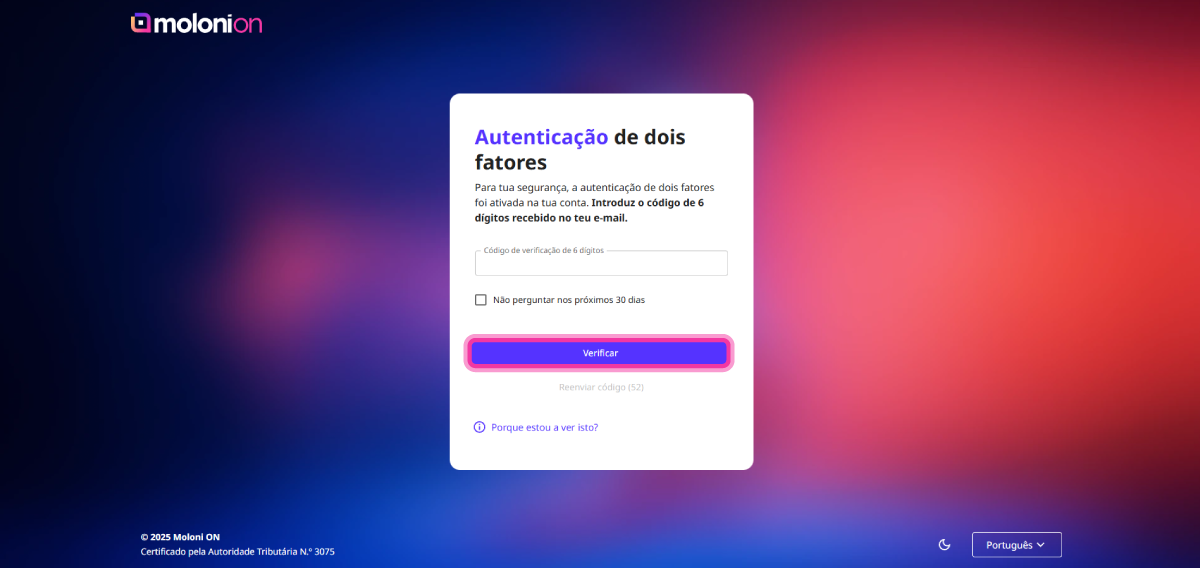
7. For security reasons, you must enable 2FA authentication. To do this, access your email again and copy the verification code you received. This code must be entered in the 6-digit verification code.
8. After entering the code, click the Verify button.
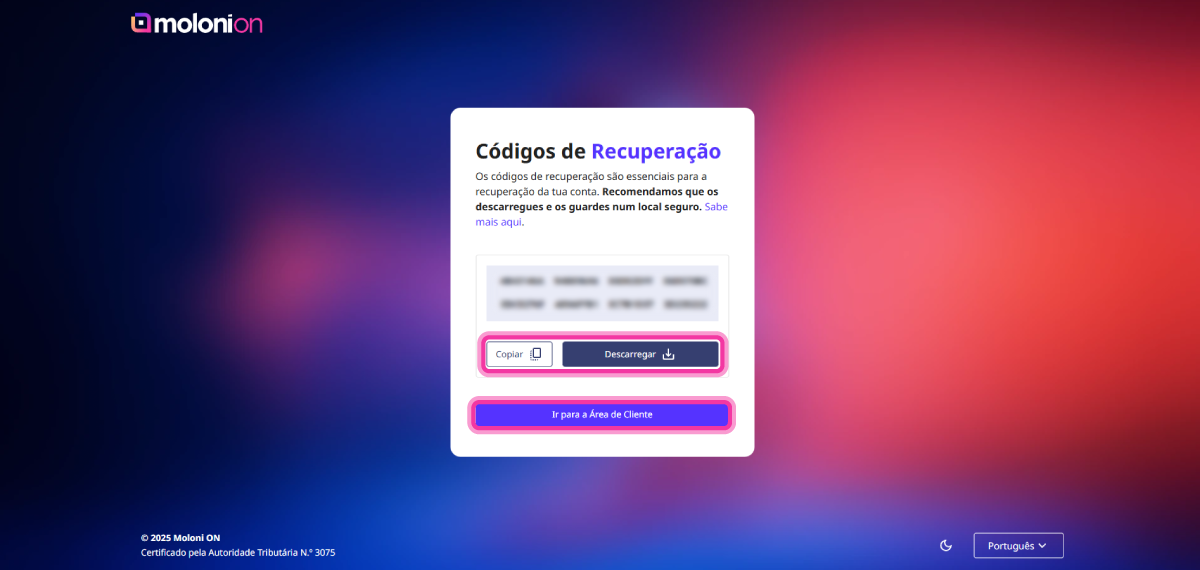
9. After activation, Moloni ON automatically generates eight backup codes. If you lose access to your account, you can use one of these backup codes to regain access. Once generated, these backup codes can only be used once and should be stored in a safe place.
Copy or download a file with the codes. To do this, click the Copy or Download button and then the Go to Customer Area button.
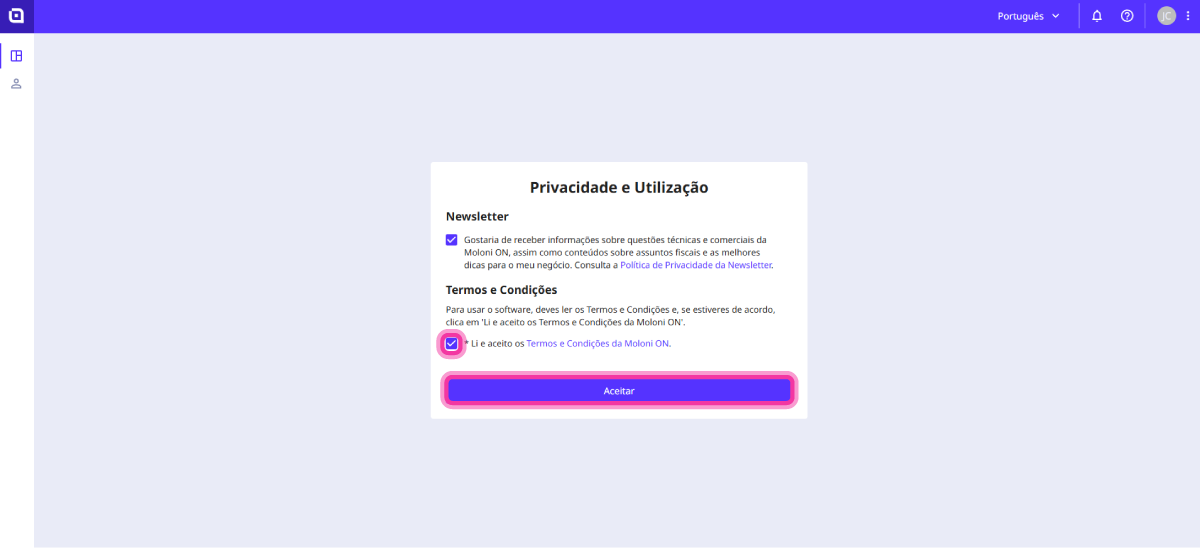
10. To receive our newsletters, tick the Newsletter checkbox.
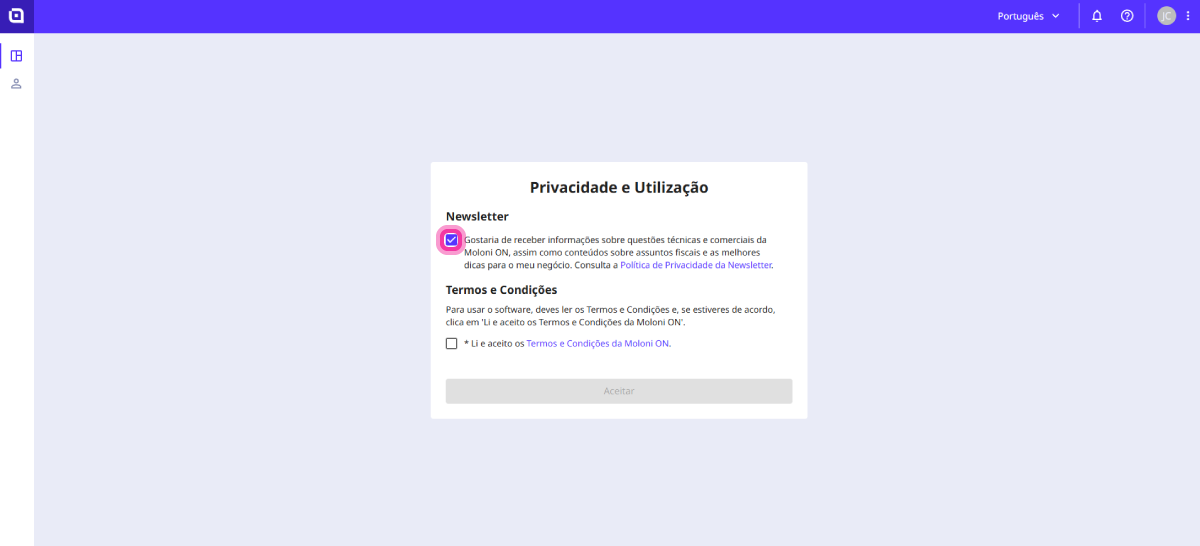
11. Read the terms and conditions and tick the I have read and agree to the Moloni ON Terms and Conditions option. Click on Accept.
Registration is complete. We will now proceed to set up your company.
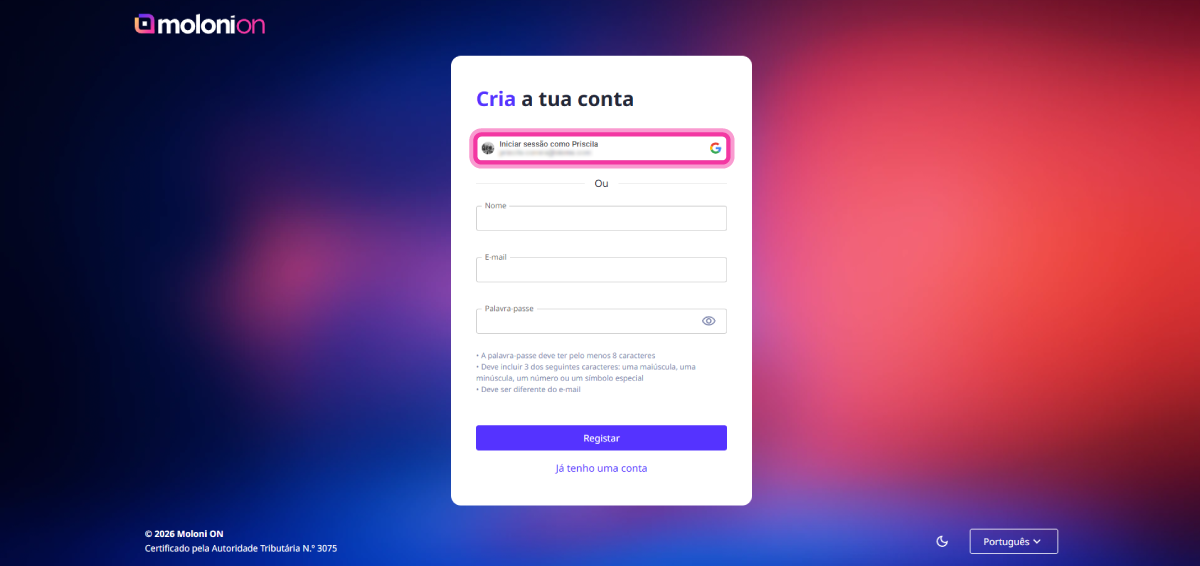
Create your account with Google
Follow these steps:
1. Go to www.molonion.pt and click Sign up with Google, located at the bottom centre of the page.

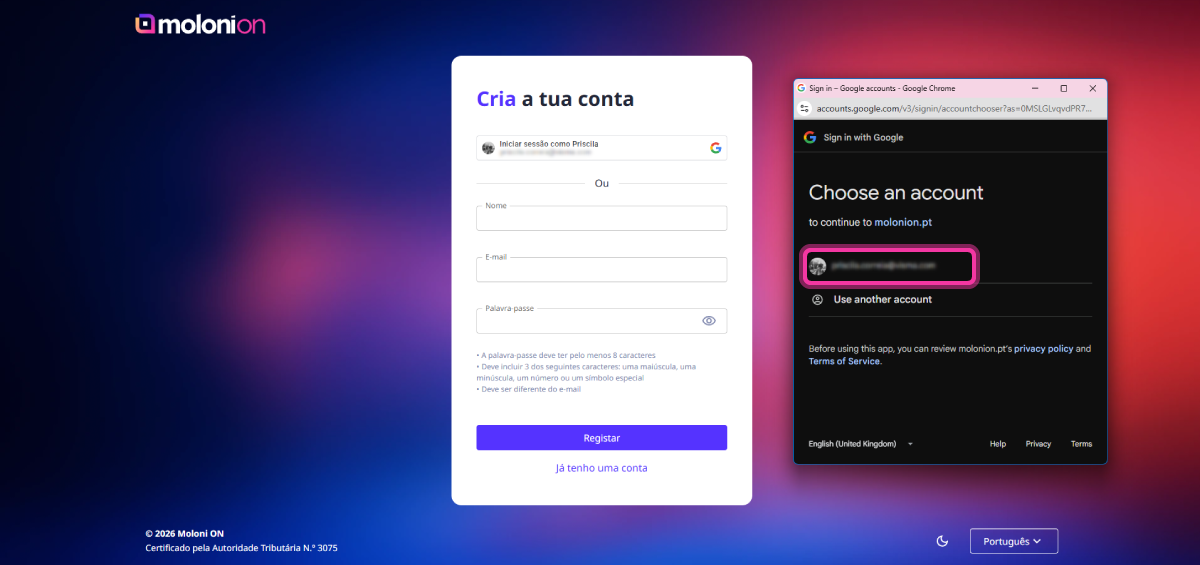
2. Click Sign in.
3. Select your account.
4. To receive our newsletters, tick the Newsletter checkbox.
5. Read the terms and conditions and tick the I have read and agree to the Moloni ON Terms and Conditions option. Click on Accept.
Registration is complete. We will now proceed to set up your company.
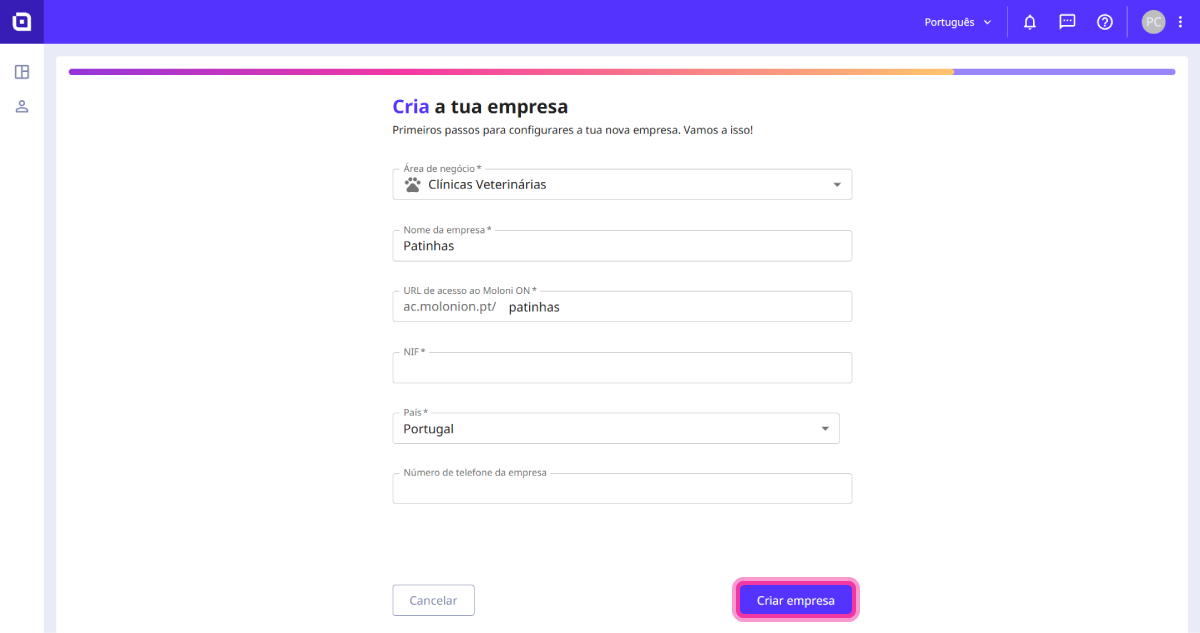
Create your company
Follow the steps:
1. Enter the requested information related to your company.
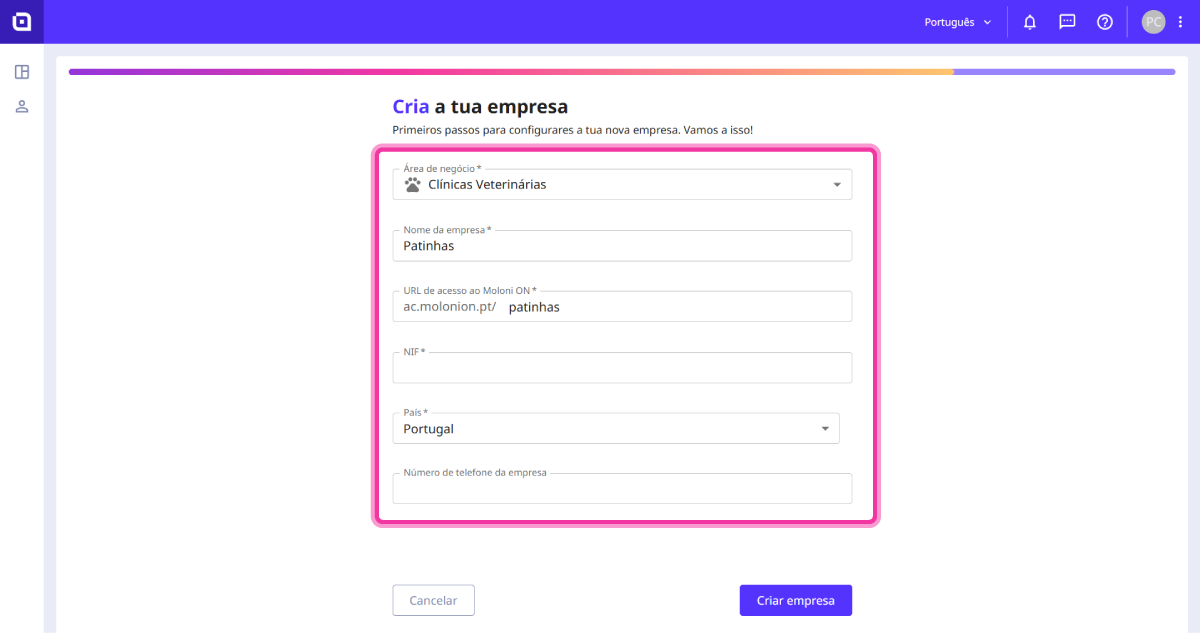
2. Click on Create company.