How to issue a partial credit note
Direct conversion is the fastest way to issue a credit note in Moloni ON: you start from the original invoice and the two documents are linked straight away.
What happens next? Your customer's balance is updated automatically. If it is a full credit note, the invoice will no longer appear as outstanding. If it is a partial one, the amount payable by the customer will be reduced according to the adjustment made.
What is a credit note?
A credit note cancels or rectifies, in full or in part, an invoice you have already issued.
There are two ways to convert an invoice into a credit note:
- Automatic reconciliation: converts the invoice directly into a credit note;
- Manual reconciliation: creates a credit note and then links it to the invoice.
For this example, we will use Automatic reconciliation (the fastest method).
Follow these steps:
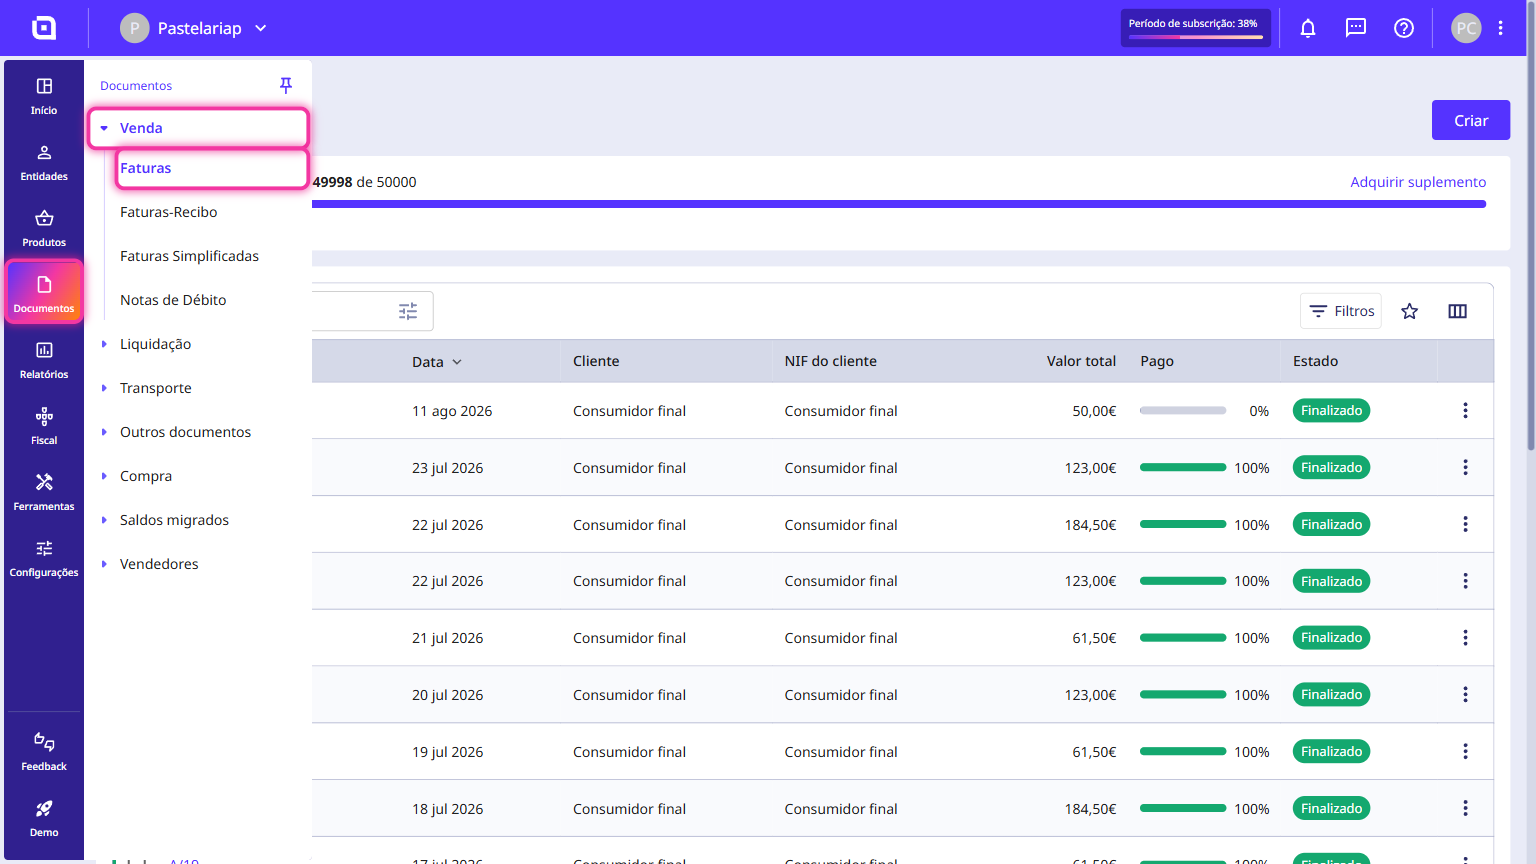
1. In the Client Area, go to the Documents menu, select Sales and click on Invoices.
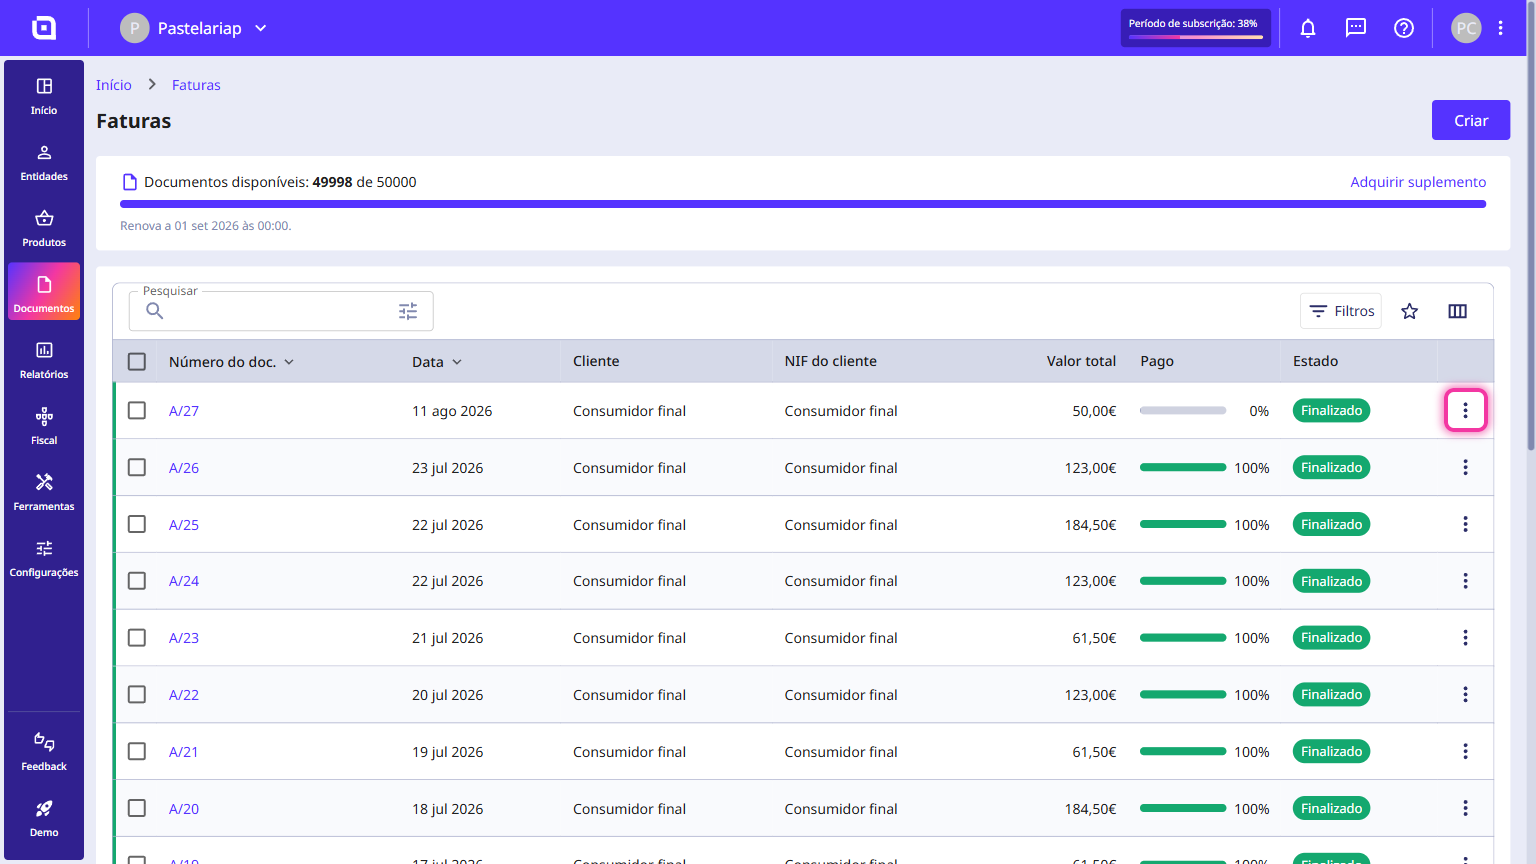
2. Select the desired document and click the three-dot icon on the right-hand side of the row.
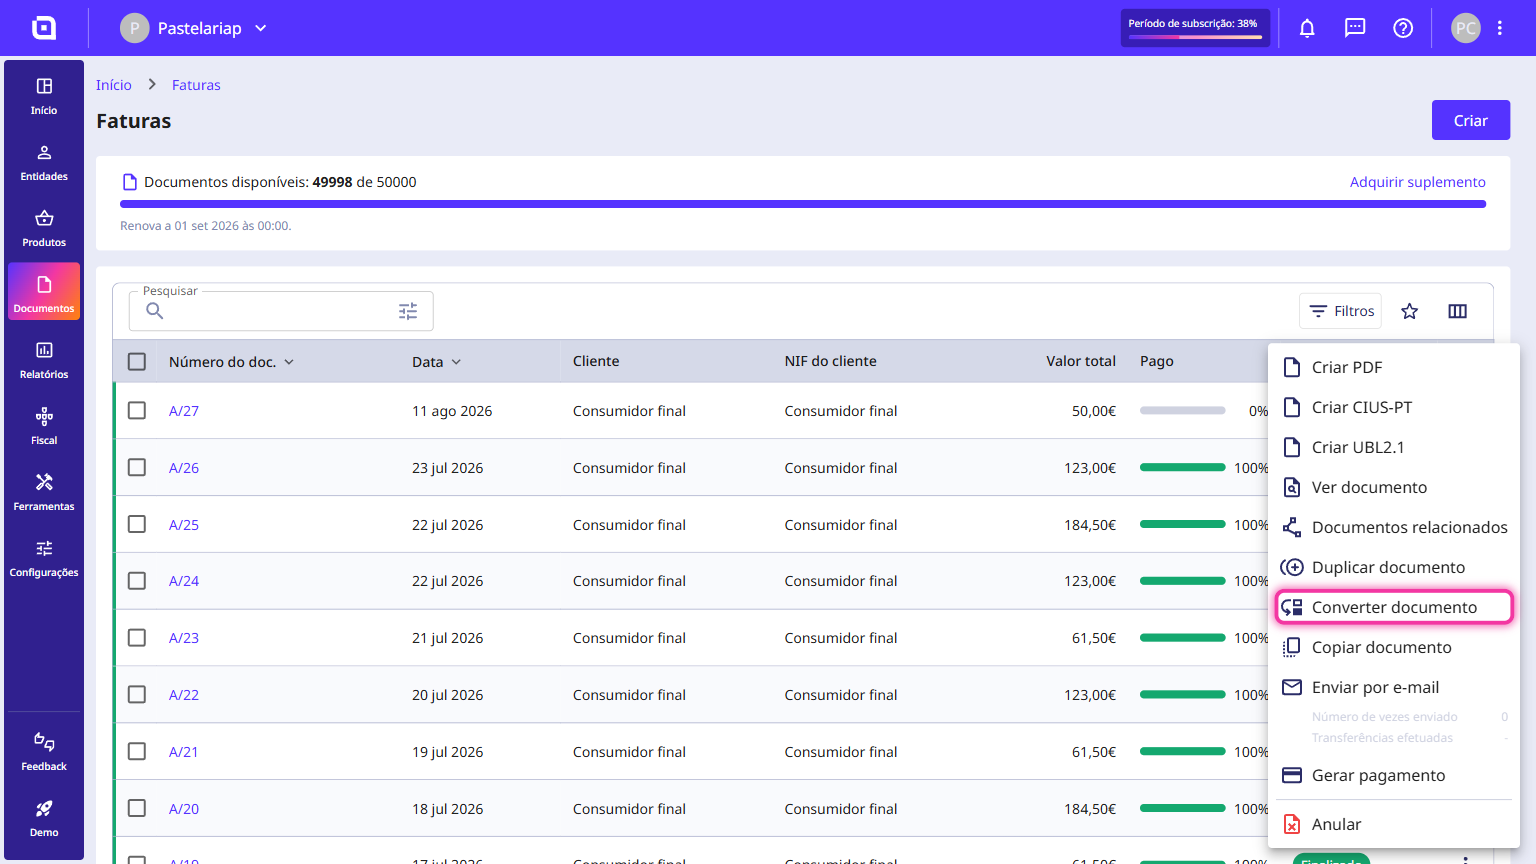
3. Click Convert document.
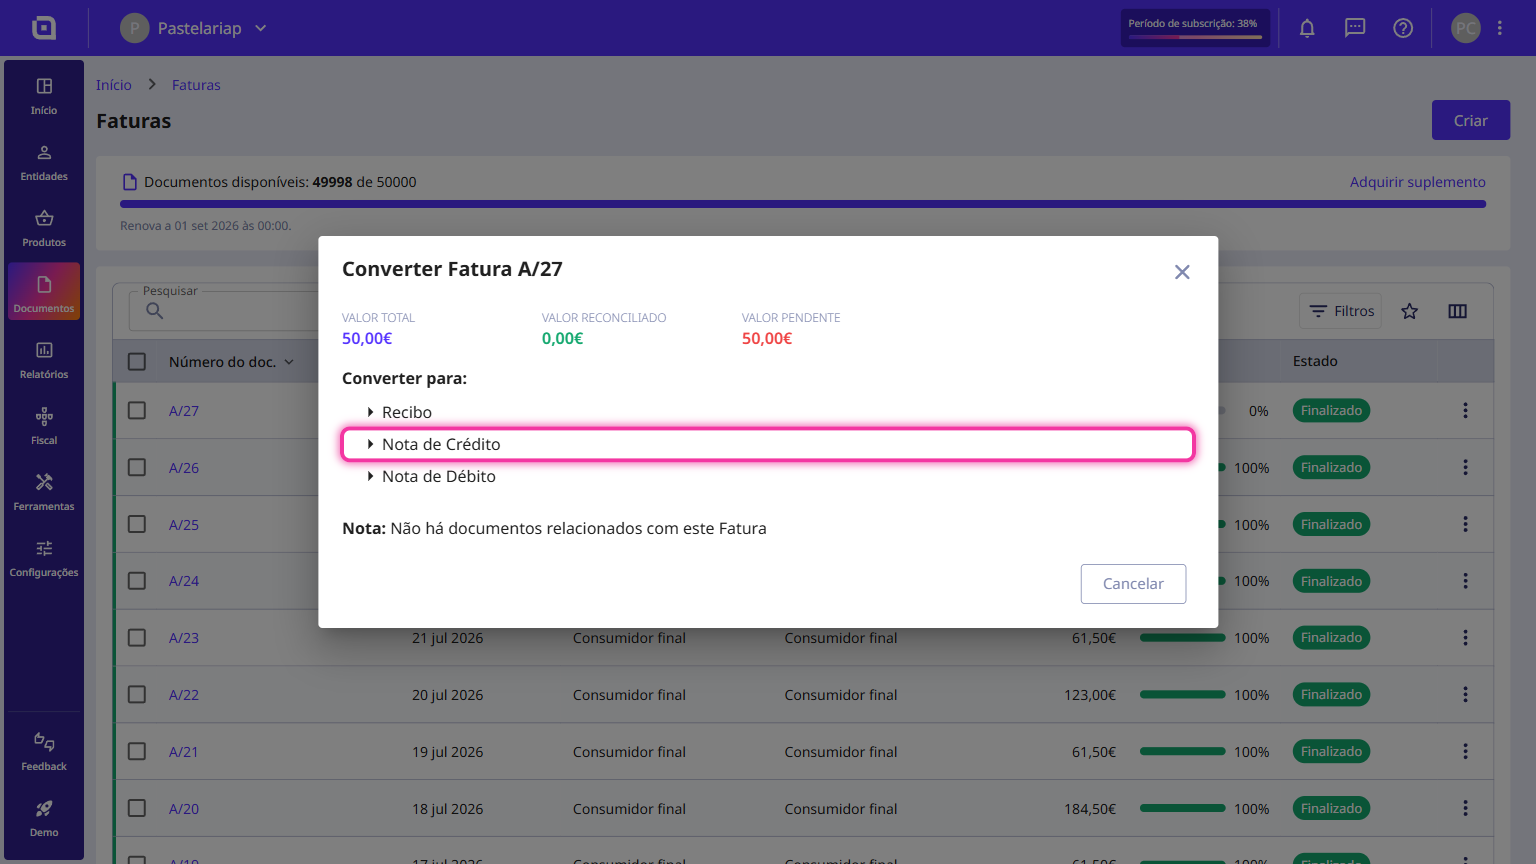
4. Click Credit Note.
5. Moloni ON automatically creates the credit note already linked to that invoice.
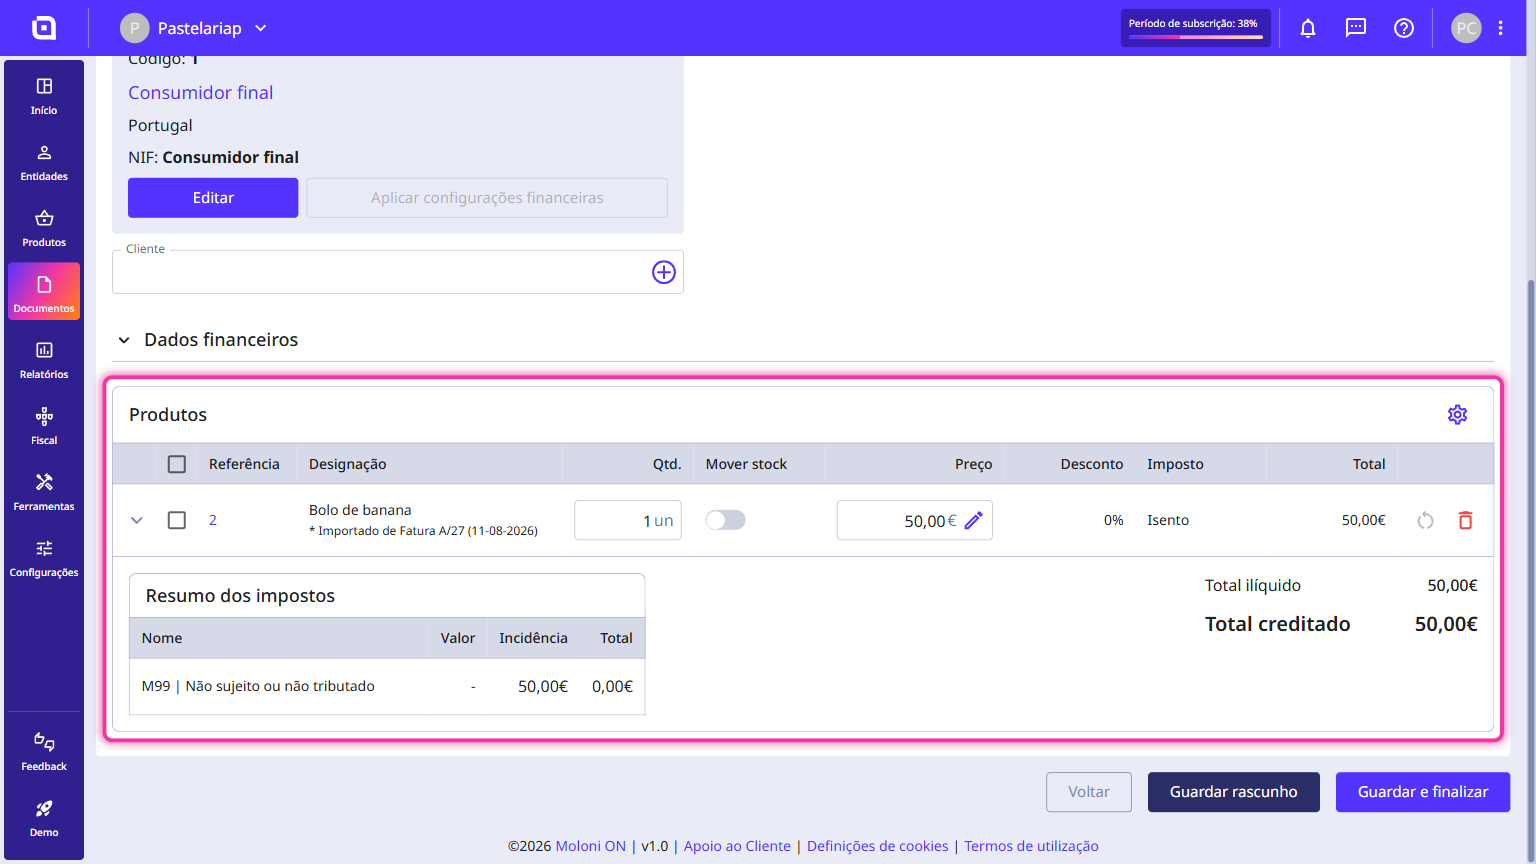
As a rule, automatic conversion gives the credit note the full value of the original document. To issue a partial credit note, keep only the products you are crediting in the Products section, adjusting their prices and quantities if you need to.
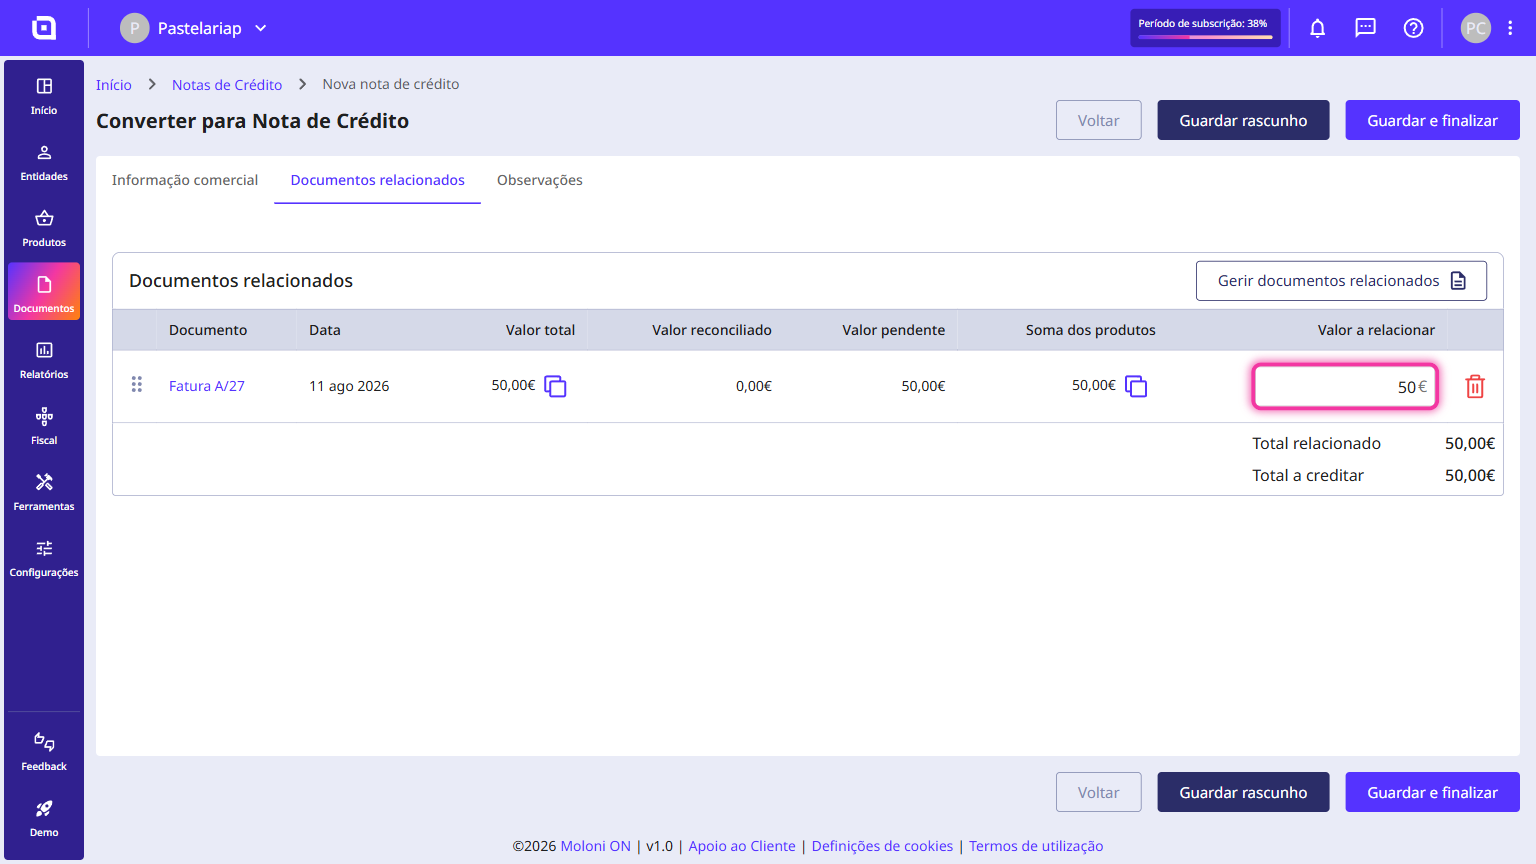
6. Next, go to the Related documents tab and change the Amount to relate field, entering the value of the credit note including taxes.
7. Finally, click Save and finish.
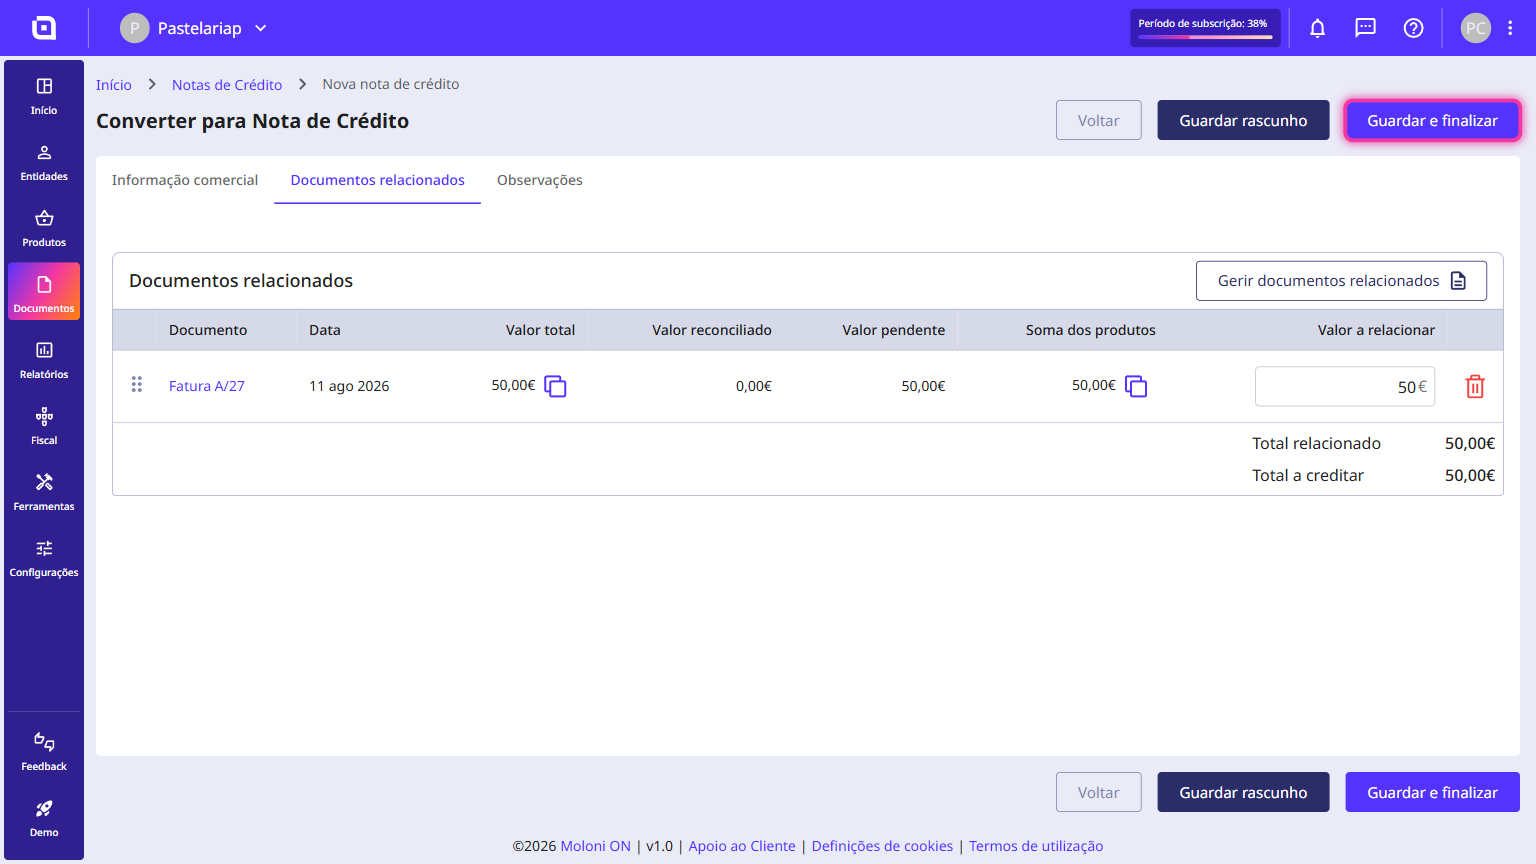
The credit note has been successfully created.